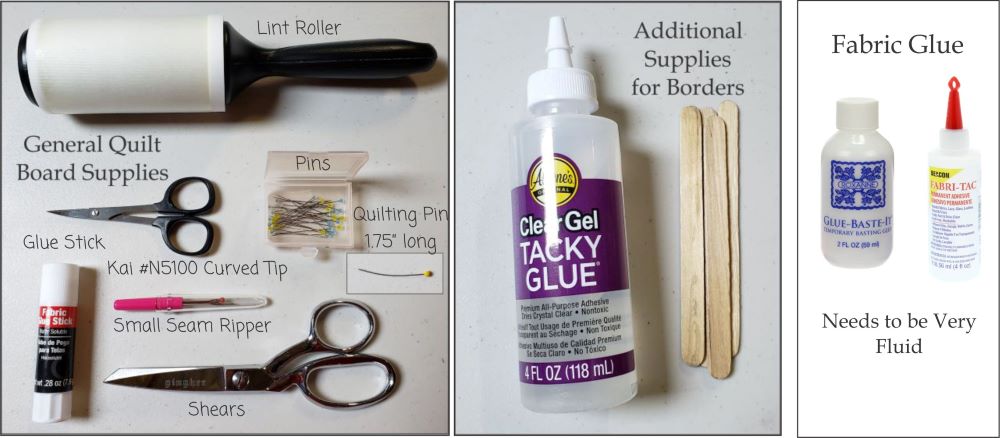
Dritz makes a great Fabric Glue Stick. Most glue sticks will work great for this application. Aleene’s makes a Quick Tacky glue that is my favorite. Any Tacky Glue will work though
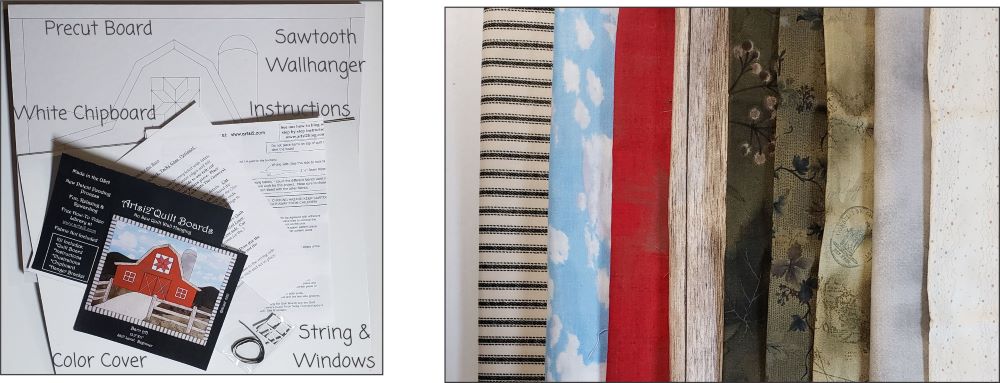
Count how many fabrics were used on the color cover sheet. Choose your fabrics.
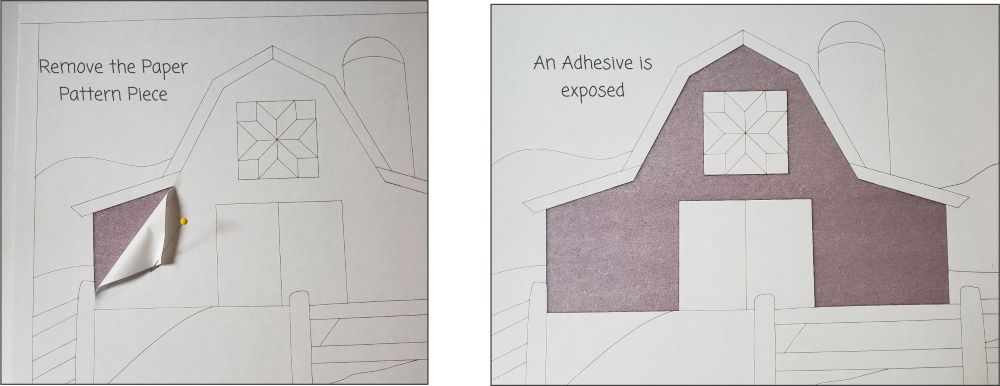
I use a pin to pick up the Paper Pattern Piece.
It is easy to figure out where the Paper Pattern Piece should be placed by finding a border or straight edge.

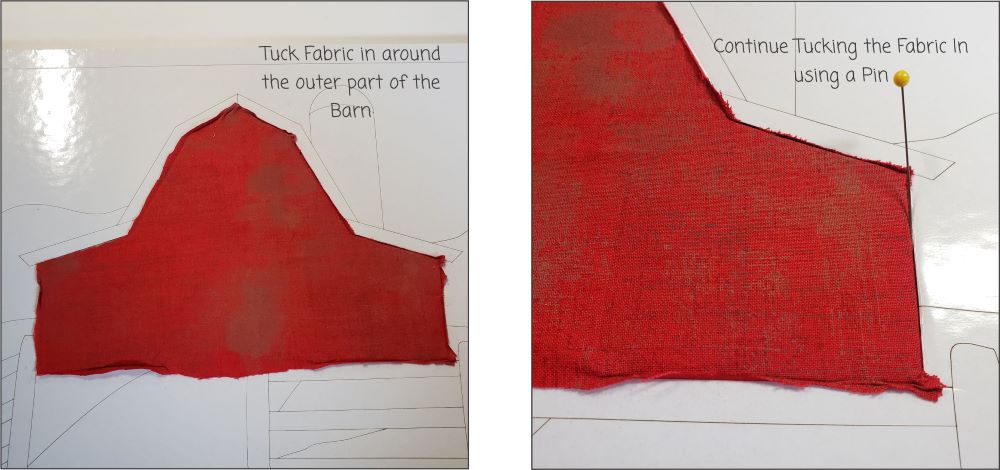
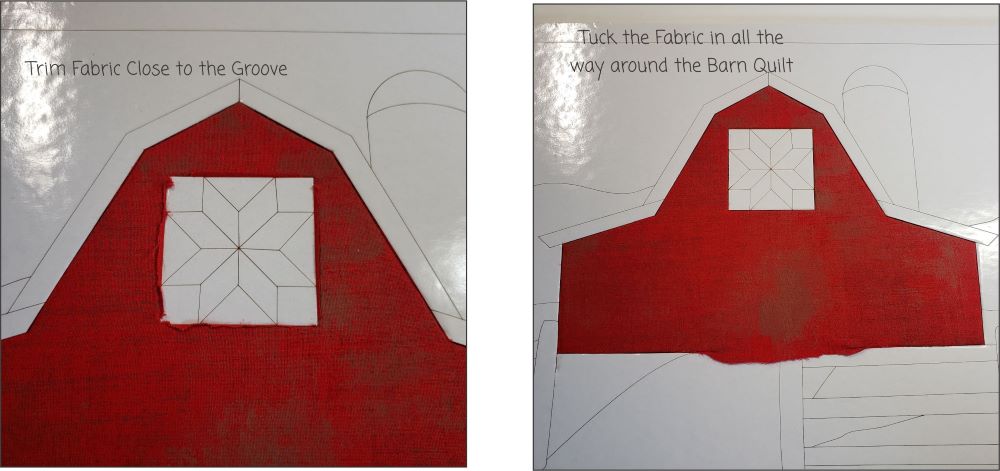
I like to gently tuck the fabric into the grooves before trimming. Sometimes I prefer to clip areas before trimming. Do what is comfortable for you. Before tucking the Fabric in completely – it’s wise to use the Lint Roller to remove and stray fibers.
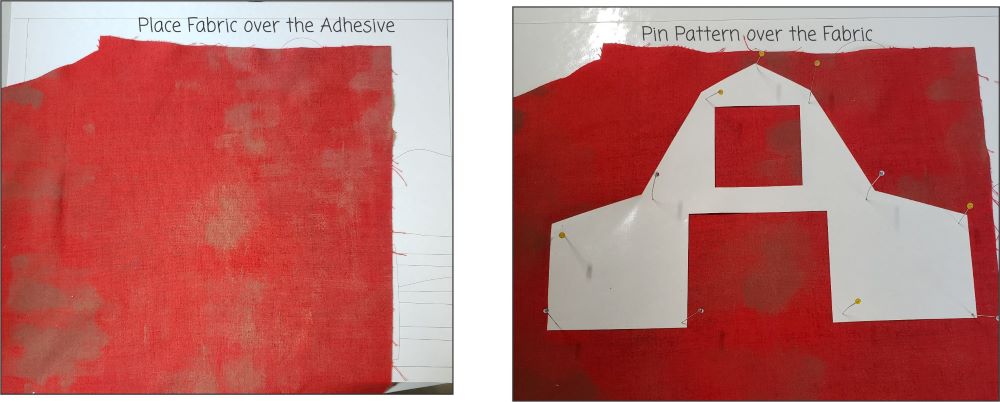
This is also a personal preference – Tucking the fabric in while the Paper Pattern Piece is still pinned on the board or removing it. Once again it’s a personal preference – which tool to use to tuck the fabric in – Pin or wrong side of the Seam Ripper.

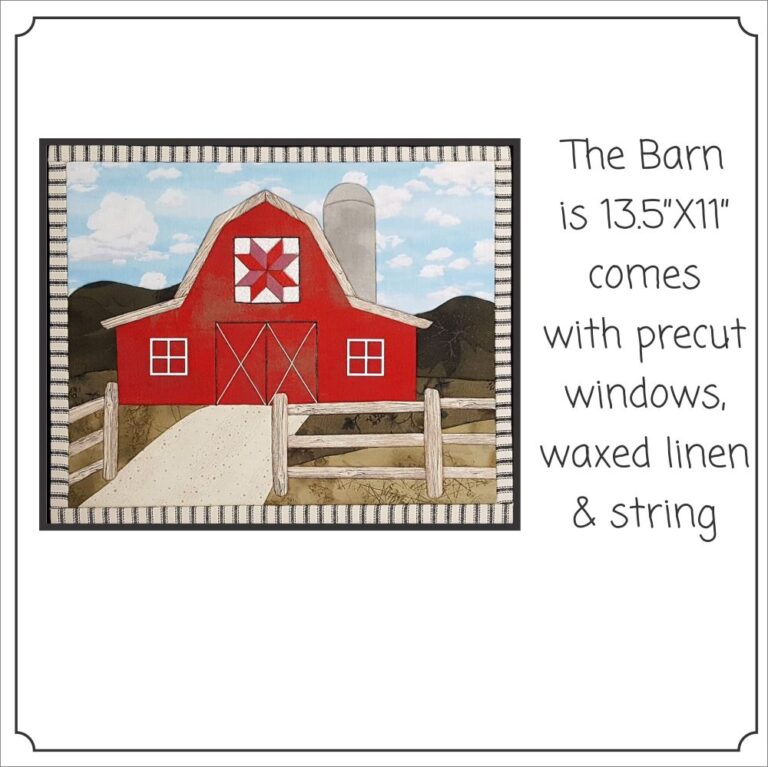
Tuck the Fabric in all around the outer edge of the Barn.

Once the Fabric is tucked in – it’s time to focus on the Barn Quilt & Doors.
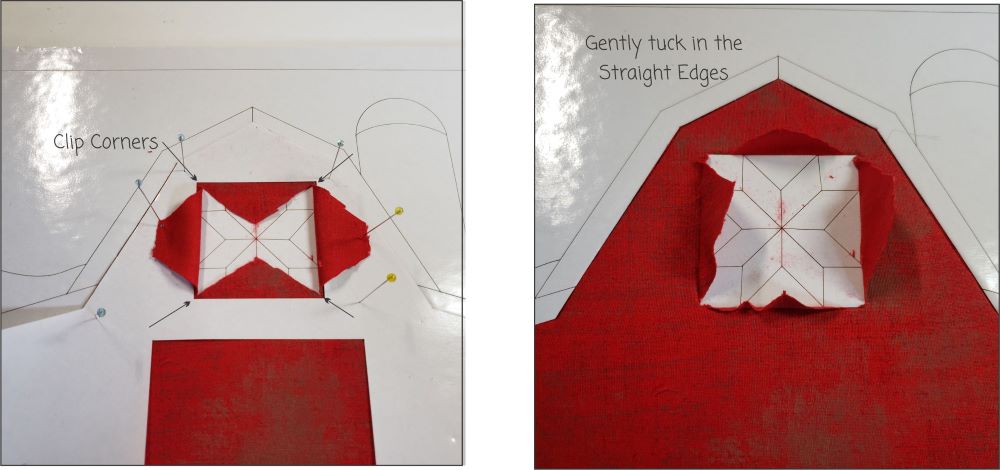
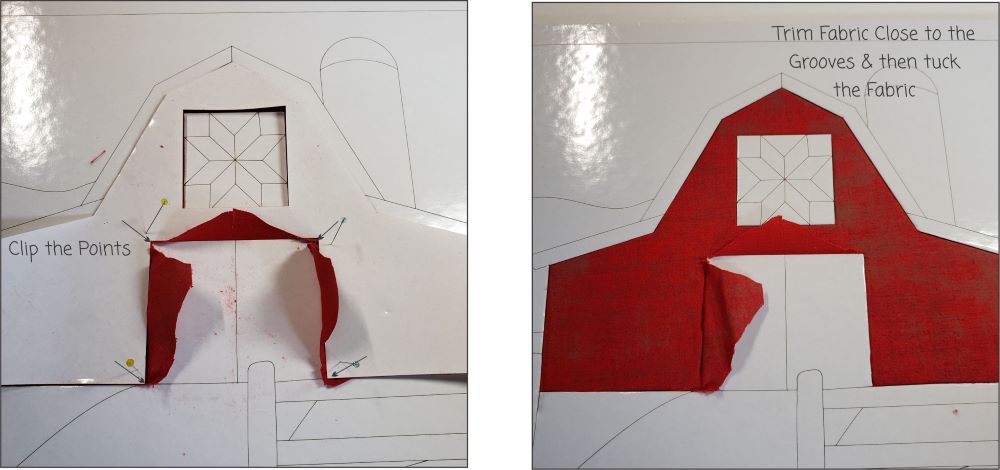
Clip the Corners as illustrated on the Barn Quilt. Gently tuck the Fabric into the Straight Edges.
Trim Fabric close to the Grooves and then use the Lint Roller before tucking the Fabric into the Grooves.
Now it’s time to work on the Door outline. Don’t forget to use the Lint Roller.
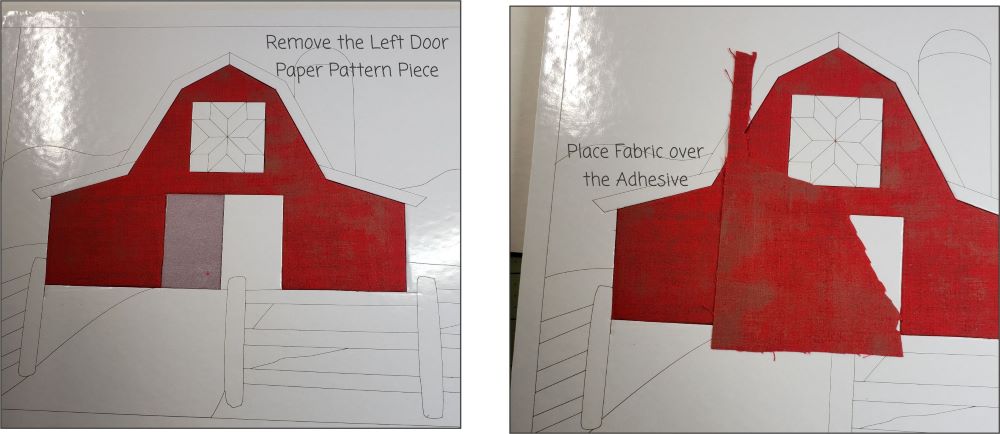
Start with the Left Door. 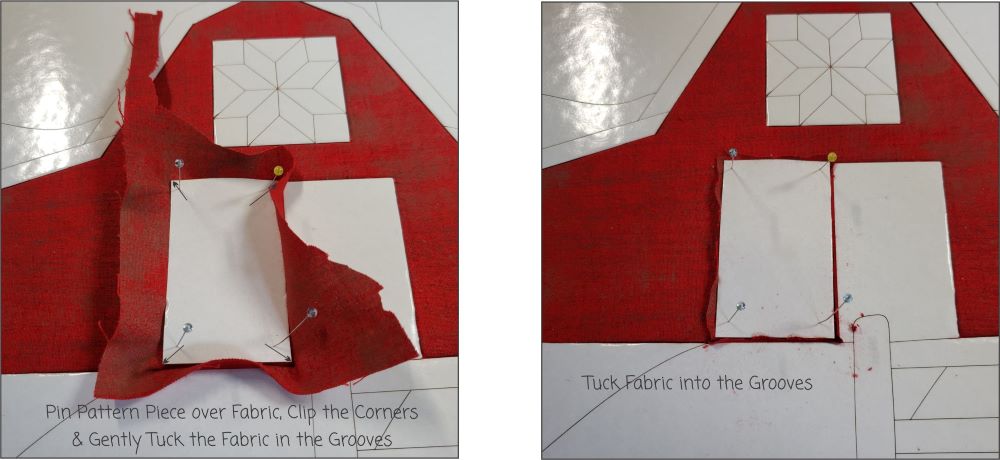
Remember to use the Lint Roller before tucking the Fabric into the Grooves.

Now it’s time for the Right Door. 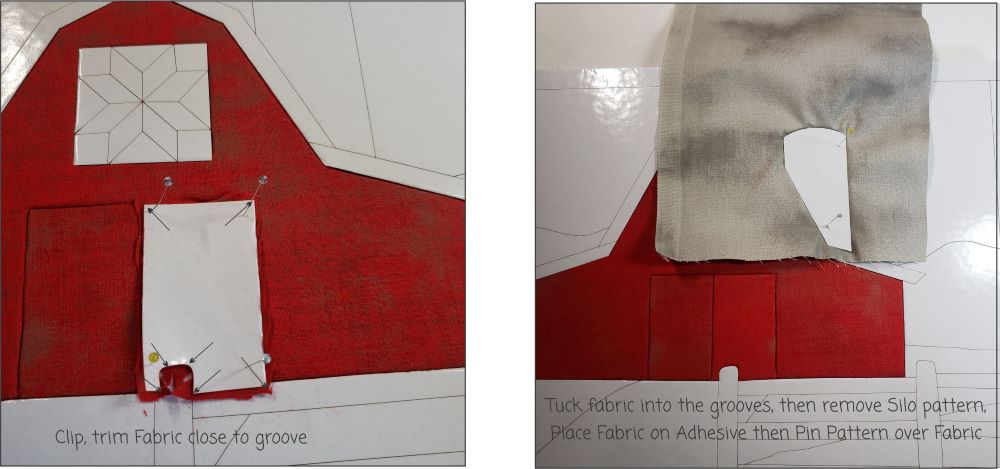
After the Barn Doors are complete – it’s time to move on to the Silo.

Go through all the Steps: Remove the Paper Pattern Piece, Place the Fabric on the Adhesive, Tuck the Fabric gently into the Grooves, Trim, Lint Roller and then tuck the Fabric into the Grooves.
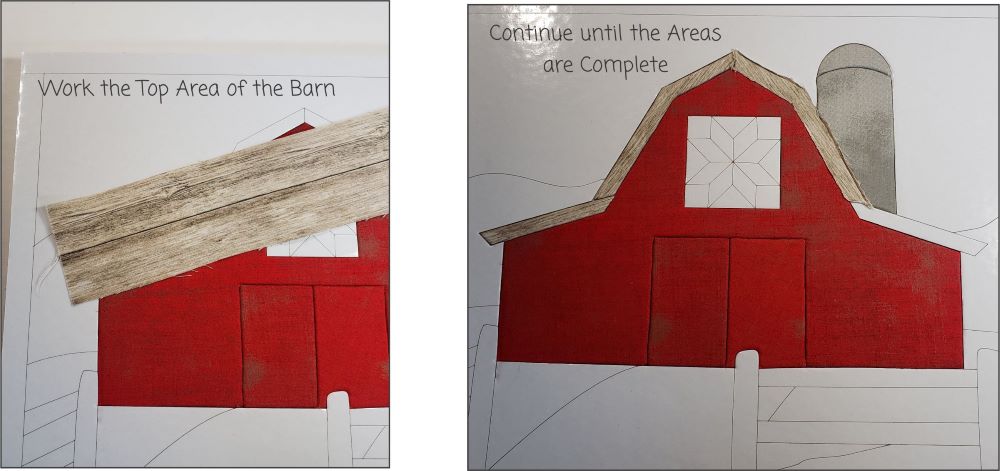
Top of the Barn – Cut a strip of Fabric .75″ X width of Fabric. Work each piece remembering the Steps: Remove Paper Pattern Piece, place Fabric on Adhesive, Gently Tuck the Fabric into the Grooves, Trim, Lint Roller and then Tuck Fabric all the way into the Grooves. 
Time for a little Landscaping! Work the Top Left and Right Landscaping that will be next to the Sky.
It’s time to sit back and admire the work you have done before proceeding to Part 2!