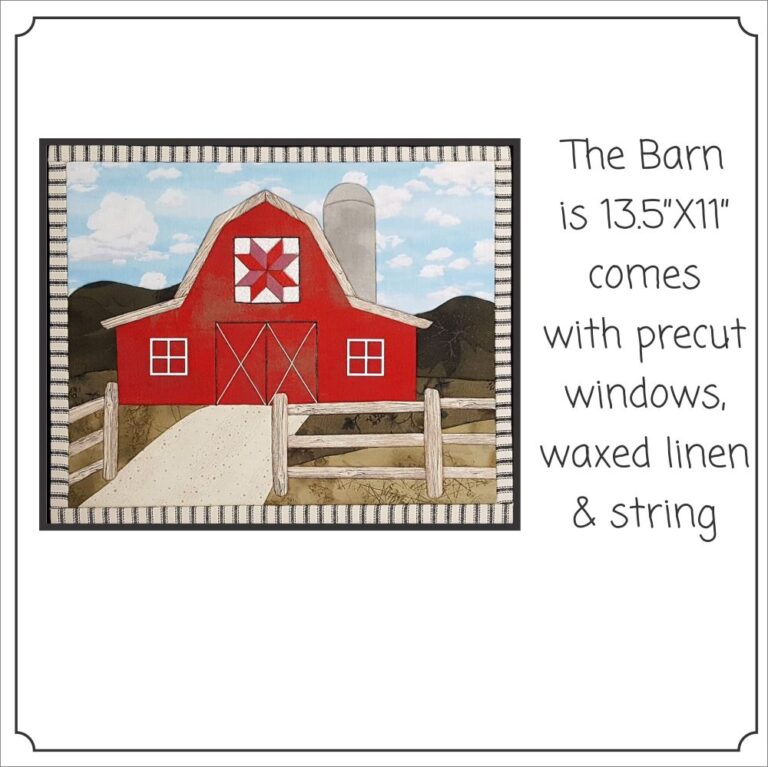
The Barn Quilt can be completed using Fabric or it can be worked up with Non-wovens such as Felt. If using Felt – cut the Felt to the exact size of the Paper Pattern Piece and DO NOT Tuck the Felt into the Grooves. 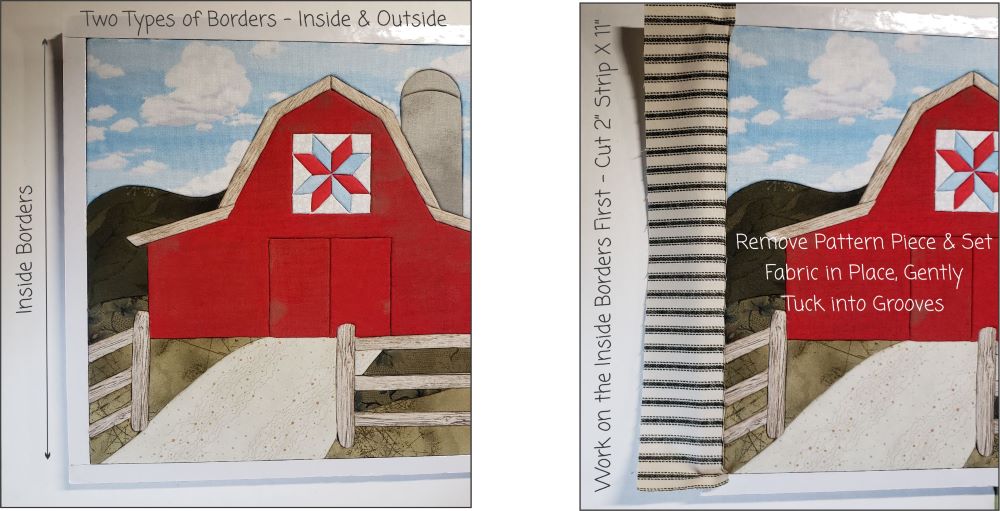
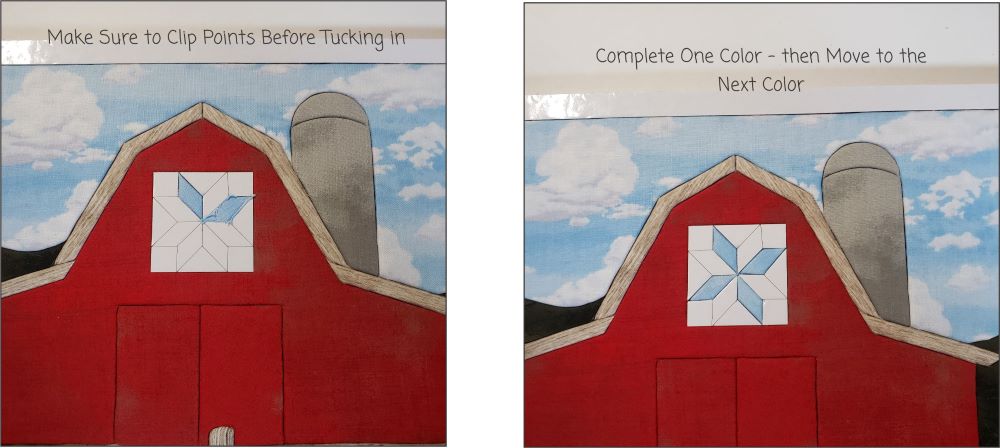
The Barn Quilt on the Color Cover Sheet was worked up in Felt. For this presentation we will use Fabric. Treat each Piece on the Barn Quilt Individually. Follow the steps: Removed the Paper Pattern Piece, Place Fabric on the Adhesive, (Optional – Pin Paper Pattern Piece over the Fabric – I generally don’t Pin the Paper when the Piece is this small) Gently Tuck the Fabric into the Grooves, Clip, Trim, Lint Roller and Tuck the Fabric in all the Way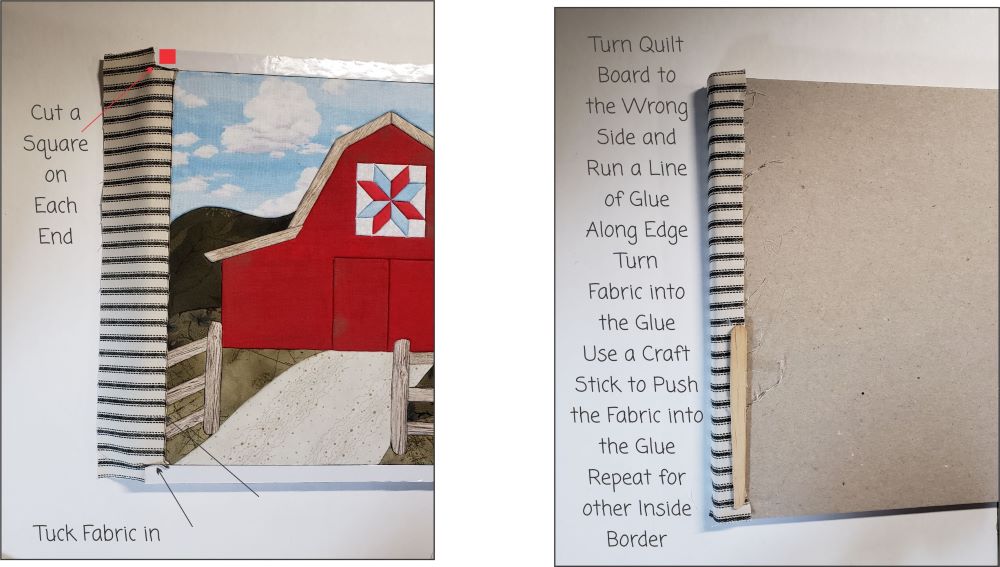
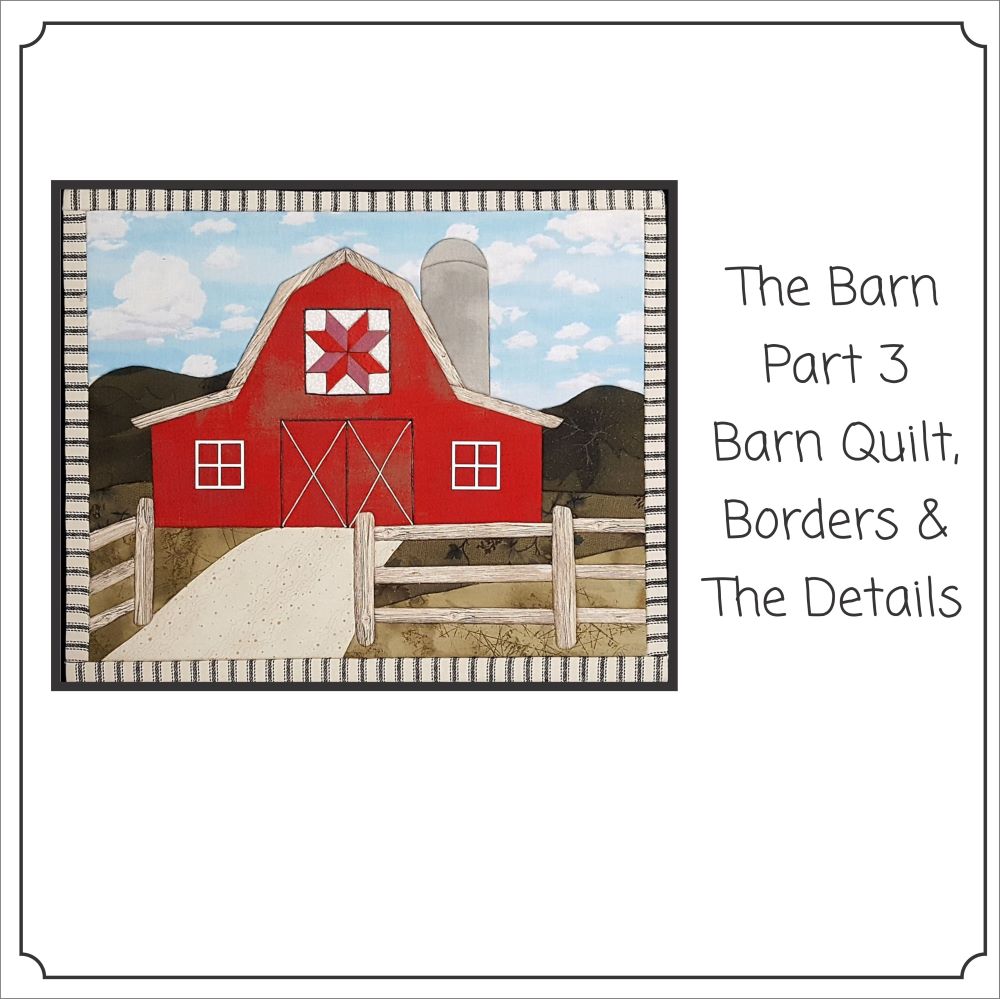
Moving on to the Borders. Cut 2 strips 2″ X 11″. Start with the 2 inside Borders. Remove the Paper Pattern Piece, Place the Fabric over the Adhesive, gently Tuck the Fabric into the Grooves, Trim – Cut a Square on each end and then Tuck the Fabric in all the Way. Place a line of Tacky Glue on the Wrong Side of the Board, Fold the Border over to the Wrong Side and Push the Glue into the Board using a Craft Stick. 
Now it’s time to work the Outside Borders. Cut 2 Strips 2″X17.5″ Long. Remove the Paper Pattern Piece. Place the Fabric on the Adhesive, Gently Tuck the Fabric into the Grooves, Trim and Then Tuck the Fabric in all the Way. Turn the Tails 1/8″ up and Press. 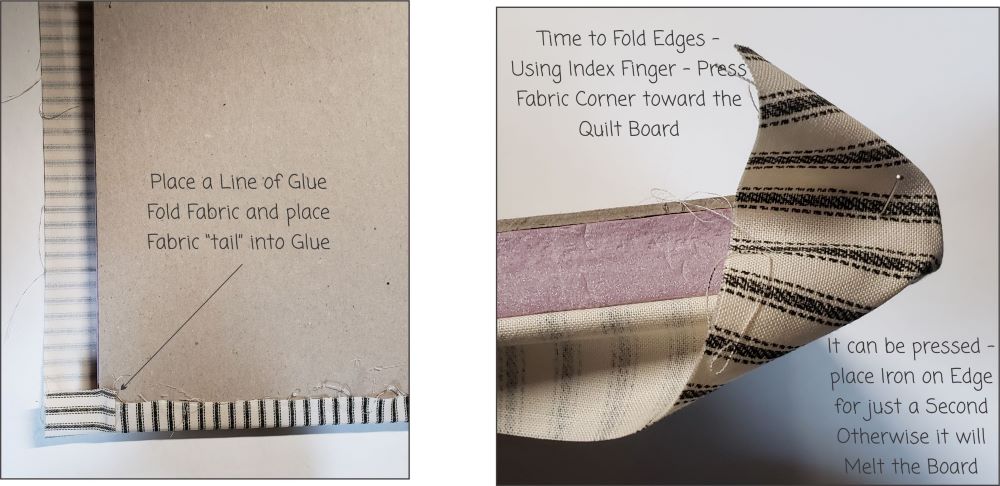
Place a Line of Tacky Glue and Fold the Tail into the Glue using the Craft Stick – Repeat for the other side. Think of wrapping a package – Using your Index Finger push the Border Fabric toward the inside of the quilt board. 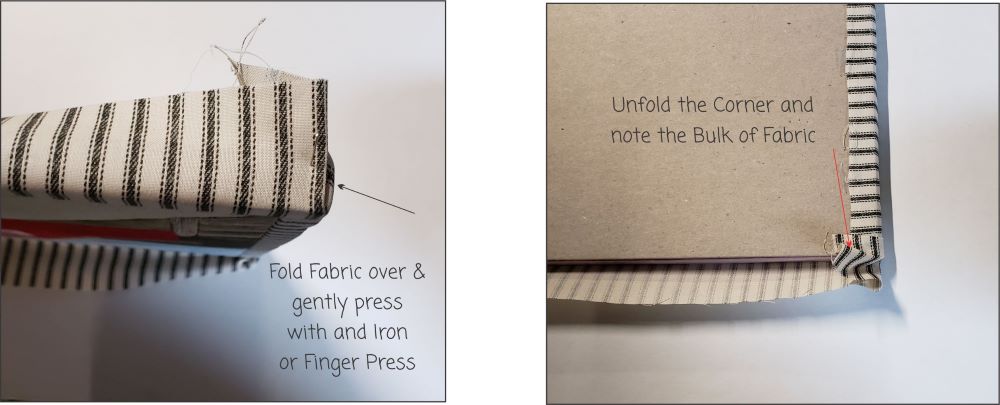
Then Fold the Border over to the Wrong side of the Quilt Board. Press Lightly or finger Press. Unfold the Corner to reveal the corner area is bulky.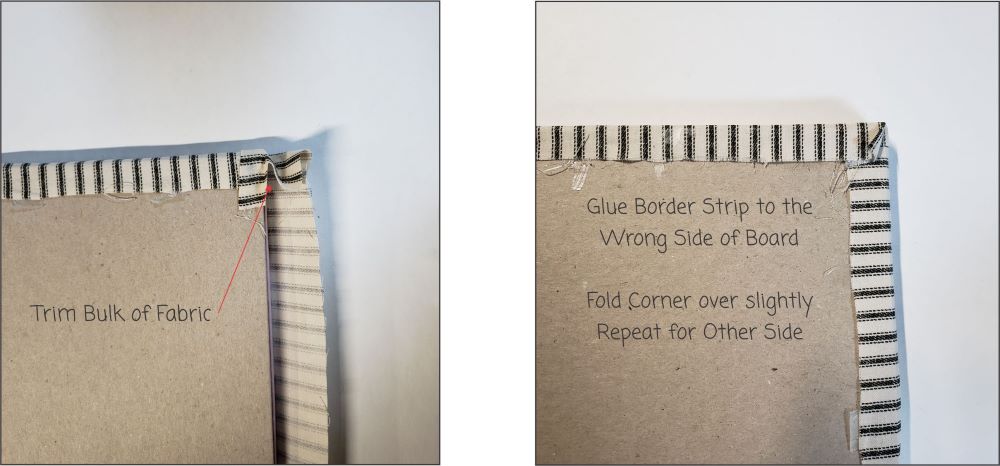
Trim the Bulk. Apply a line of Tacky glue on the wrong side and fold the Border into the Glue. Use the Craft Stick to push the Fabric into the Glue. 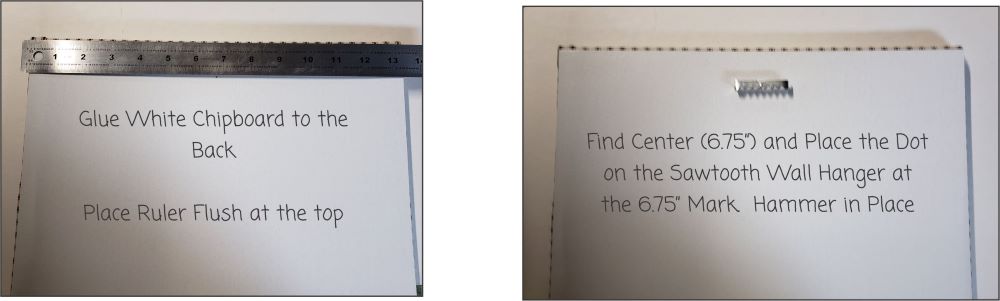
To Center the Sawtooth Wall Hanger; Place a Ruler flush to the top and mark the Center (6.75″). Match the Sawtooth Wall Hanger Dot to the 6.75″ center mark. Hammer in place.
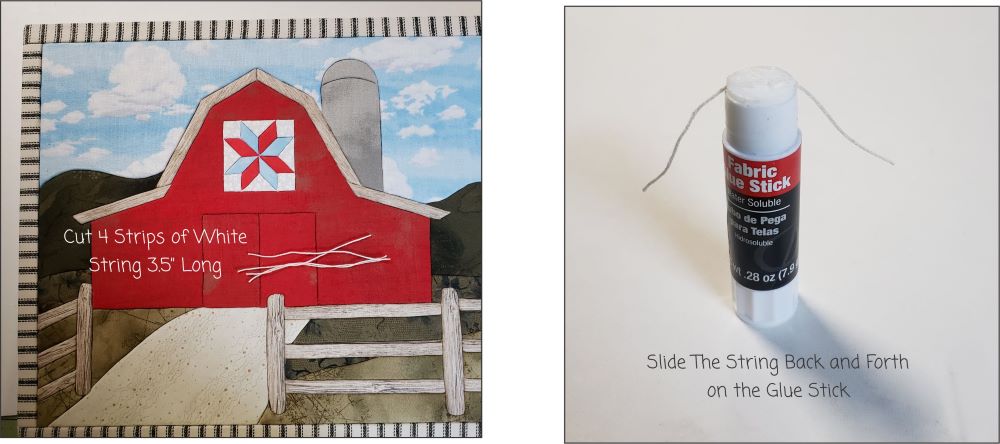
Cut 4 Strips of White String 3.5″ long. Slide the String Back and Forth on the Glue Stick.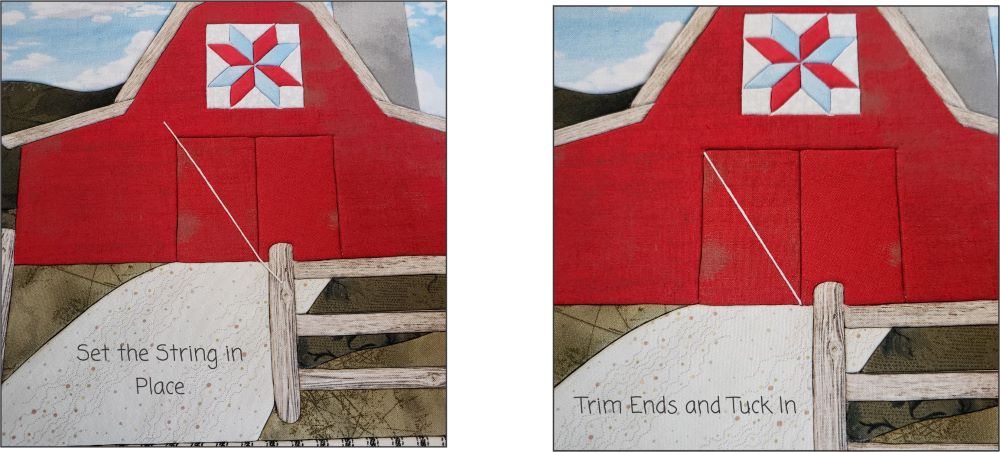
Place the String at an angle, Trim the Ends and then Tuck the Ends into the Grooves.

Continue creating an X on both Barn Doors. Cut 1 Strip of Waxed Linen the width of the Two Doors. Apply some Glue (the very liquid glue) using a pin or toothpick. Then place the Waxed Linen in the Glue. If the Waxed Linen cording is slightly large – tuck the ends into the grooves. 
Continue Placing Waxed Linen on the Remaining Sides of the Barn Quilt. Then cut 3 pieces the length of the Vertical Doors. Apply the Glue (very fluid) into a Vertical Ditch using a pin or toothpick. Place the Waxed Linen Cording into the Glue. Repeat for the 2 other Vertical Doors. Finish by Placing a Waxed Linen Cord at the Top of the Doors.
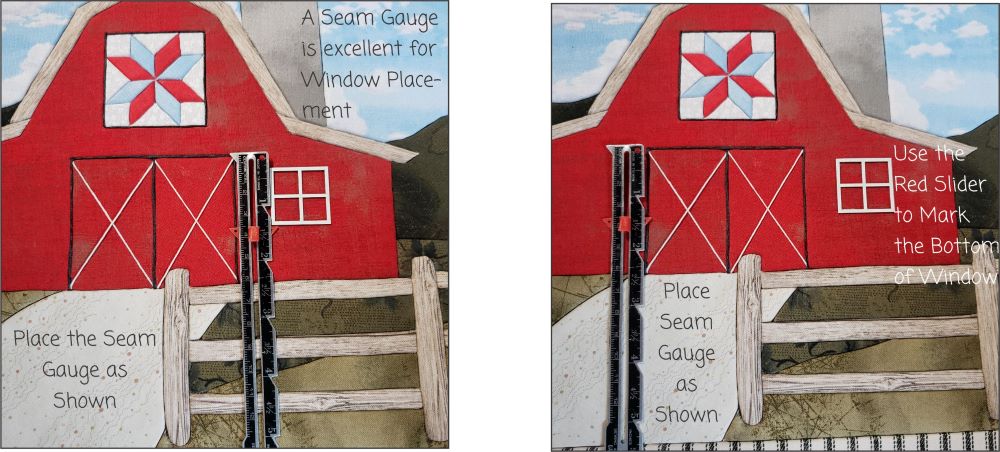
The Seam Gauge is excellent to use for Window Placement. Place the Seam Gauge as Shown – Top of Gauge Flush with the Top of the Doors, Width of Gauge Flush with a Door and Slide the Red Guide to the Lower Part of the Window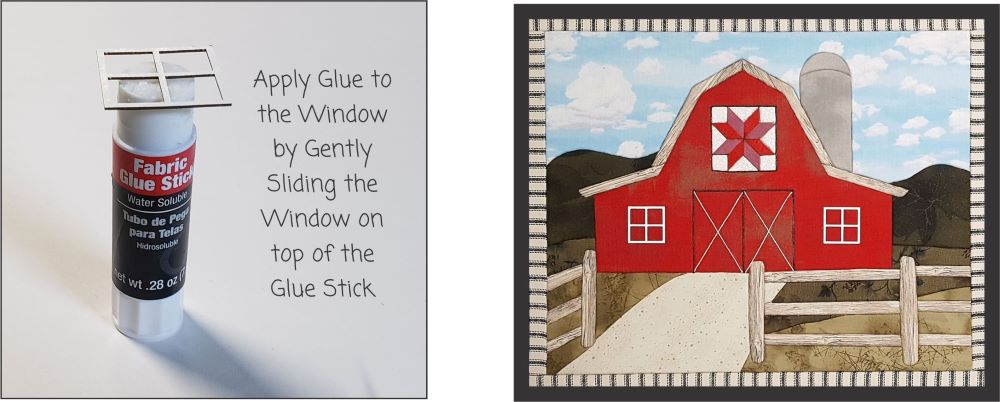
To Apply Glue to the Window Gently Slide the Window over the Top of the Glue Stick. Be Gentle – otherwise the Window will pick up too much glue.