Kits Available at:
https://artsi2.com/product/betsy-the-cow-no-sew-quilt-wall-hanging-by-artsi2/
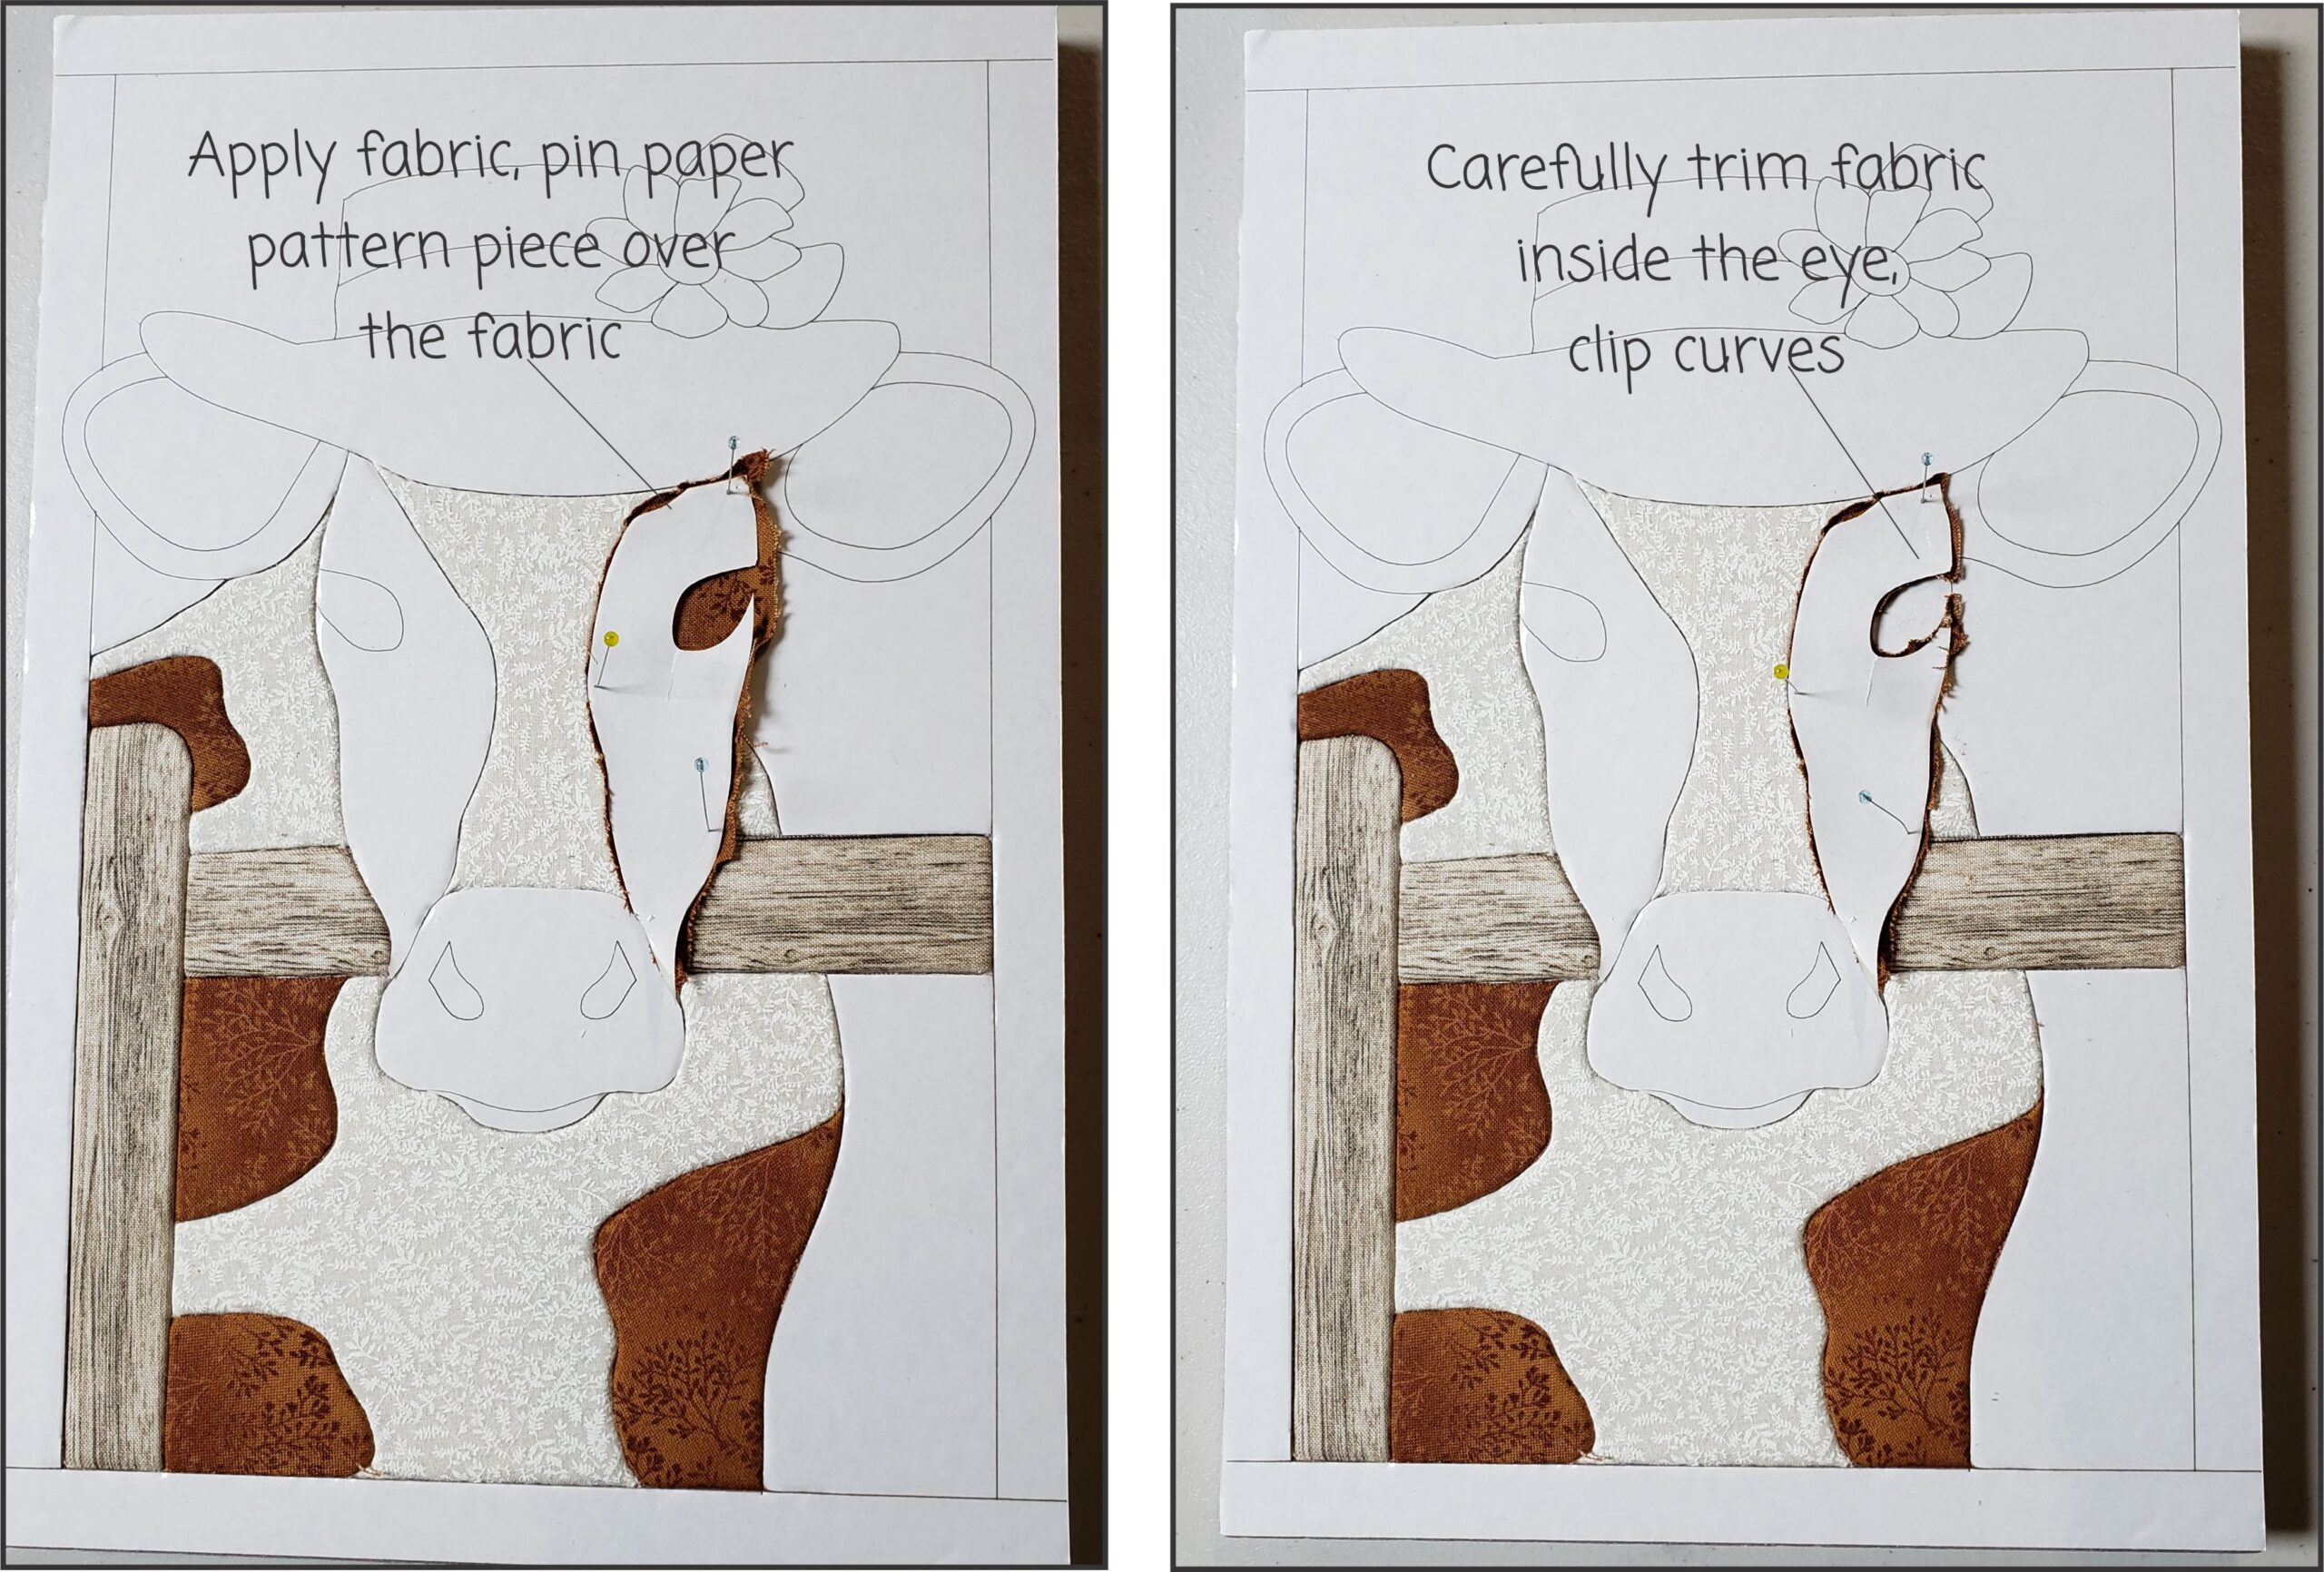
Place the Brown Fabric over the adhesive, put the paper pattern piece over the fabric and pin down. Tuck the fabric in slightly but not all the way. Trim the fabric around the outer edges. Clip curves around the eye, then trim the eye area. Remove the paper pattern piece. Now is a good time to use the lint roller. then tuck the fabric in all the way.
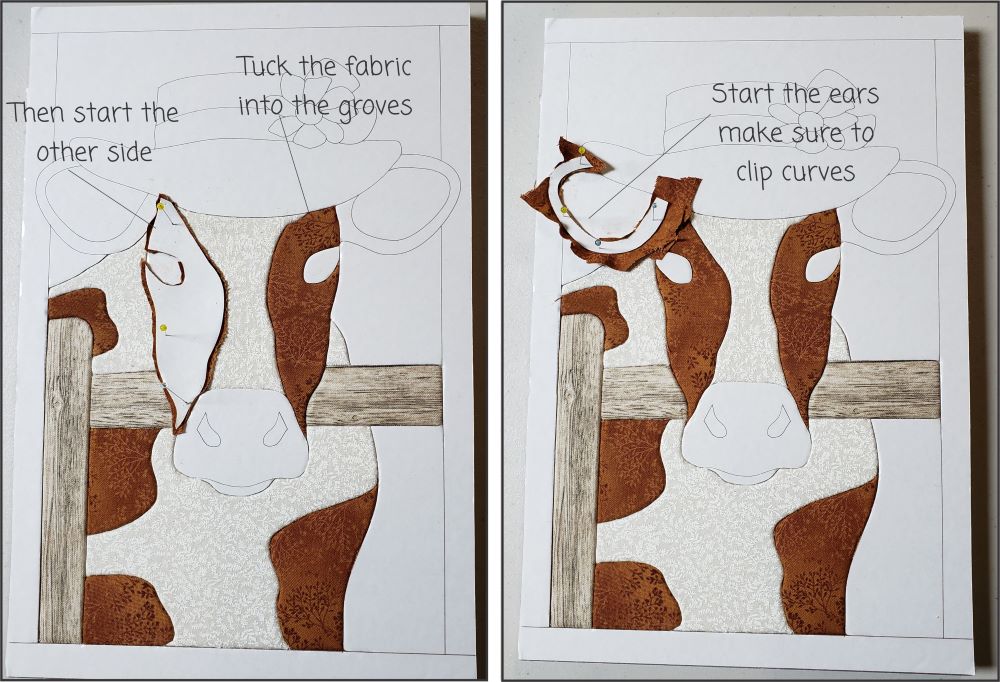
Repeat for the other side. On to the ears. Place the Brown Fabric in place, put paper pattern piece over the fabric, slightly tuck in fabric. Cut clips on the inside curves and pie shapes on the outer curves. Trim the fabric. Remove the paper pattern piece, use the lint roller, and tuck fabric in place. Repeat for the other ear.
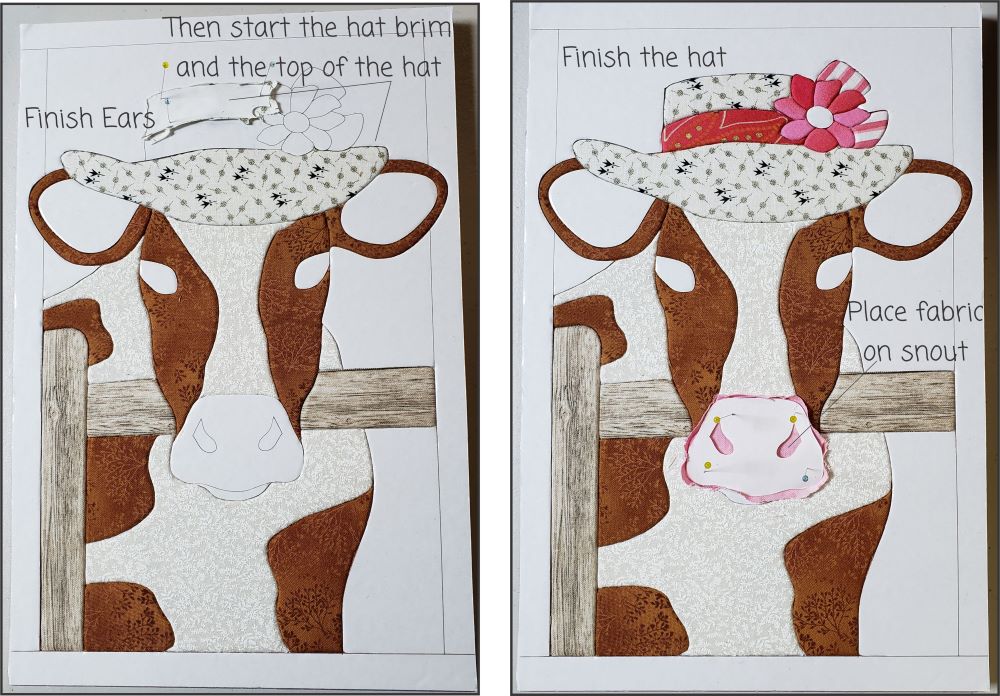
On to the Hat. Follow these steps: place fabric on the adhesive, put paper pattern piece in place, pin, slightly tuck in the fabric, trim fabric, remove paper pattern piece, use the lint roller and tuck the fabric in the following areas:
- Hat Brim
- Top of Hat
- Hat Ribbon
- Flower
- Striped Ribbon
The next step; place the Pink Fabric over the adhesive, put the paper pattern piece and pin in place.
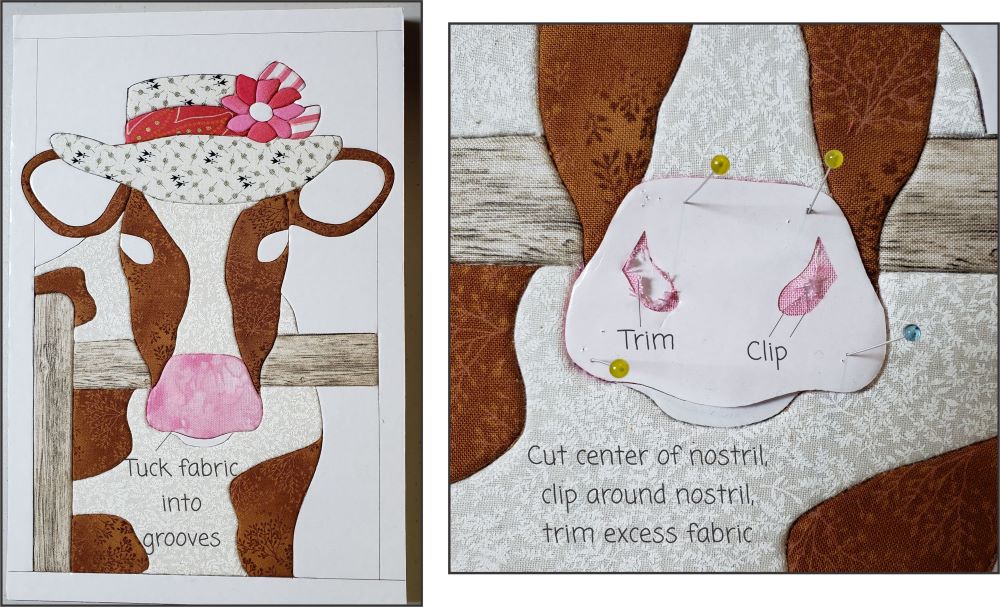
Slightly tuck in the fabric, trim, remove the paper pattern piece, and use the lint roller. Tuck Pink Fabric in place. Next pin paper pattern piece over the pink fabric. Cut a center slit, clip around nostril and then trim excess fabric. Remove the paper pattern piece. Use the lint roller. Then tuck the fabric in. Repeat for other nostril.
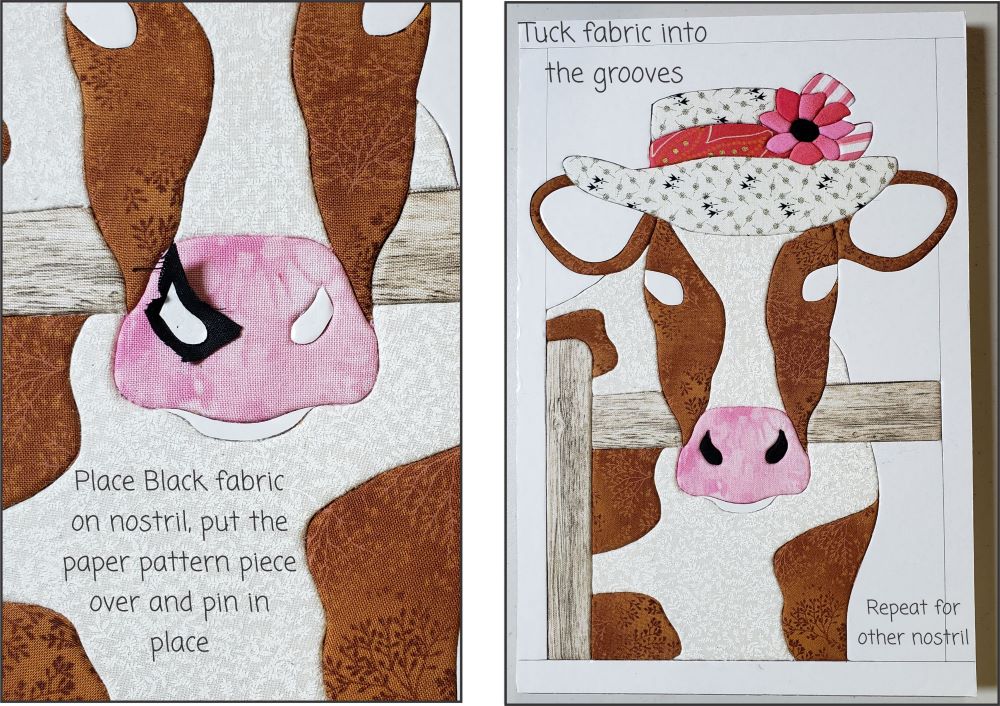
I know if you are anything like me you are thinking get that poor cow a Kleenex! Remove a nostril paper pattern piece. Place Black Fabric on nostril, place paper pattern piece over and pin. Slightly tuck the fabric around the nostril. Trim the fabric (I trim pretty close). Remove paper pattern piece and use the lint roller. Then tuck in place. Repeat for other nostril.
Remove the center of the flower paper pattern piece. Put black fabric on the center flower, place paper pattern piece over and pin, trim excess fabric, remove paper piece, use the lint roller, and tuck completely in grooves.
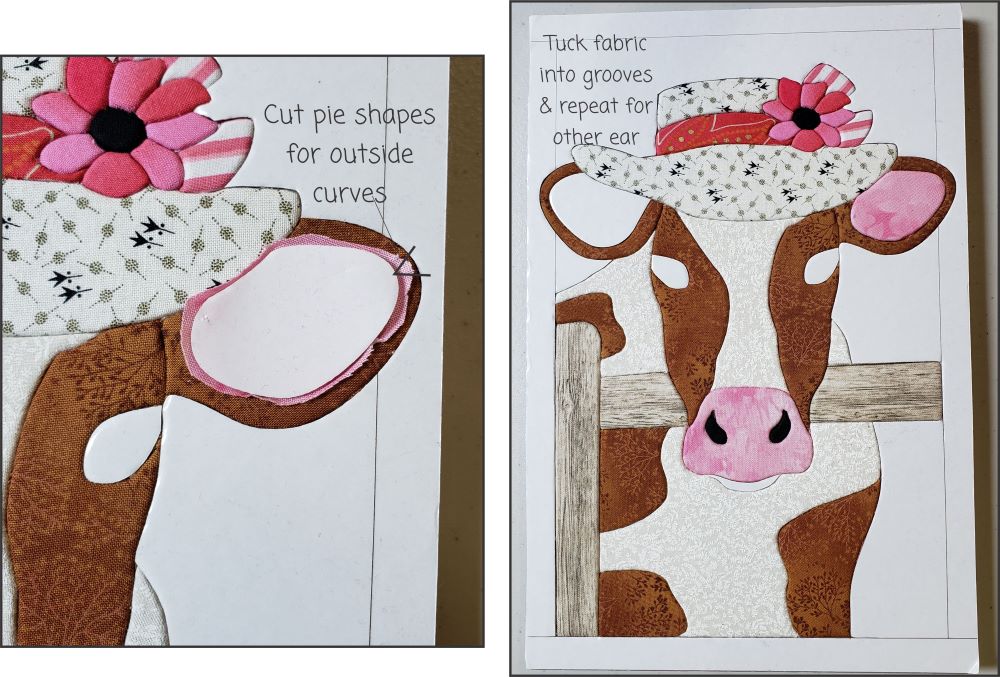
Back to the ears. Place the Pink Fabric on the adhesive, put paper pattern piece in place, pin, slightly tuck in the fabric, trim fabric (cut pie shapes for outside curves to reduce bulk) remove paper pattern piece, use the lint roller and tuck the fabric in completely. Repeat for other ear.
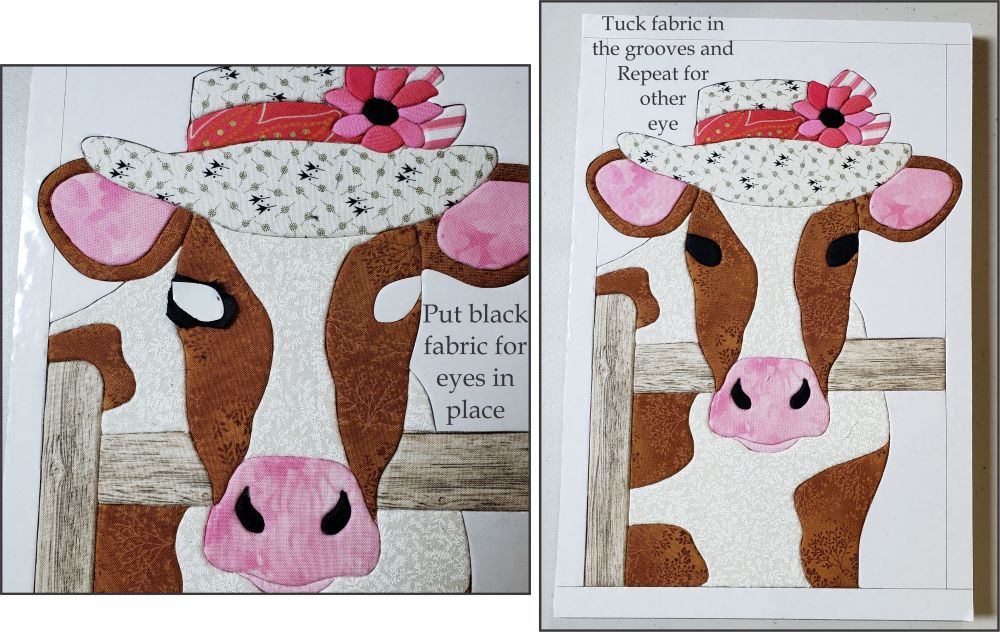
For the eyes, put the Black Fabric on the eye, place the paper pattern piece over the fabric and pin. Slightly tuck in fabric, remove paper pattern piece, trim fabric (I trim pretty close). Use the lint roller and then tuck the fabric in completely. Repeat for other eye.
Remove the lower lip paper pattern piece and apply pink fabric, pin paper piece over the fabric and pin in place. Slightly tuck fabric in around lip, remove the paper pattern piece. Trim fabric, use the seam roller and then tuck the fabric in completely.
NEXT: Part 3 is all about working in large areas. The Sky.
Kits Available at:
https://artsi2.com/product/betsy-the-cow-no-sew-quilt-wall-hanging-by-artsi2/