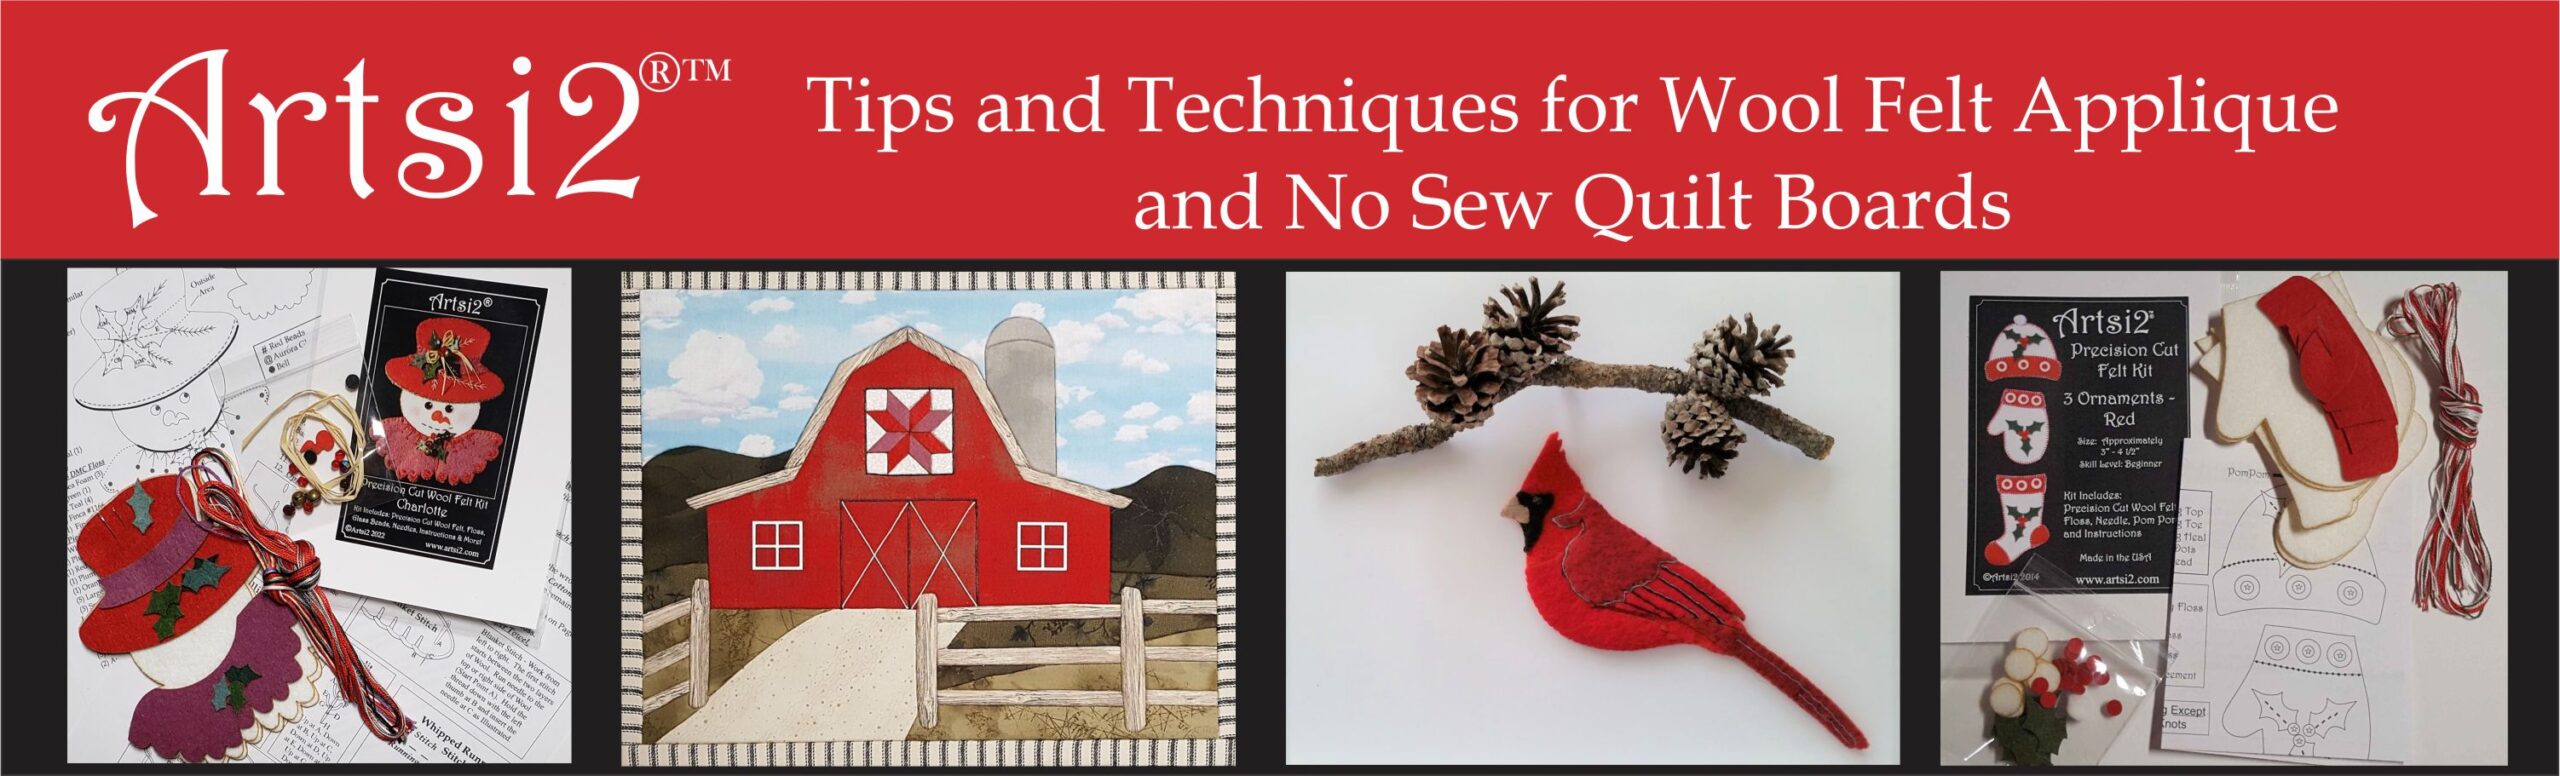

Kits Available at:
https://artsi2.com/product/charlotte-wool-applique-snow-woman-stitch-kit-by-artsi2/
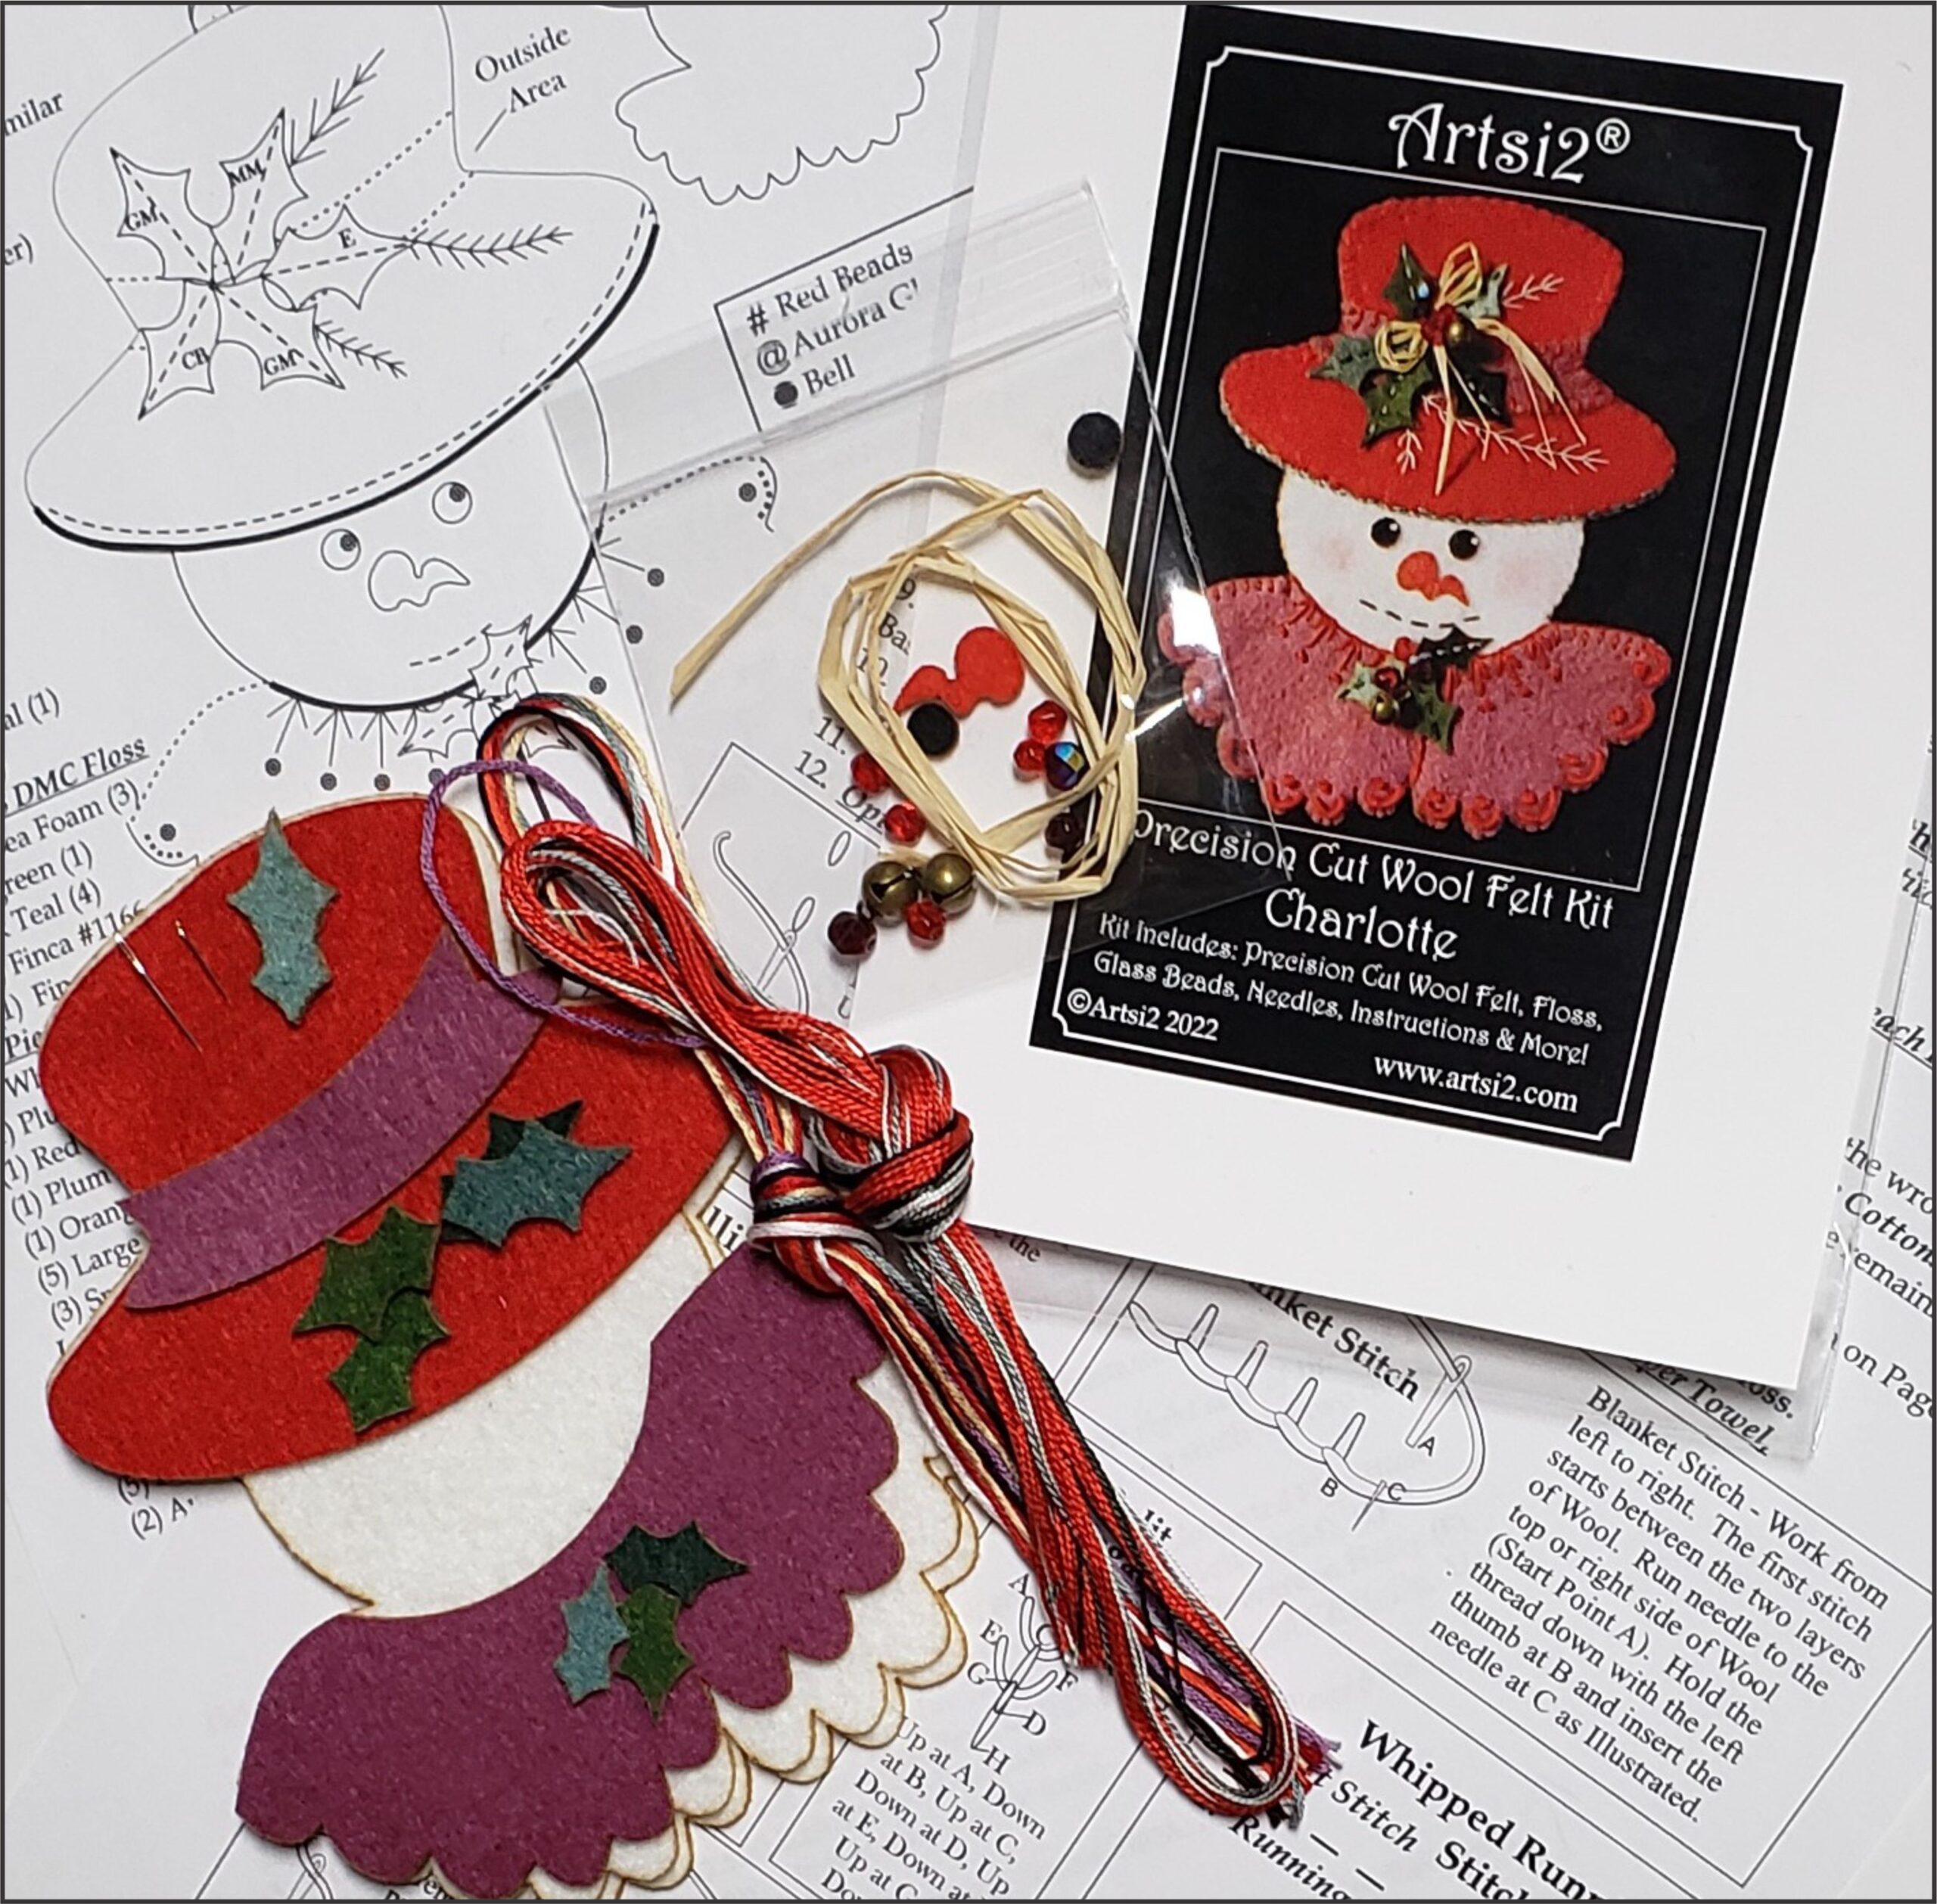
Contents of the kit include:
- Sharp #10 Needle
- Embroidery #5 Needle
- DMC 6 Strand Hank
- Perle Cotton 8 Hank
- Precut Wool Felt Pieces
- (7) Glass Beads
- (2) Bells
- Raffia
- Detailed Contents of Floss Colors, Quantities & Wool Felt Pieces
- Instructions and Illustrations.
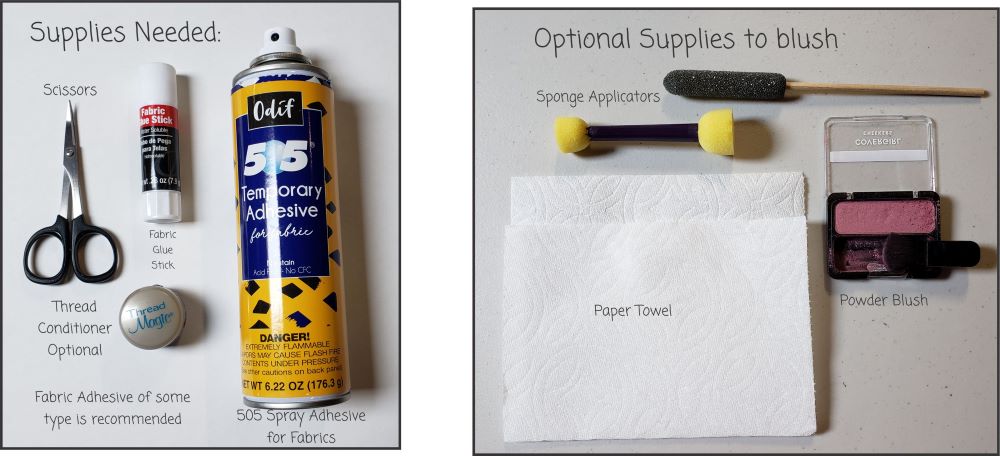
Supplies Needed:
- Scissors
- Thread Conditioner (optional)
- 505 Fabric Spray Adhesive or similar (optional)
- Dritz Fabric Glue Stick (optional)
Optional Supplies for Blush:
- Paper Towel
- Powder Blush
- Sponge Applicators
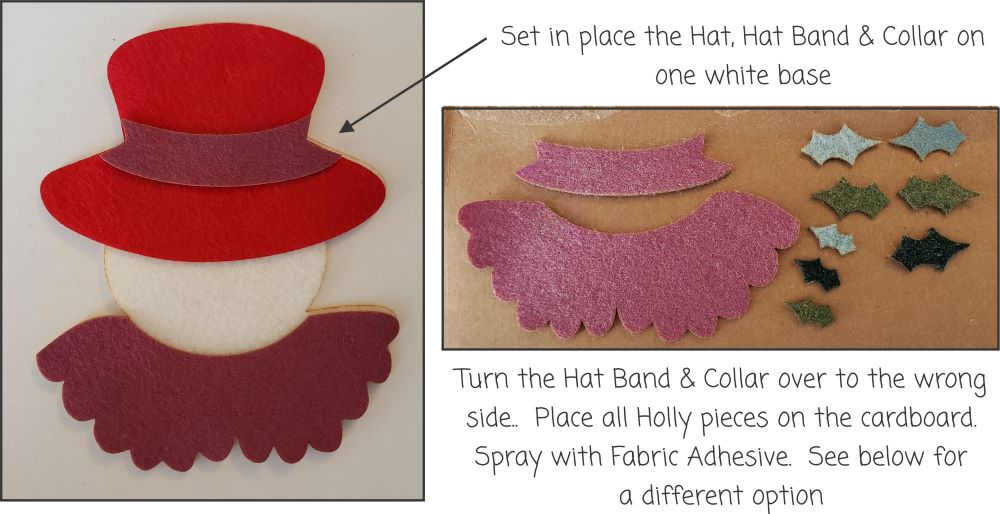
The following step helps eliminate applying Spray Adhesive on the incorrect side. Put the Hat, Hat Band & Collar on one white base. On a piece of cardboard – light spray with adhesive. Just enough to give a lite tack. This will hold the pieces down when spraying. Otherwise the Holly will go flying and possibly the other pieces as well! Turn the Collar and Hat Band to the wrong side and place on the cardboard. Place all 8 pieces of Holly on the cardboard. Spray adhesive to the pieces.
Optional: When traveling I take the Fabric Glue Stick which eliminates the need for the Spray Adhesive. A lot of people prefer this method. Just make sure you apply the glue to the wrong side of the piece. Gently apply adhesive to the piece that will be worked. Do not apply to the whole piece – just enough to hold the piece in place.
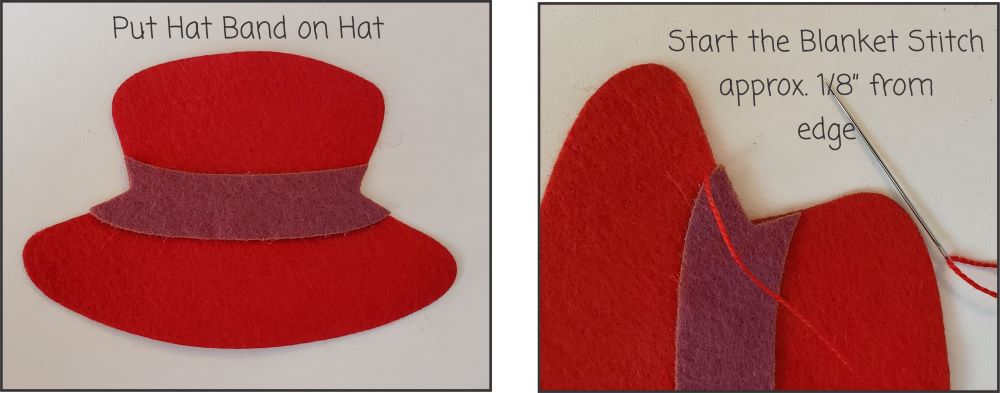
Put the Hat Band on the Hat. Use 1 strand of Red Perle Cotton 8. Bring your needle up to the right side, approximately 1/8″ from edge.
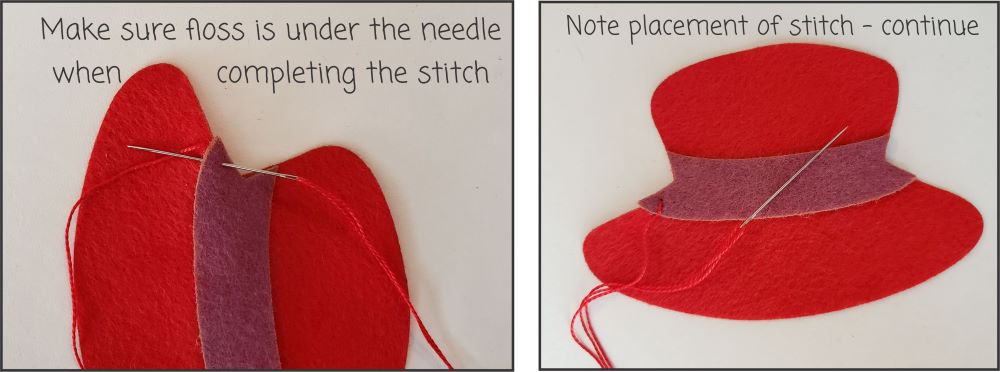
Take the needle and slide it through to the edge, catching some of the red felt. Make sure the floss is under the needle when pulling through
Continue to the end of the Hat Band.
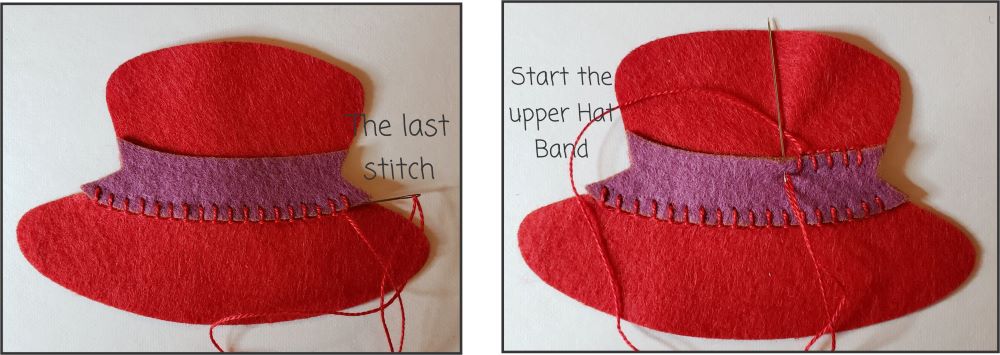
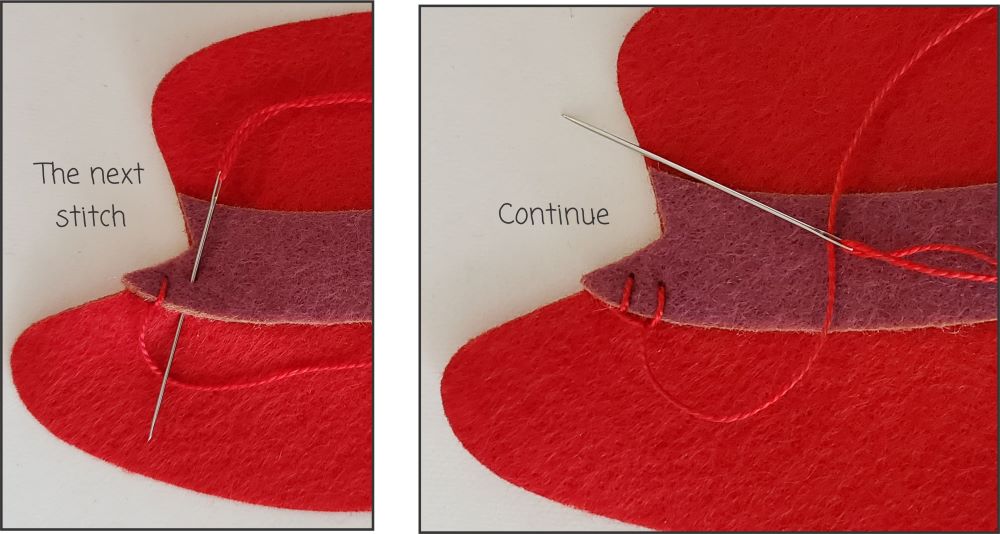
At the end, take the needle down, approximately 1/8″ from the edge and secure the floss. Then Blanket Stitch the upper part of the Hat Band.
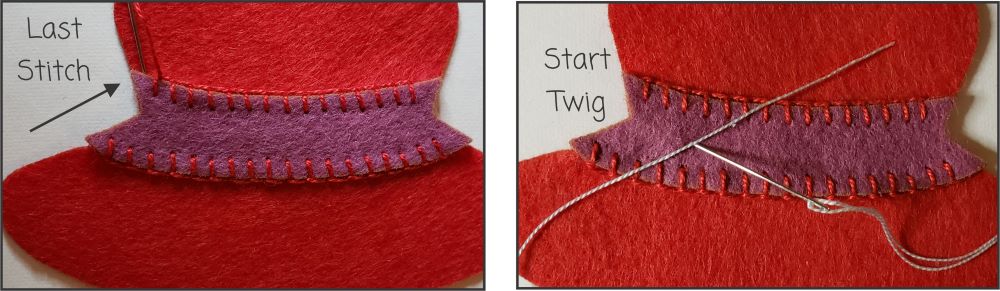
For the last stitch, take needle to the wrong side, approximately 1/8″ from the edge and secure the floss. We’ll start with the first twig. Use 1 strand of Sea Foam Perle Cotton. Bring the needle up where the end of the twig will be. I like to get a good reference point by pulling the floss to the spot where the twig will end. Often times I will check the reference point while stitching.
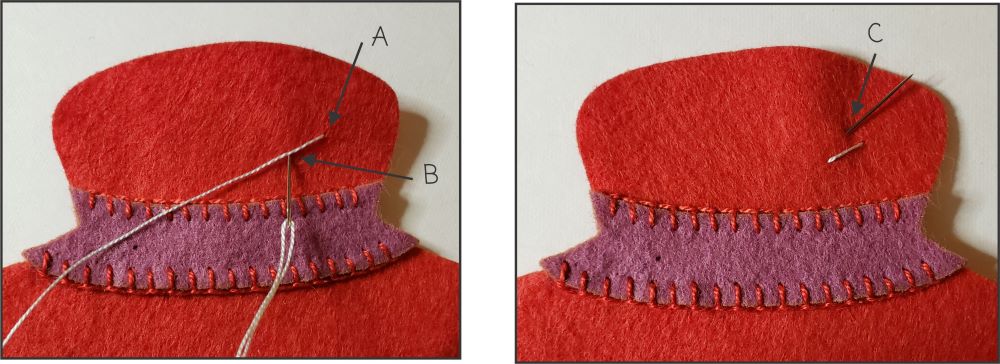
Next take the needle to the wrong side of the hat B. Then come up at C.
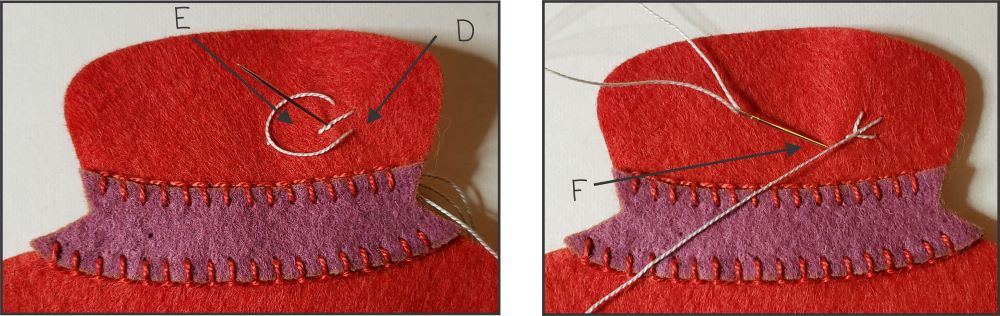
Now, go down at D then up at E. E – the needle will go through the previous straight stitch. Make sure the floss is under the needle before pulling the needle all the way through. This is called a Split, Elongated, Fly Stitch.
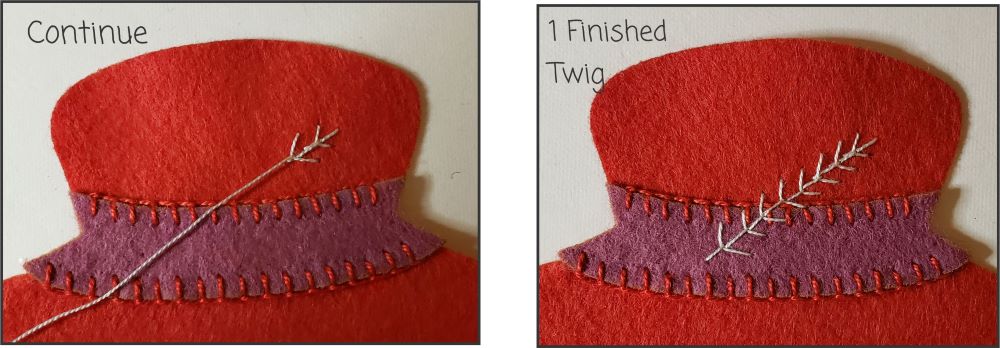
Continue until the twig is complete.
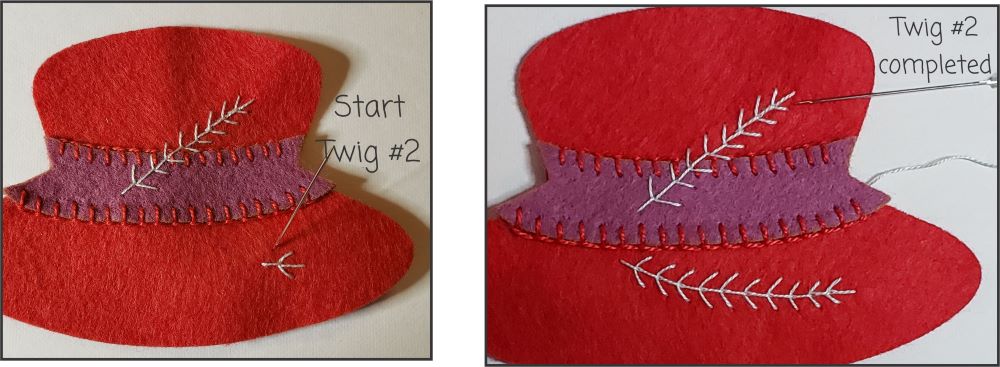
Start Twig #2 and continue to completion.
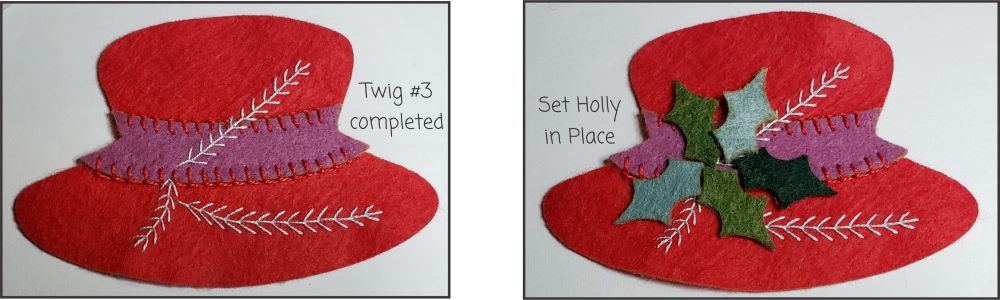
Complete Twig #3. Set the 5 Large Holly in place.
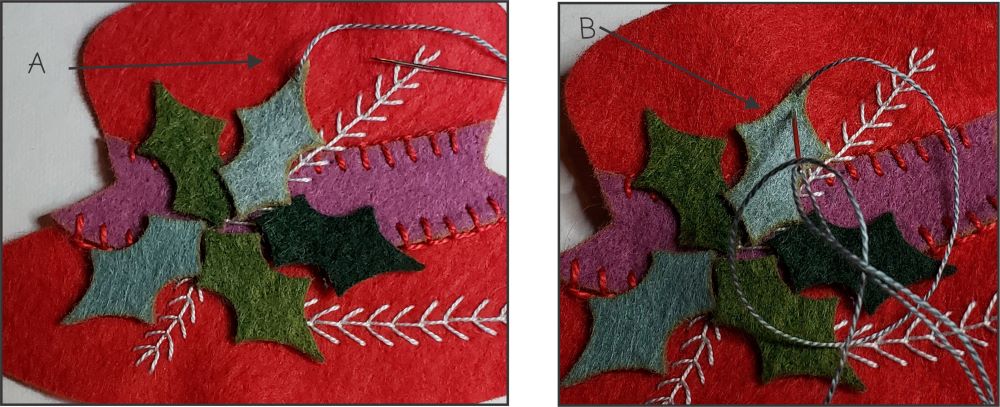
Bring the needle into the Holly Leaf at A and then go down at B. The kit comes with an Evergreen Perle Cotton if you would prefer a darker color on some of the leaves. For this demonstration I used Dark Teal for the MM and CB leaves. For leaves GM and E I used the Sea Foam. This can be a Running Stitch or a Back Stitch – same look. It adds a little interest if the stitches are not all the same length. See below.
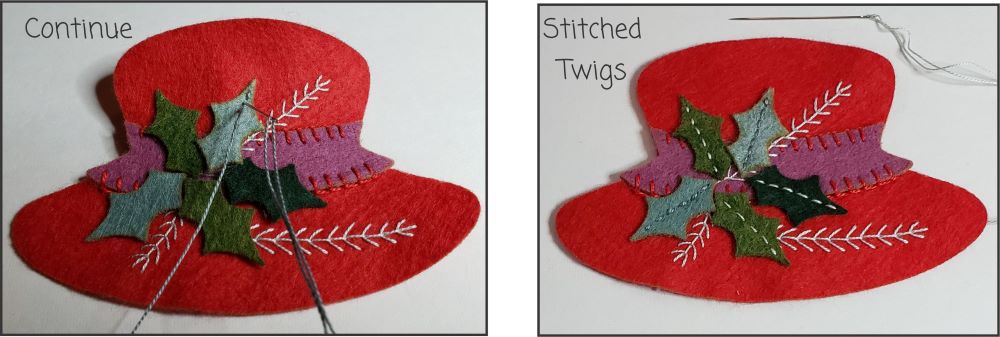
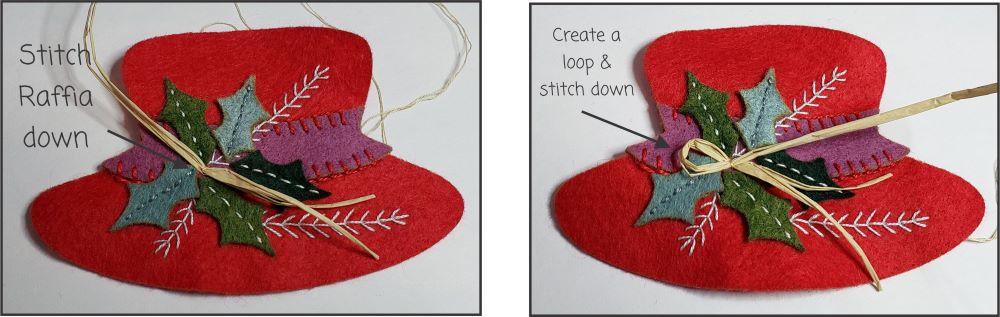
Take 1 or 2 pieces of Raffia. One if it is thick and 2 if it is thin and tack in place using 1 Strand of 6 Strand Beige floss.
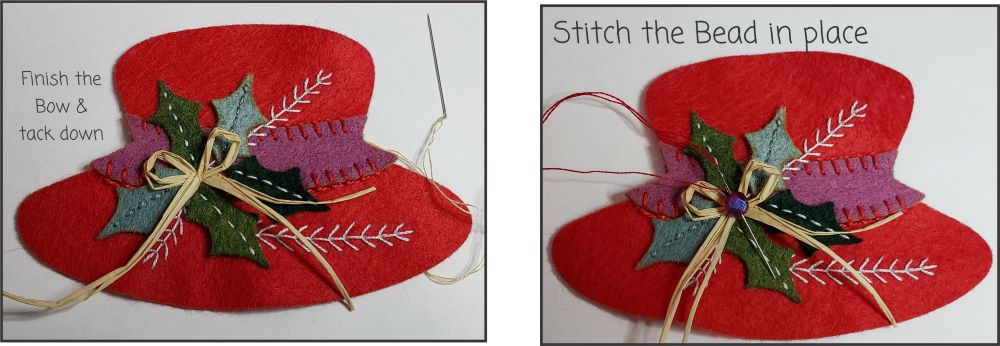
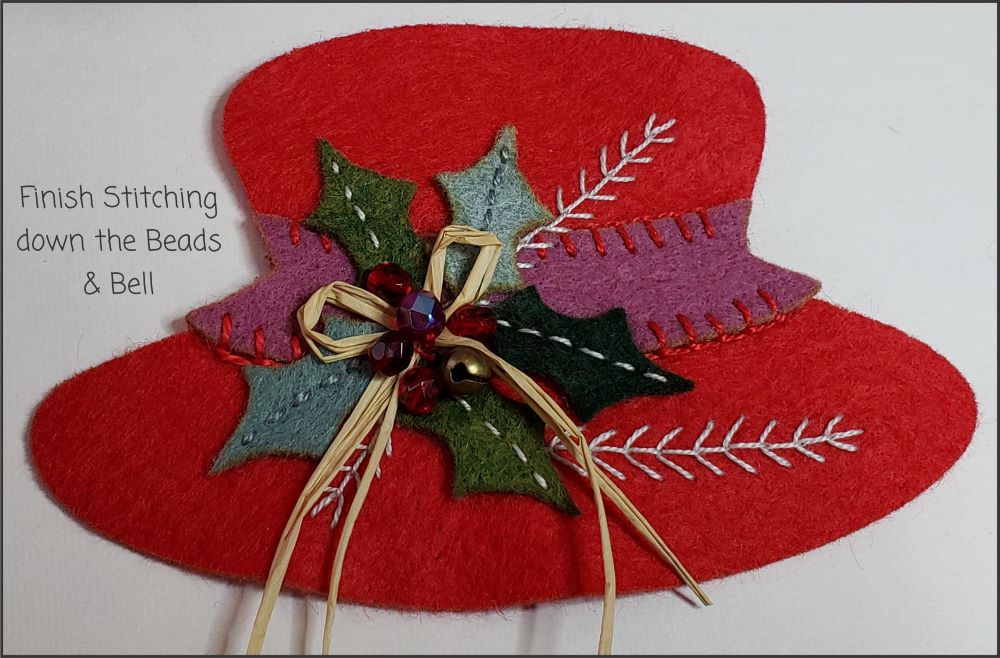
Finish the Bow and tack down. It stitch the Beads in place. Use 1 Strand of 6 Strand Floss Red. Stitch the bead down. I stitch the beads down at least twice. Stitch all Beads and the Bell in place. See below.
Kits Available at:
https://artsi2.com/product/charlotte-wool-applique-snow-woman-stitch-kit-by-artsi2/