Kits Available at:
https://artsi2.com/product/christmas-bulbs-9×13-5-no-sew-quilt-wall-hanging-by-artsi2-copy/
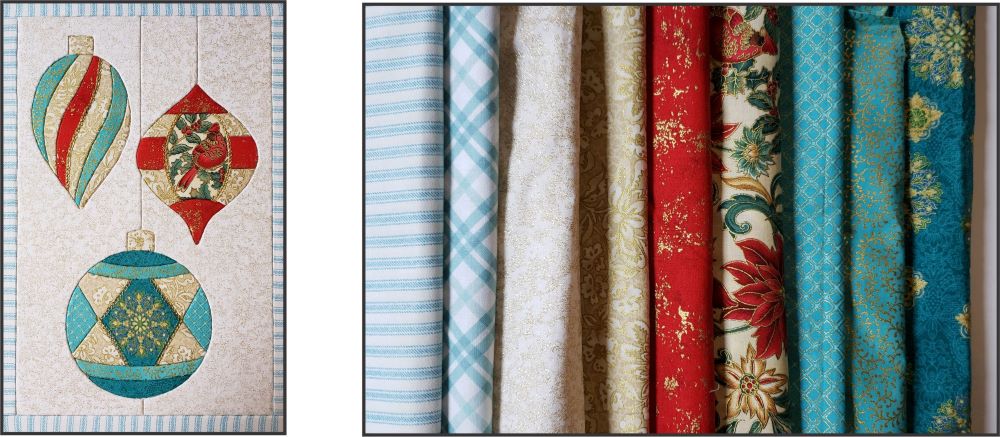
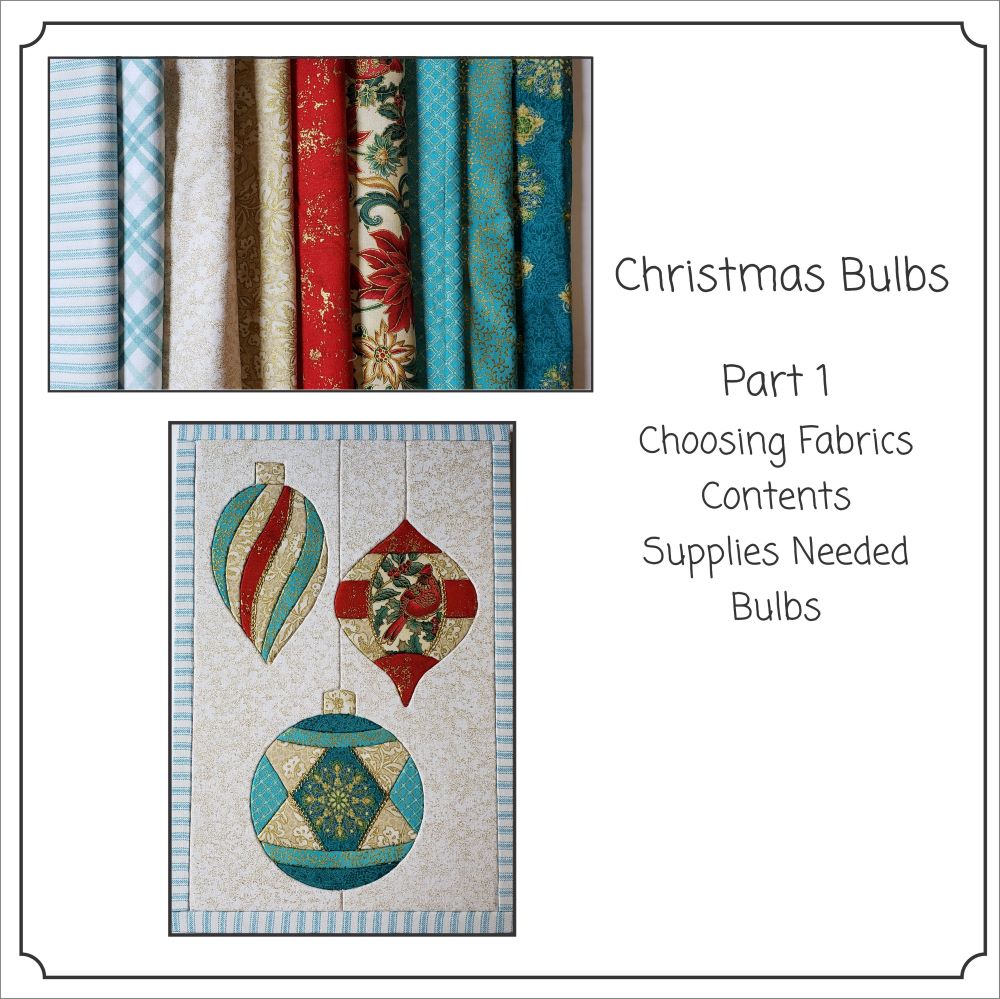
The design would look beautiful with rustic fabrics (pinecones, plaids), sparkly fabrics, country look etc. So many possibilities.
How many fabrics are needed? Count the fabrics used in the color cover sheet. That is a base line. Of course you may want to use more or less.
- I start with a palette of fabrics. Sometimes when working on a project I decide that a different fabric would be a better choice. I did not use the plaid It was one of the original fabrics destined for the border . I picked the ticking for the border. Generally scraps is all that is needed. For those that do not have a fabric stash – craft stores, fabric and quilt stores offer Fat Quarters (18″X21″). Some fabric stores will cut as small as an 8th of a yard. Listed below are some fabric requirements:
- TEAL FABRICS 6″X6″ square each
- RED FABRICS 6″X6″ square
- GOLD FABRIC 8″X8″ square
- BACKGROUND 14″X14″
- BORDERS 5″X45″
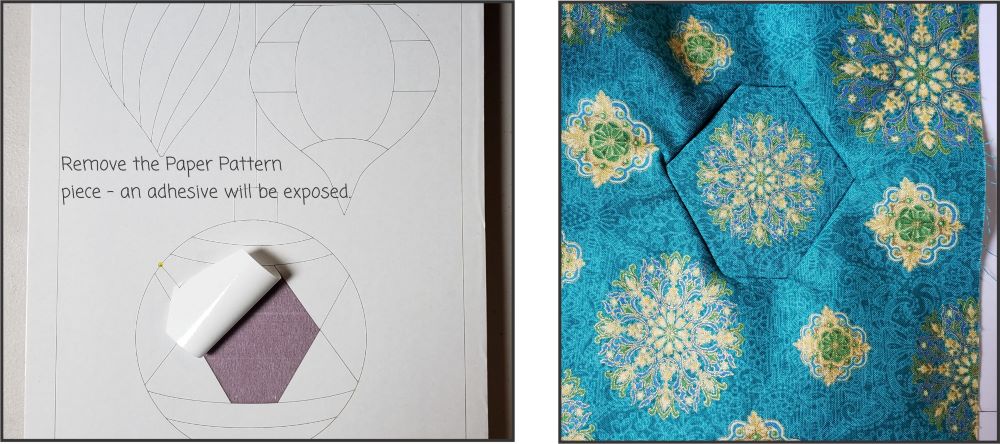
Tick up the Paper Pattern piece, an adhesive will be exposed. The tip of a pin works great – it might a few attempts.
If you have a fabric that has a focal point that you would like to center there are several ways to get to that place. If you have a light box – wonderful. Place the fabric on the box and center the paper pattern piece over – center. Then cut the fabric 1/4″ outside the paper pattern piece.
Above – The fabric was positioned until the medallion was centered.
Or – position the paper pattern piece over the focal point. cut the fabric 1/2″ outside the pattern. That will give some wiggle room to center.
When the fabric is in place. Slightly tuck fabric into the grooves. 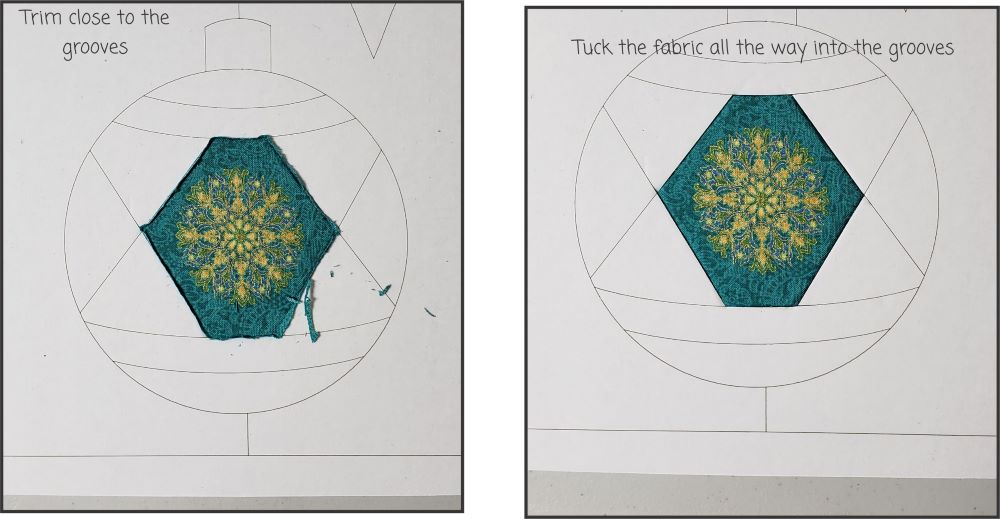
Trim fabric close to the grooves, use a lint roller. Tuck the fabric all the way into the grooves.
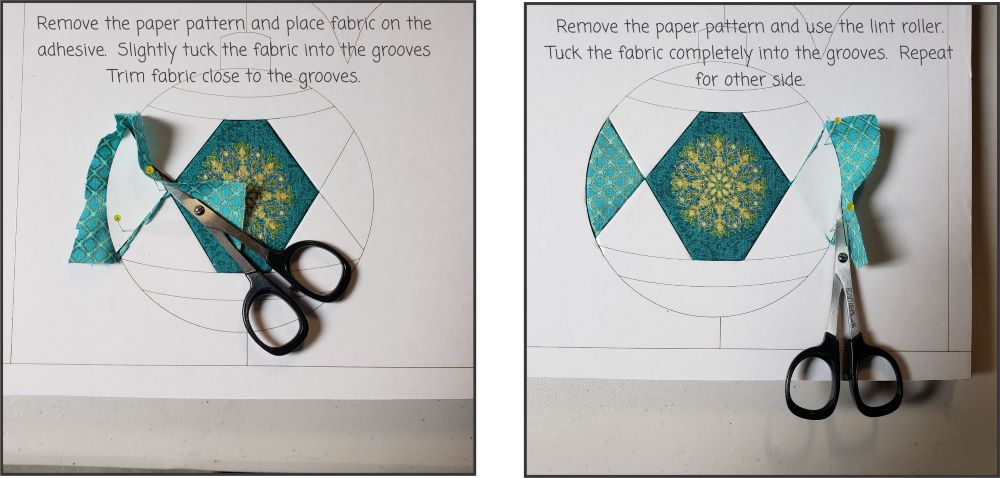
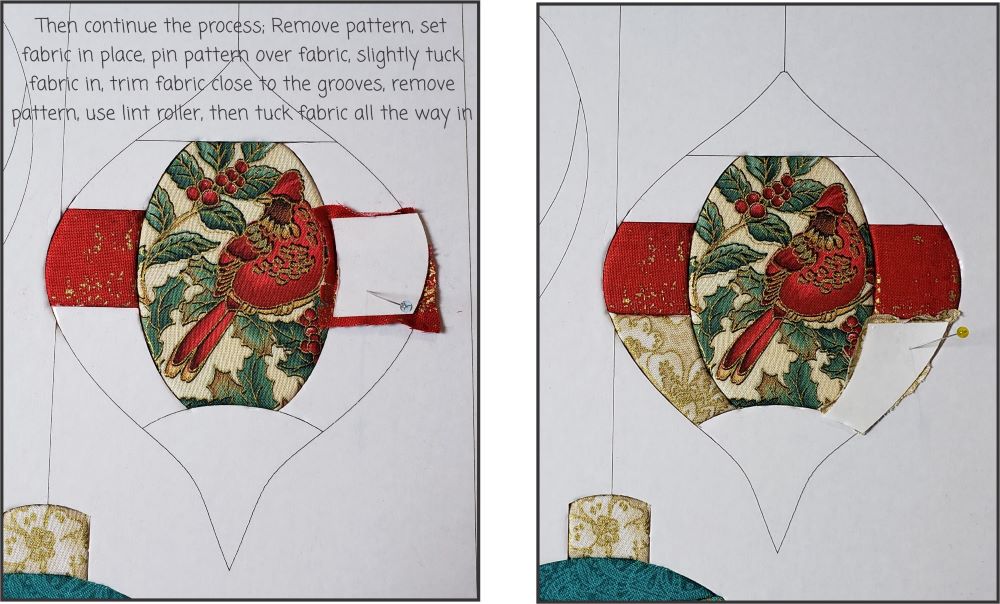
Remove the paper pattern and place the fabric on the adhesive. Pin pattern to the fabric. This will help determine where the grooves are. Slightly tuck the fabric into the grooves. Trim fabric close to the grooves. Remove pattern, use lint roller and then tuck the fabric into the grooves all the way. Repeat for other side.
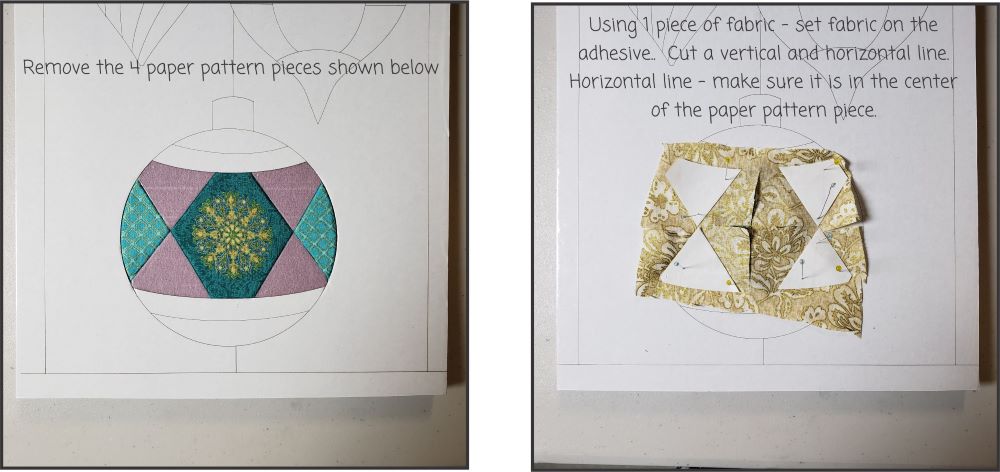
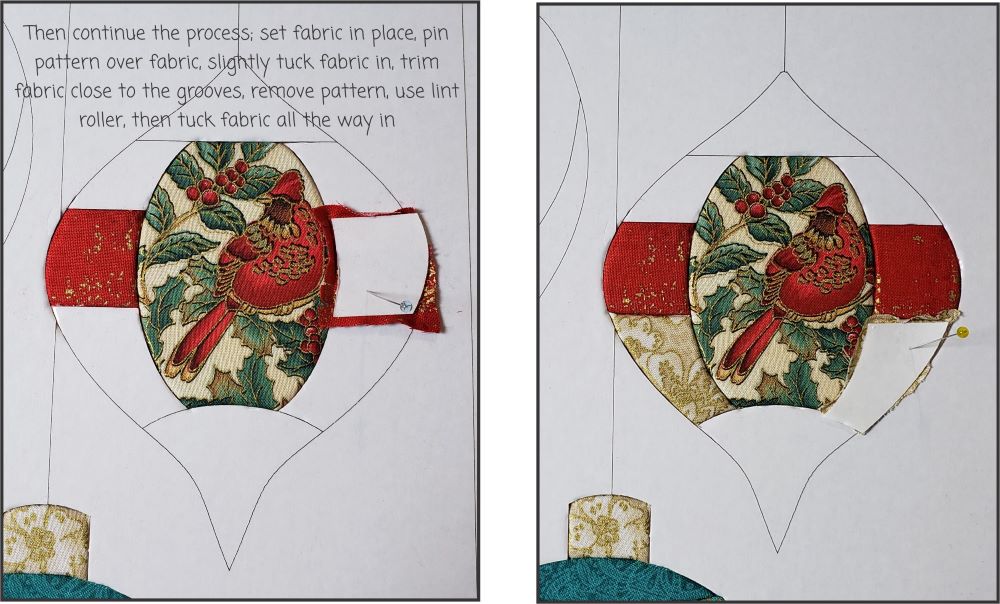
There are two different ways to apply fabric to the four pieces above. If it is easier you may treat each piece separately. Following the general process: Remove paper pattern of one piece. Place the fabric on the adhesive, pin pattern to the fabric. Slightly tuck the fabric into the grooves. Trim fabric close the grooves. Remove pattern and use the lint roller. Then tuck fabric all the way into the grooves. Repeat for the 3 remaining pieces.
The method used in the blog – remove the 4 paper pattern pieces show above. Place a piece of fabric over the exposed adhesive. Cut the fabric horizontally and vertically. When cutting the horizontal cut make sure that you are in the center of the two pieces.
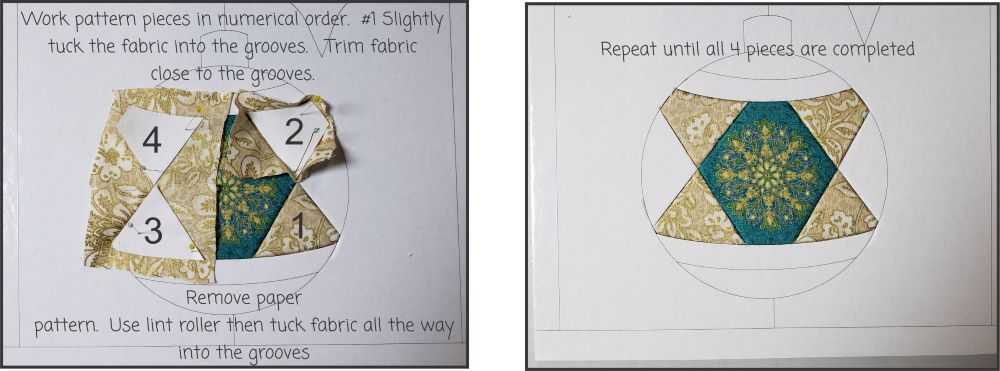
Work pattern pieces in numerical order. #1 – slightly tuck the fabric into the grooves, trim fabric close to the grooves, remove the pattern piece. Use the lint roller and then tuck the fabric all the way into the grooves. Repeat for pieces 2, 3, and 4.
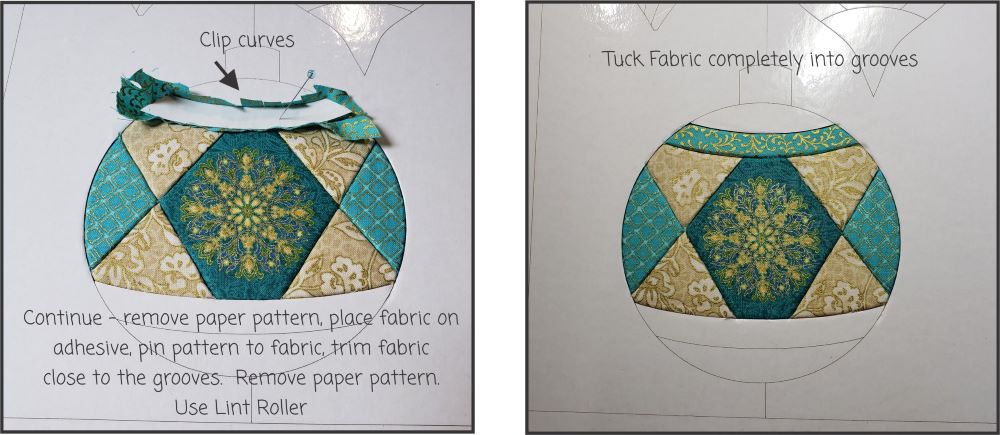
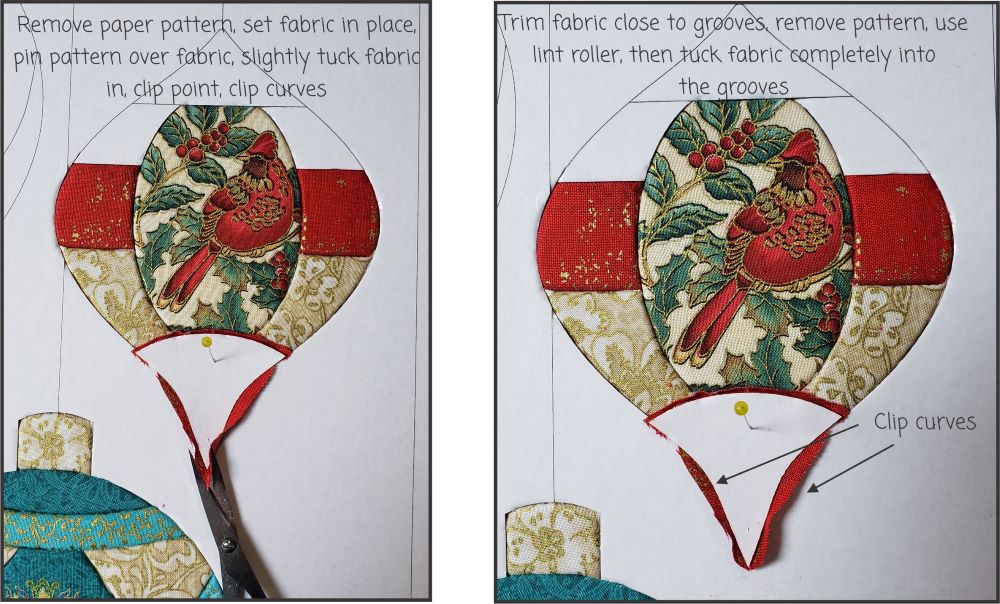
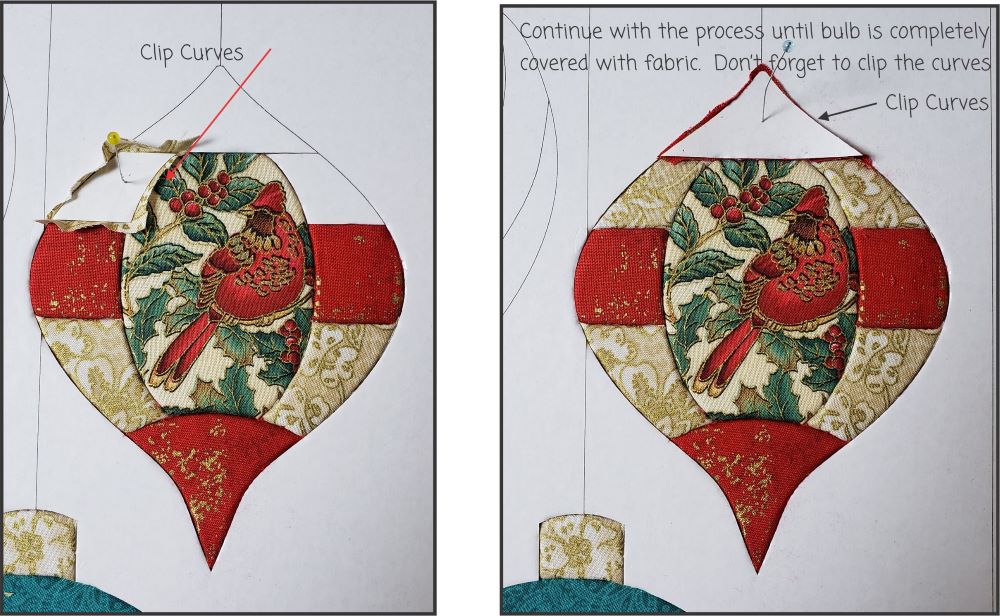
Continue covering the bulb with fabrics. Using the basic process; remove the paper pattern, place fabric on the adhesive, pin the pattern to the fabric. Slightly tuck the fabric into the grooves, clip curves if needed, and trim fabric close to the grooves. Remove the pattern piece, use the lint roller and then tuck the fabric into the grooves all the way.
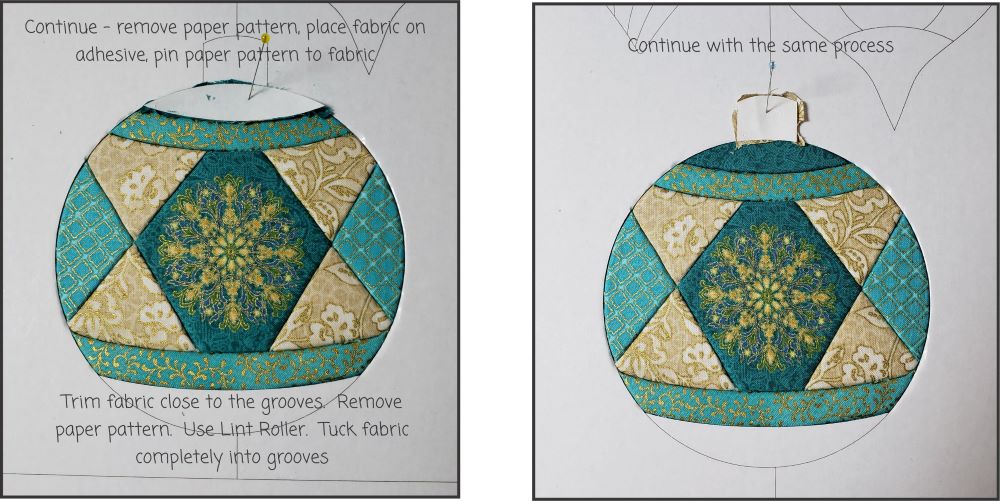
Continue covering the bulb with fabrics. Using the basic process; remove the paper pattern, place fabric on the adhesive, pin the pattern to the fabric. Slightly tuck the fabric into the grooves, clip curves if needed, and trim fabric close to the grooves. Remove the pattern piece, use the lint roller and then tuck the fabric into the grooves all the way.
Continue covering the bulb with fabrics. Using the basic process; remove the paper pattern, place fabric on the adhesive, pin the pattern to the fabric. Slightly tuck the fabric into the grooves, clip curves if needed, and trim fabric close to the grooves. Remove the pattern piece, use the lint roller and then tuck the fabric into the grooves all the way.
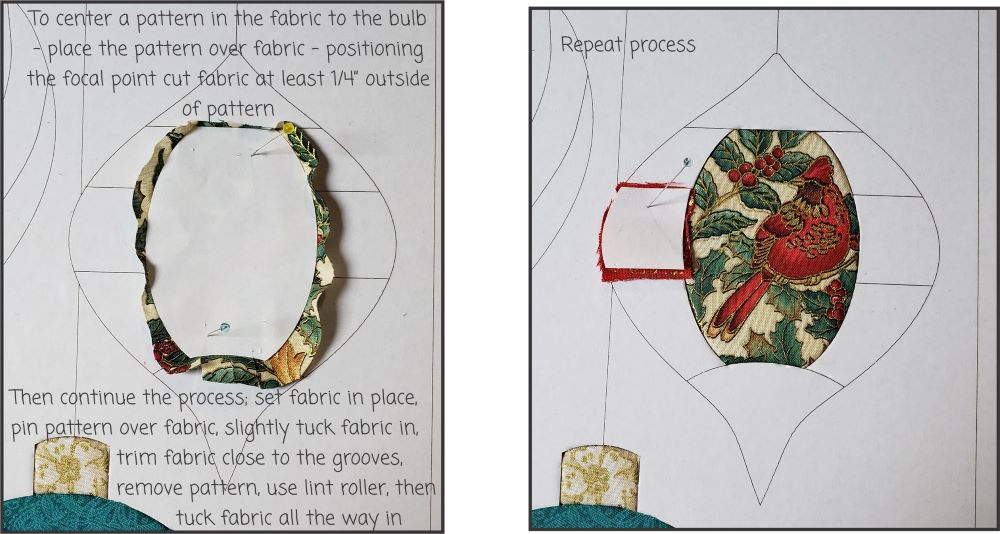
For the next bulb – if you have a pattern that you would like centered – use the method that works be for you. (see the beginning of the blog). Once again; Continue covering the bulb with fabrics. Using the basic process; remove the paper pattern, place fabric on the adhesive, pin the pattern to the fabric. Slightly tuck the fabric into the grooves, clip curves if needed, and trim fabric close to the grooves. Remove the pattern piece, use the lint roller and then tuck the fabric into the grooves all the way.
Continue covering the bulb with fabrics. Using the basic process; remove the paper pattern, place fabric on the adhesive, pin the pattern to the fabric. Slightly tuck the fabric into the grooves, clip curves if needed, and trim fabric close to the grooves. Remove the pattern piece, use the lint roller and then tuck the fabric into the grooves all the way.
Yes, once again continue covering the bulb with fabrics. Using the basic process; remove the paper pattern, place fabric on the adhesive, pin the pattern to the fabric. Slightly tuck the fabric into the grooves, clip curves if needed, and trim fabric close to the grooves. Remove the pattern piece, use the lint roller and then tuck the fabric into the grooves all the way.
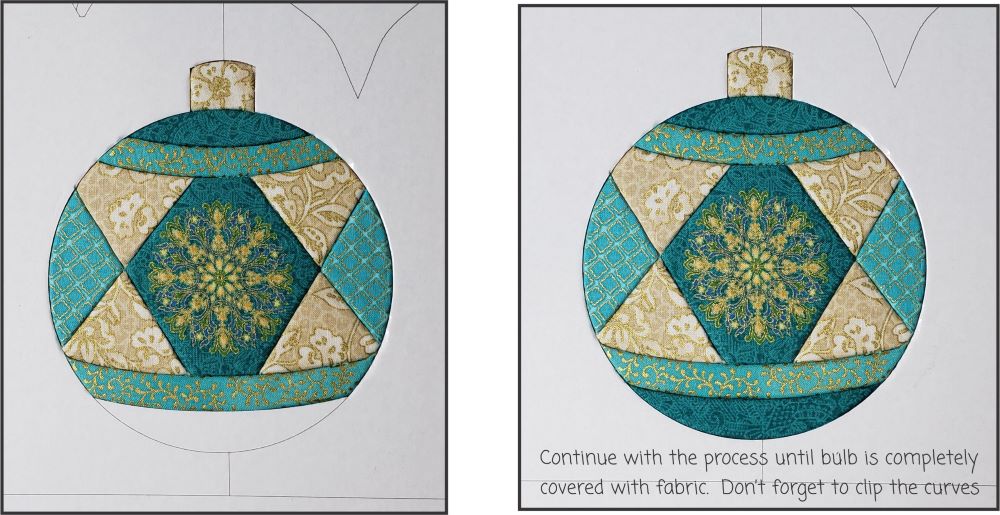
Continue the basic process make sure the the tip of the bulb is clipped.
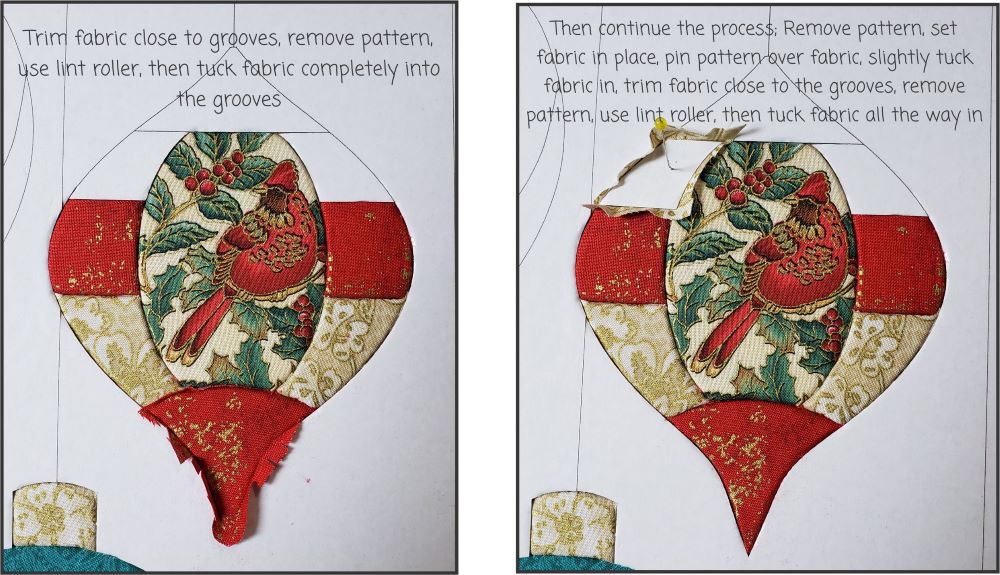
Trim fabric close to the grooves. Remove the pattern piece, use the lint roller and then tuck the fabric into the grooves all the way. Continue the basic process until the bulb is covered.
Using the same basic process – finish applying fabric to the bulb. You are ready for Part 2!
Kits Available at:
https://artsi2.com/product/christmas-bulbs-9×13-5-no-sew-quilt-wall-hanging-by-artsi2-copy/