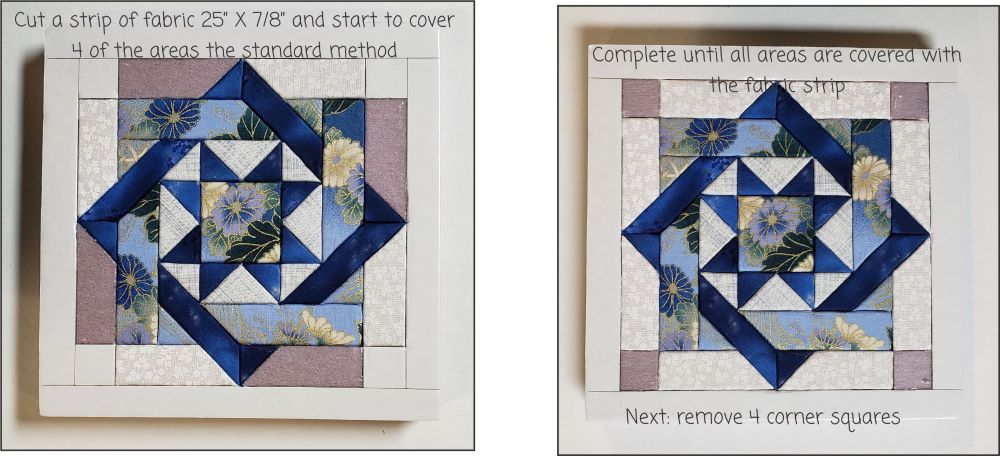
There are a total of 8 areas to cover in the next section. Start with four that are not next to one another (in other words not touching each other). Then cover the remaining 4 sections. Then work on the four corners.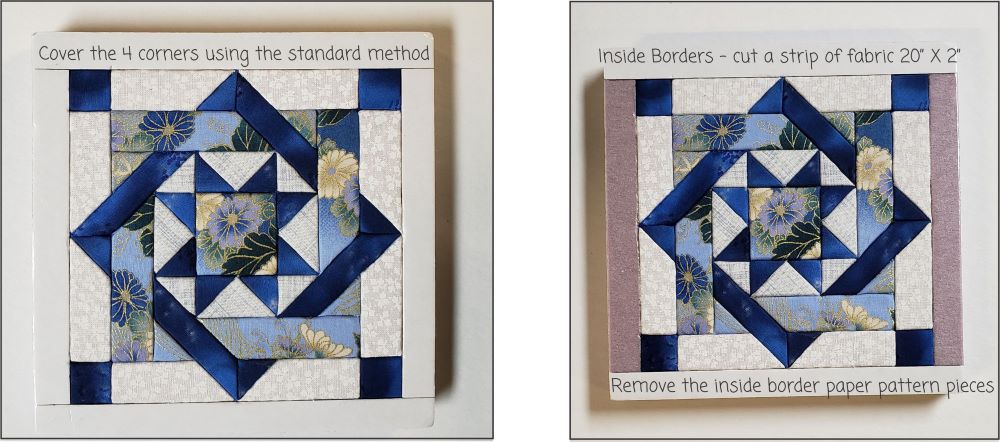
There are two different borders: Inside Borders and Outside Borders. The Inside Borders are inside the two Outside Borders. Cut a strip of fabric 20″X2″. Remove the paper pattern pieces of the Inside Borders. 
Place the strip of fabric flush on one end to the other end. Tuck the fabric into the long groove on both sides. Gently tuck the corners in the grooves.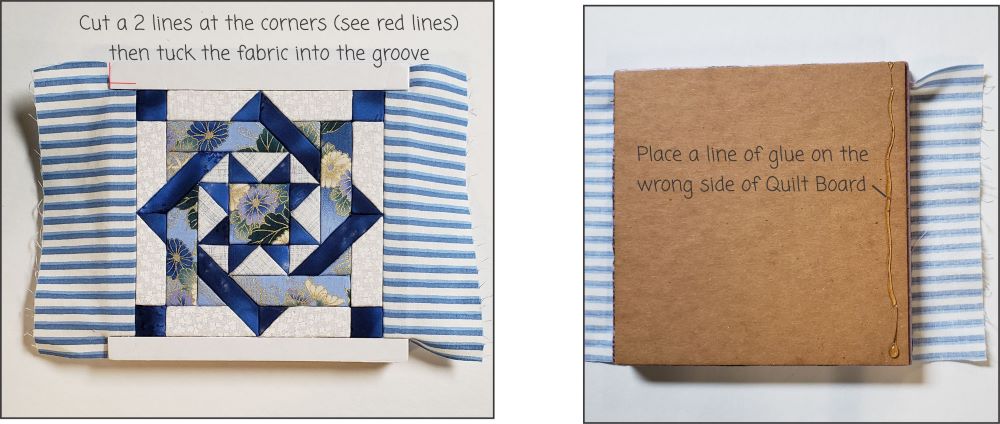
Cut an “L” at the corners – see the red lines. Then tuck the corners in on all four sides. Turn the Quilt Board to the wrong side and place a strip of glue down the edge as shown. Repeat for other side.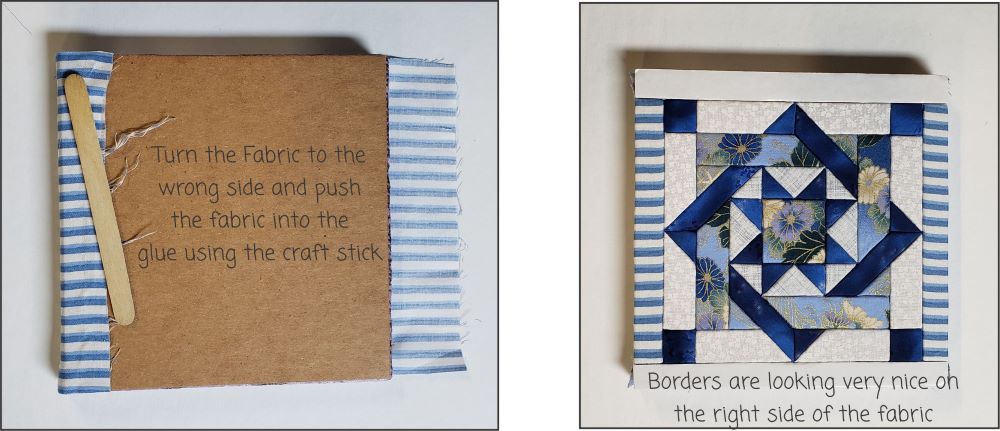
Using a craft stick push the fabric into the glue so that the border is nice and tight. Repeat for the other side.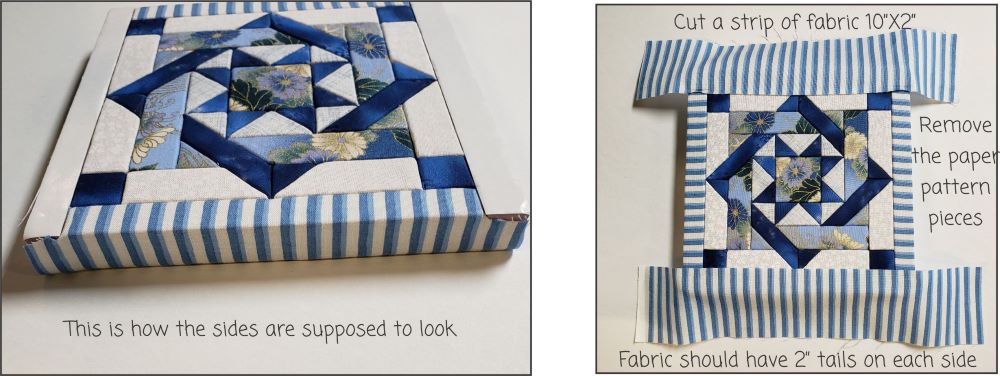
The Outside Borders are next. Cut a strip of fabric 10″ X 2″. Remove the paper pattern pieces of the Outside Borders. Lay the fabric over the adhesive, leaving 2″ tails on both sides. 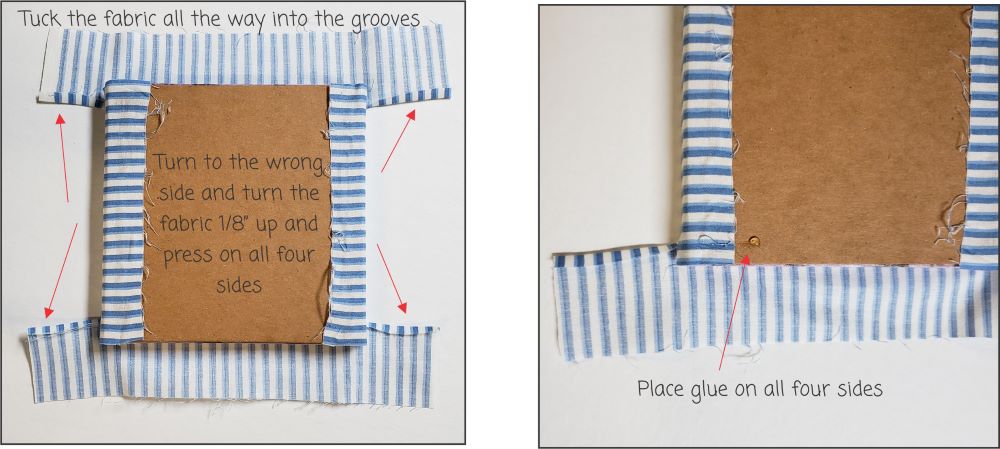
Turn the Quilt Board to the wrong side and turn the inside edges of the fabric strip up 1/8″ and press. Place a line of glue as shown in the picture. Fold the fabric over, using a craft stick push the fabric into the glue and repeat for all 4 sides.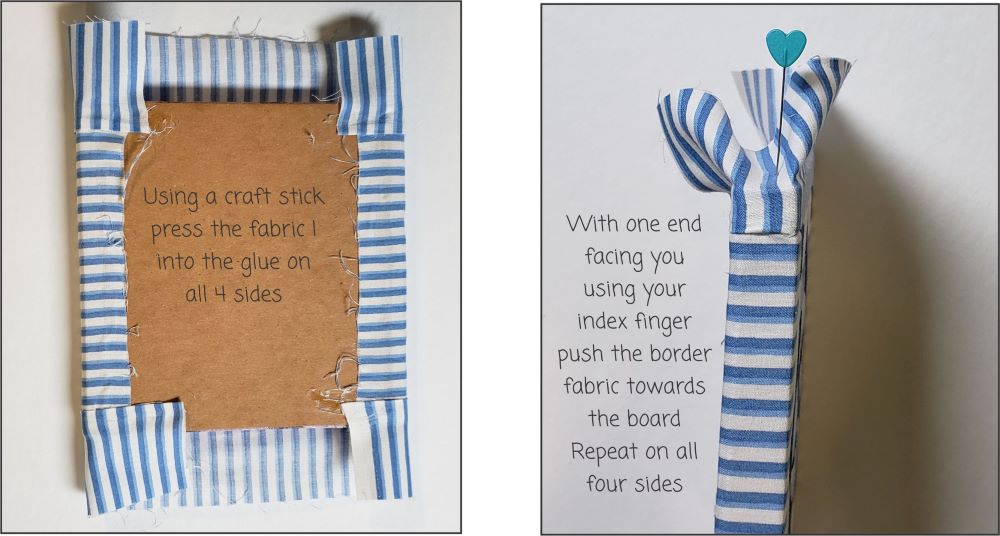
Turn the Quilt Board facing you. Using your index finger push the fabric toward the board. Finger press or use an iron but be very carful when using an iron. The foam core can melt with prolonged heat. Just a quick touch of the iron is best. Repeat for all four sides.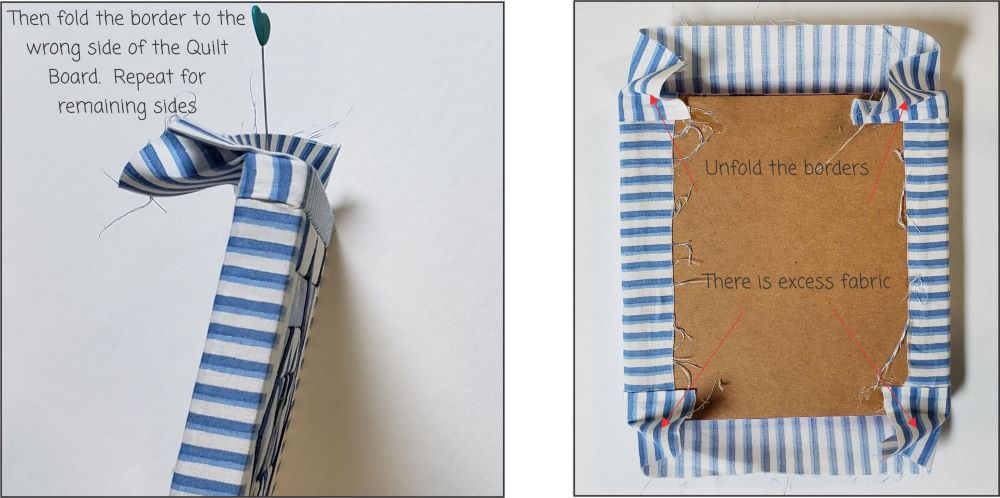
Fold the strip of fabric to the wrong side. Once again finger press or a very light touch of an iron. Turn the Quilt Board to the wrong side. Note there is excess fabric at the folds.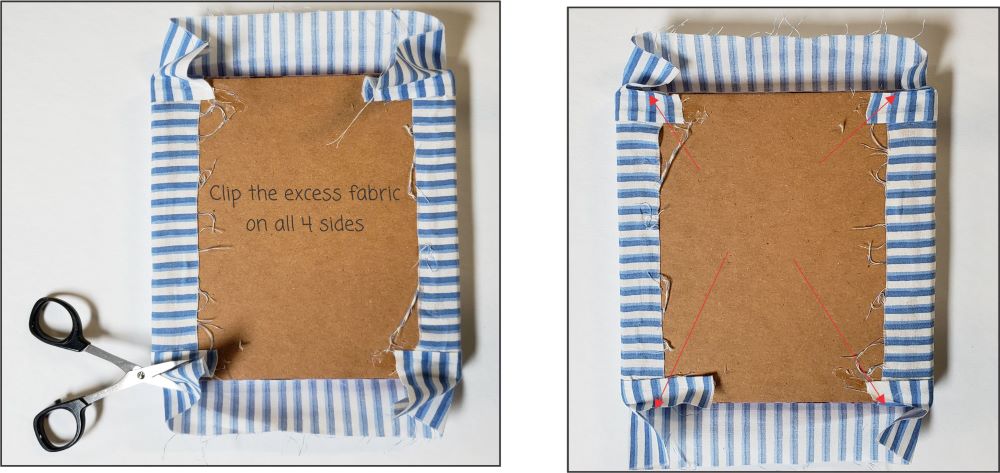
Trim the excess fabric at the folds on all four sides. 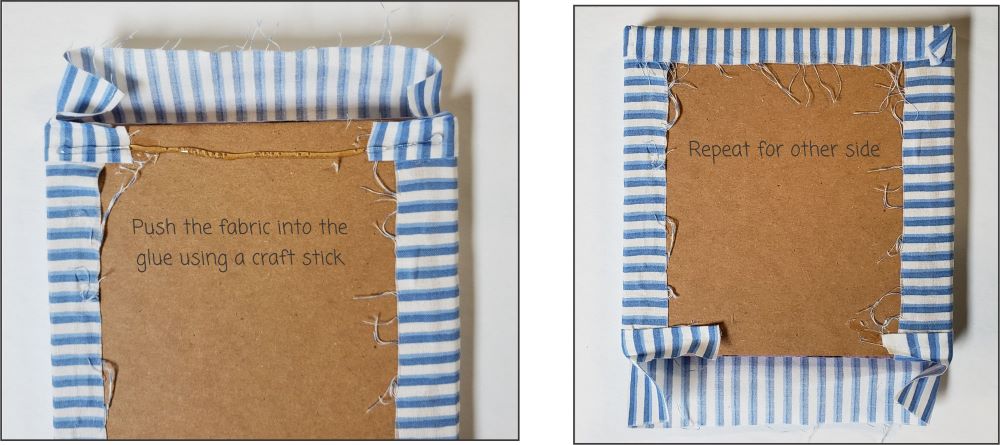
Place a line of glue along the edge and then press the fabric into the glue using a craft stick. Repeat for the other side. 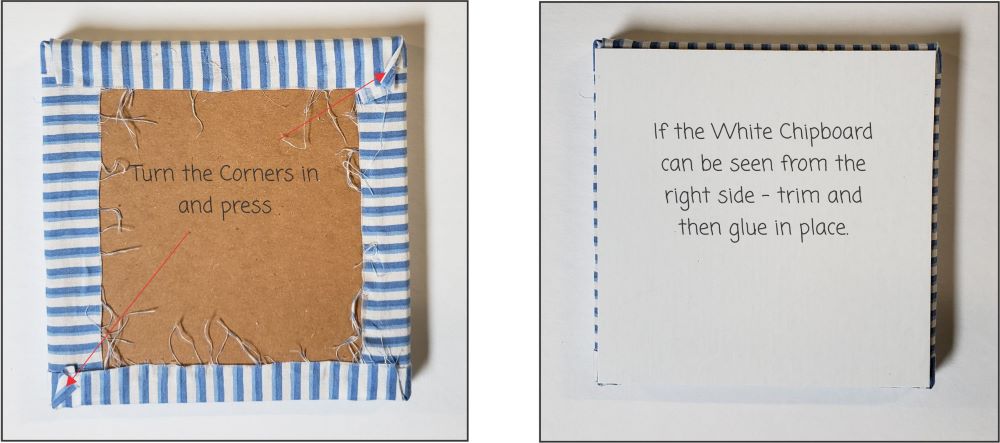
If the ends of the corners overlap the Quilt Board, turn them in and press or glue down. Before gluing the white chipboard to the back of the Quilt Board – make sure it is about 1/8″ smaller than the Quilt Board. Then glue in place. 
Place a ruler flush at the top of the Quilt Board. Note there is a dot on the Sawtooth Wall Hanger. Match the dot to the 3″ mark (the middle) and hammer it in place. Do hammer all the down to the board as a little room is necessary to hang the Quilt Board on a nail.