
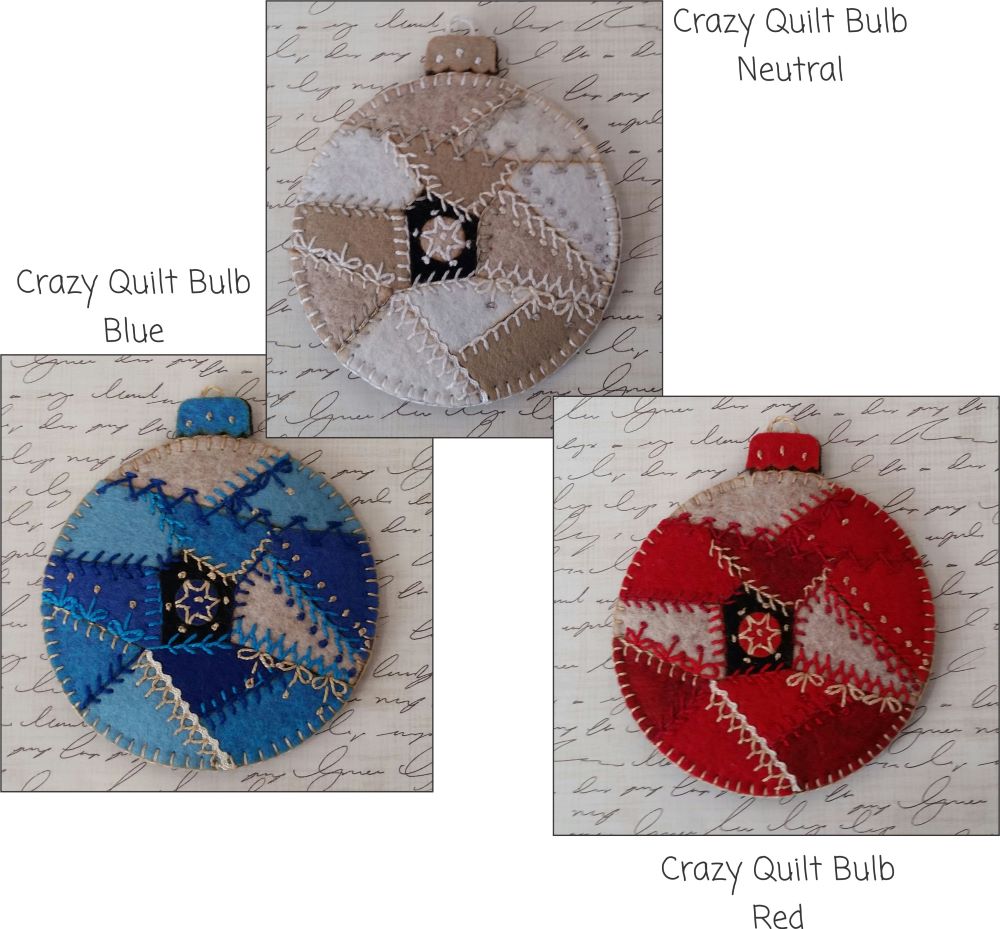
Kits Available at:
https://artsi2.com/product/crazy-quilt-christmas-bulb-wool-felt-ornament-kit-natural/
https://artsi2.com/product/crazy-quilt-christmas-bulb-wool-felt-ornament-kit-red/
https://artsi2.com/product/crazy-quilt-christmas-bulb-wool-felt-ornament-kit-blue/
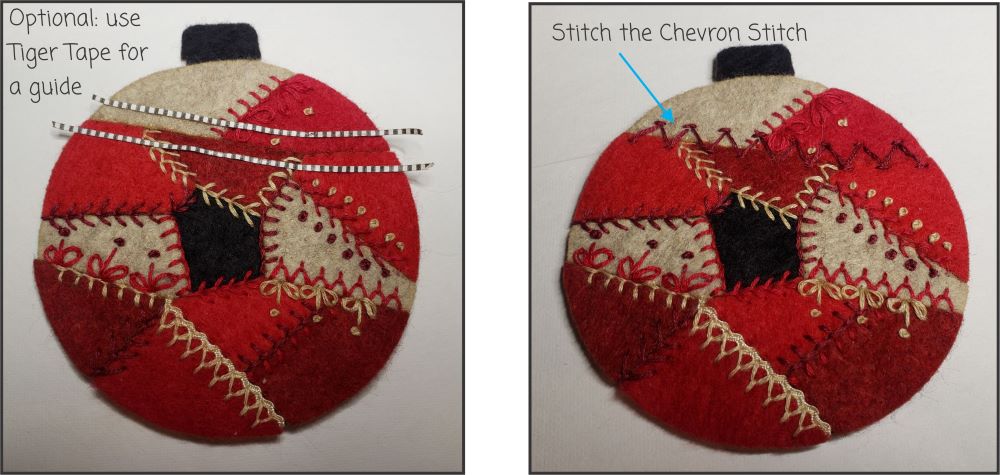
The Tiger Tape is available in different sizes. I like using the smallest size for this project. Scotch Tape works as well.
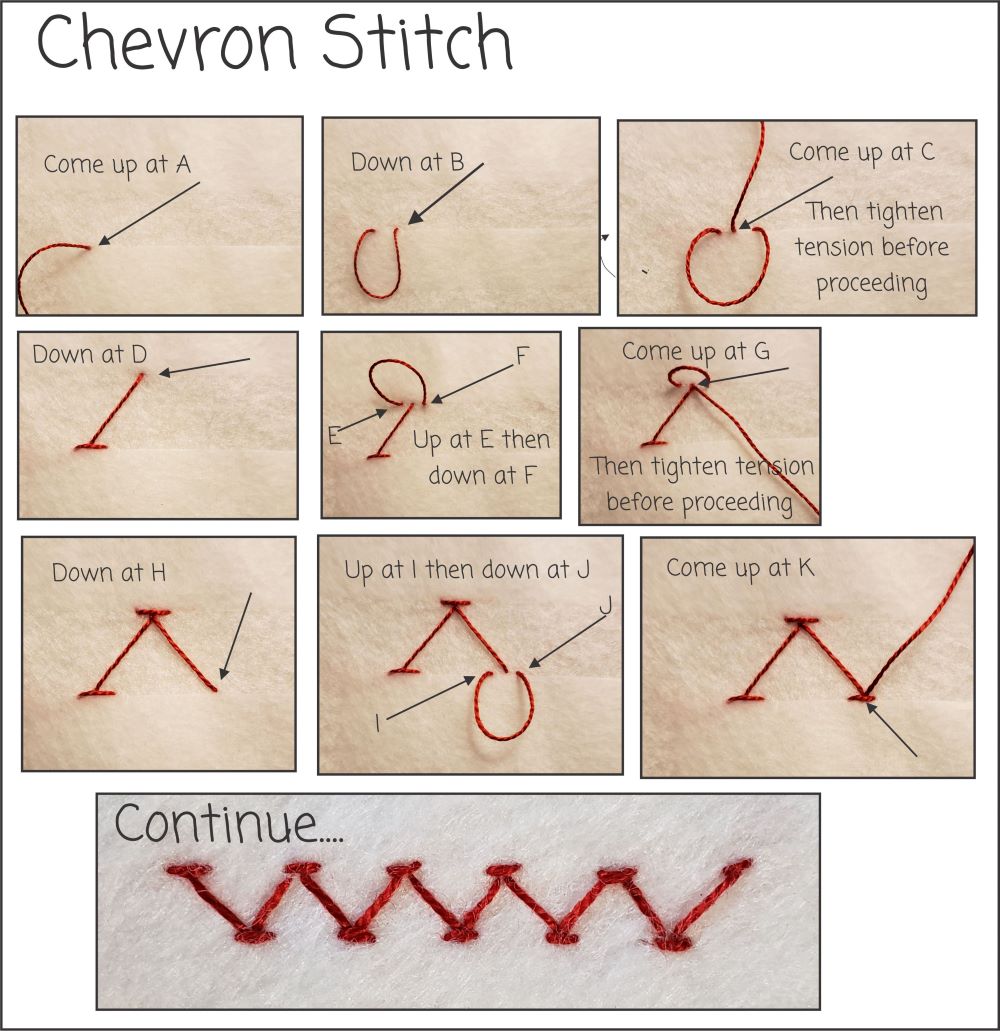
The Chevron Stitch was not an easy one for me. I practiced several times before I was happy. If you need to practice – DO NOT USE THE FLOSS IN THE KIT TO PRACTICE. There will not be enough.
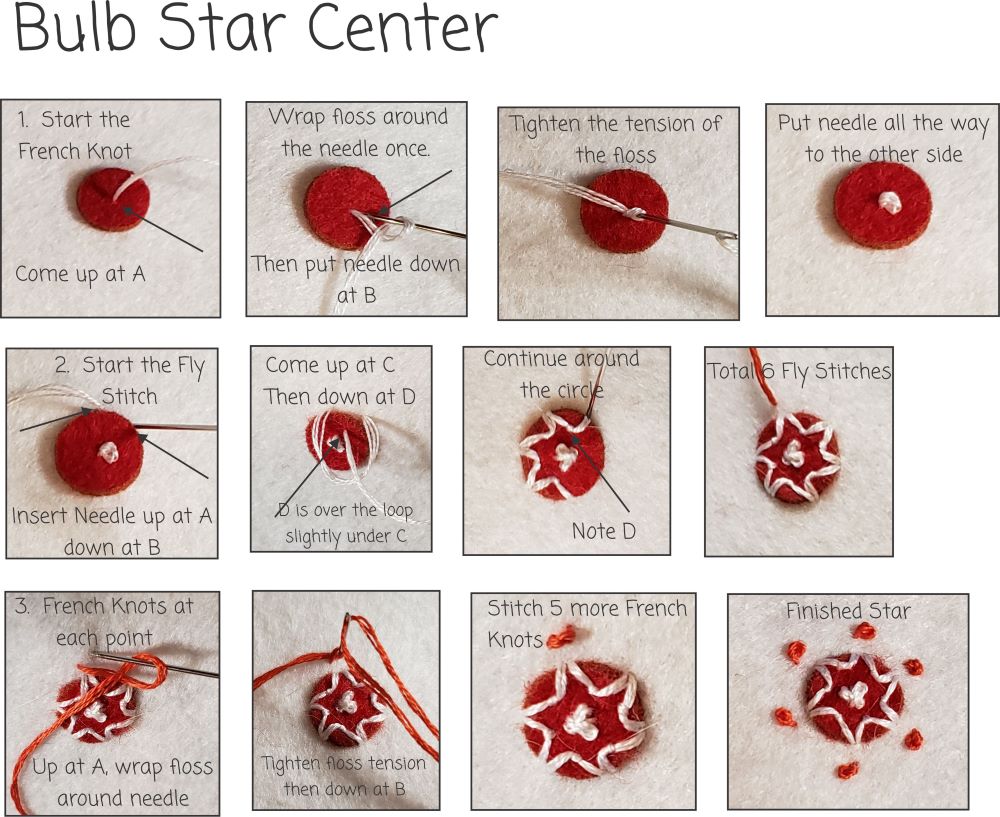
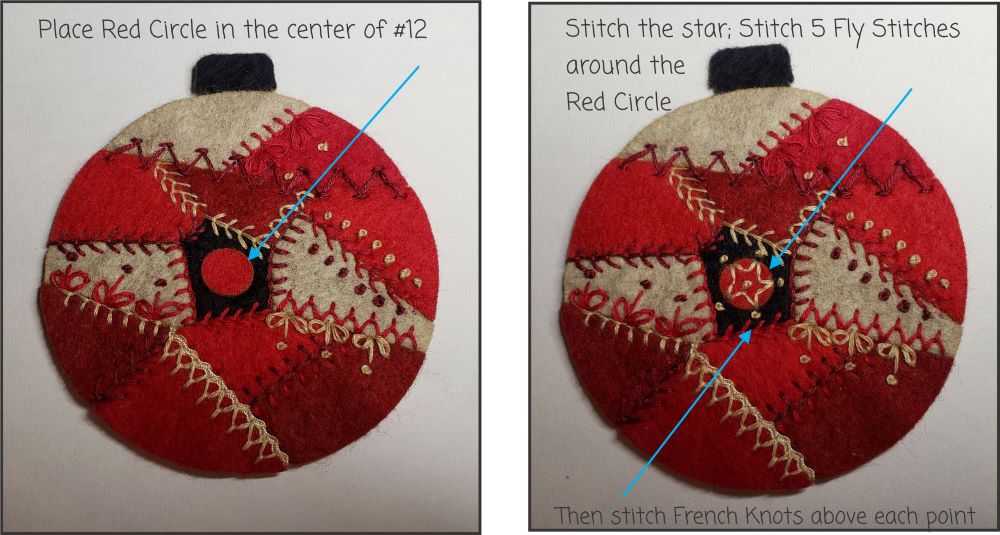
Spray Adhesive to the back of the Red Circle and set in place on #12. Stitch the Star (5 Fly Stitches) around the Red Circle. Then stitch 5 French Knots at the Points.
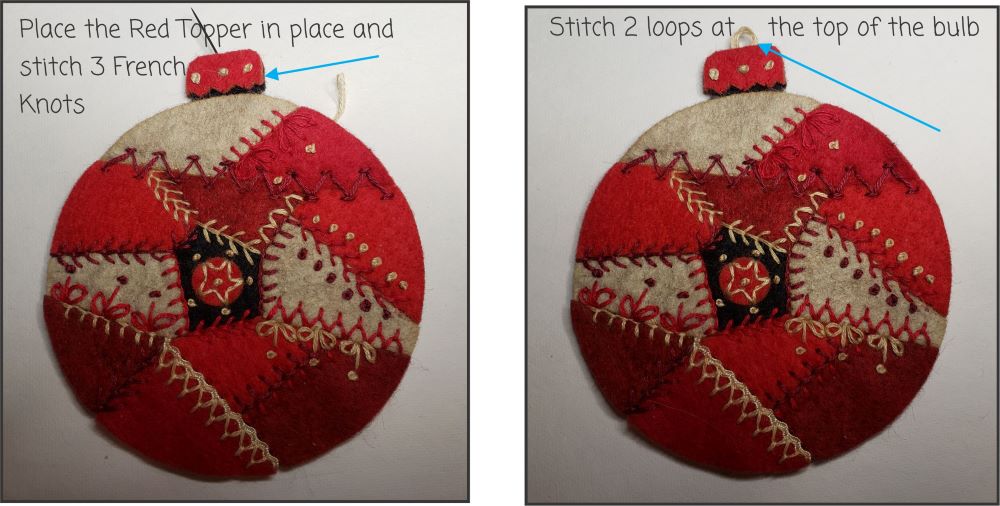
Spray adhesive to the Red Topper and set in place. Stitch 3 French Knots. Next stitch 2 loops at the top of the Bulb.

Bring the needle up at A on the Black Bulb Base. Once the 2 loops are in place – secure the floss at the back of the Black Bulb.
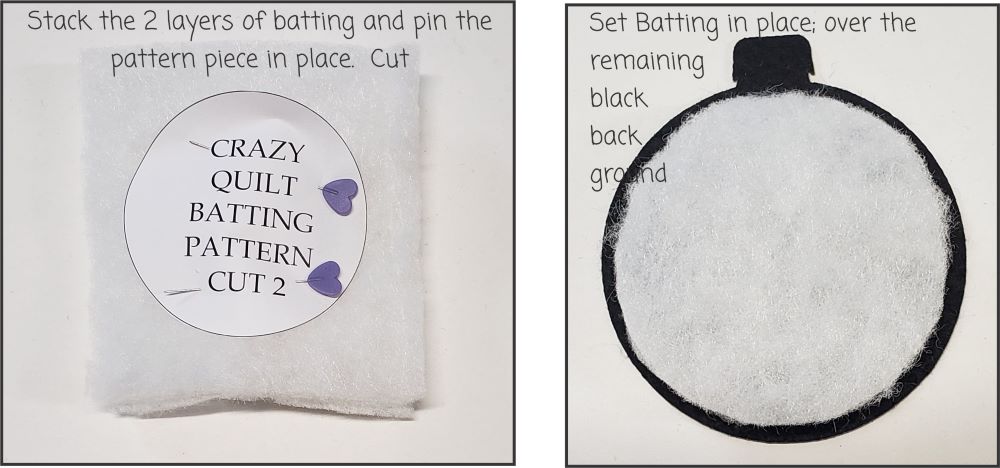
Stack up 2 layers of batting and pin pattern piece in place. Cut the 2 layers. Spray adhesive to the batting and set in place.
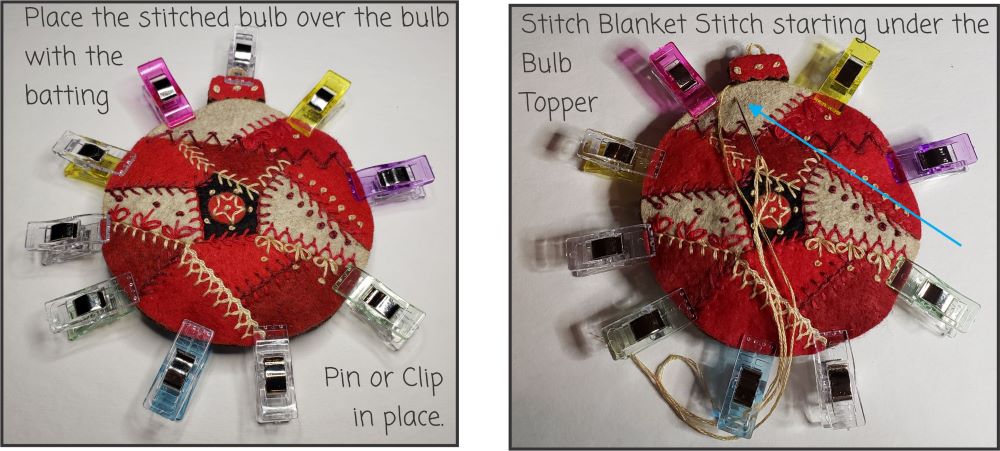
Spray adhesive to the wrong side of the Stitched Bulb. Set it over the bulb backing with the batting on top. Pin or clip in place. Stitch a Blanket Stitch starting under the Bulb Topper.

Continue Stitching Blanket Stitches around the Bulb.
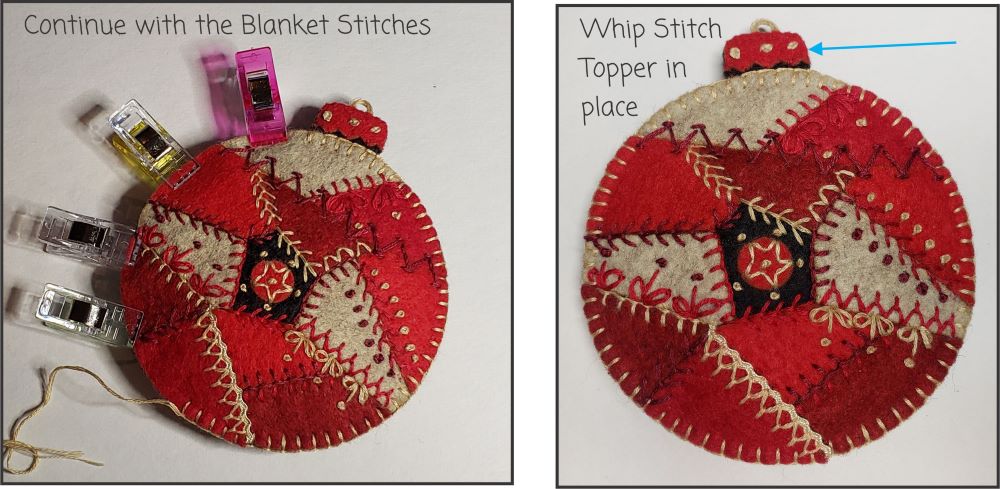
When the Blanket Stitches are around the Bulb; Whip stitch the Topper in place.
Kits Available at:
https://artsi2.com/product/crazy-quilt-christmas-bulb-wool-felt-ornament-kit-natural/
https://artsi2.com/product/crazy-quilt-christmas-bulb-wool-felt-ornament-kit-red/
https://artsi2.com/product/crazy-quilt-christmas-bulb-wool-felt-ornament-kit-blue/