Kits Available at:
https://artsi2.com/product/scare-crow/
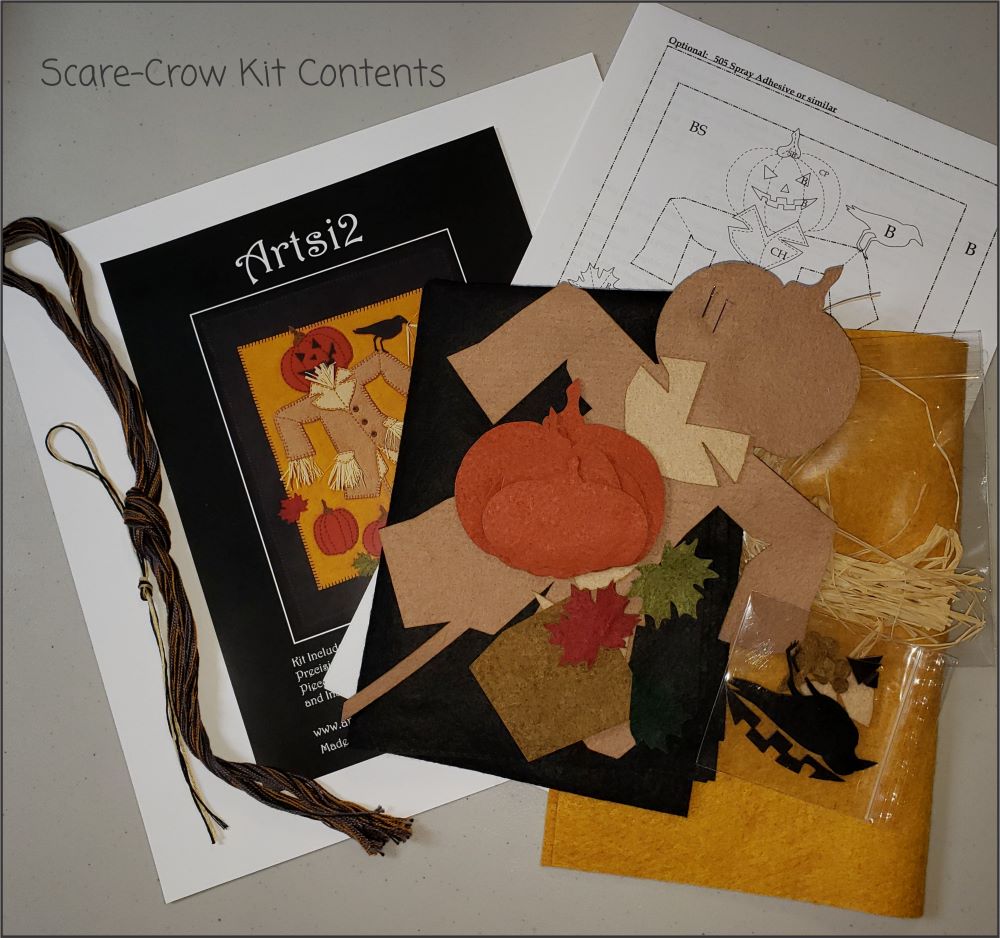
Contents of Scare-Crow Kit
- Precut Wool Felt pieces
- Perle Cotton 8
- DMC 6 Strand Floss
- Embroidery Needle #5,
- Sharp #10 Needle
- Raffia
- Color Cover Sheet
- Instructions
- Illustrations
- Detailed Kit Contents
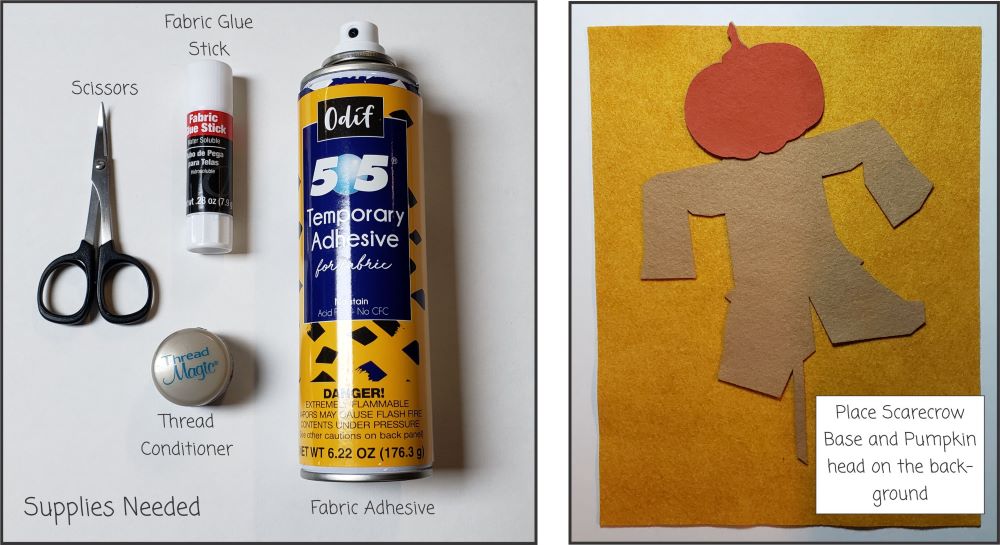
Supplies Needed:
- Curved Embroidery Scissors (My favorite KAI #N5100, 4″ Curved Tip Needlecraft Scissors) I love these scissors. Inexpensive, sharp and long lasting.
- Thread Conditioner (optional)
- 505 Fabric Spray Adhesive or similar (optional)
- Dritz Fabric Glue Stick (optional)
Place the Scare-Crow Base on Butternut Squash Background and place Pumpkin Head in place. This step will insure that you will stitch the Pumpkin Head on the correct side. Remove Pumpkin Head and start the next step.
PLEASE NOTE THE BLOG WILL NOT FOLLOW THE INSTRUCTIONS PROVIDED IN THE KIT. Same result just approaching it in a different way.
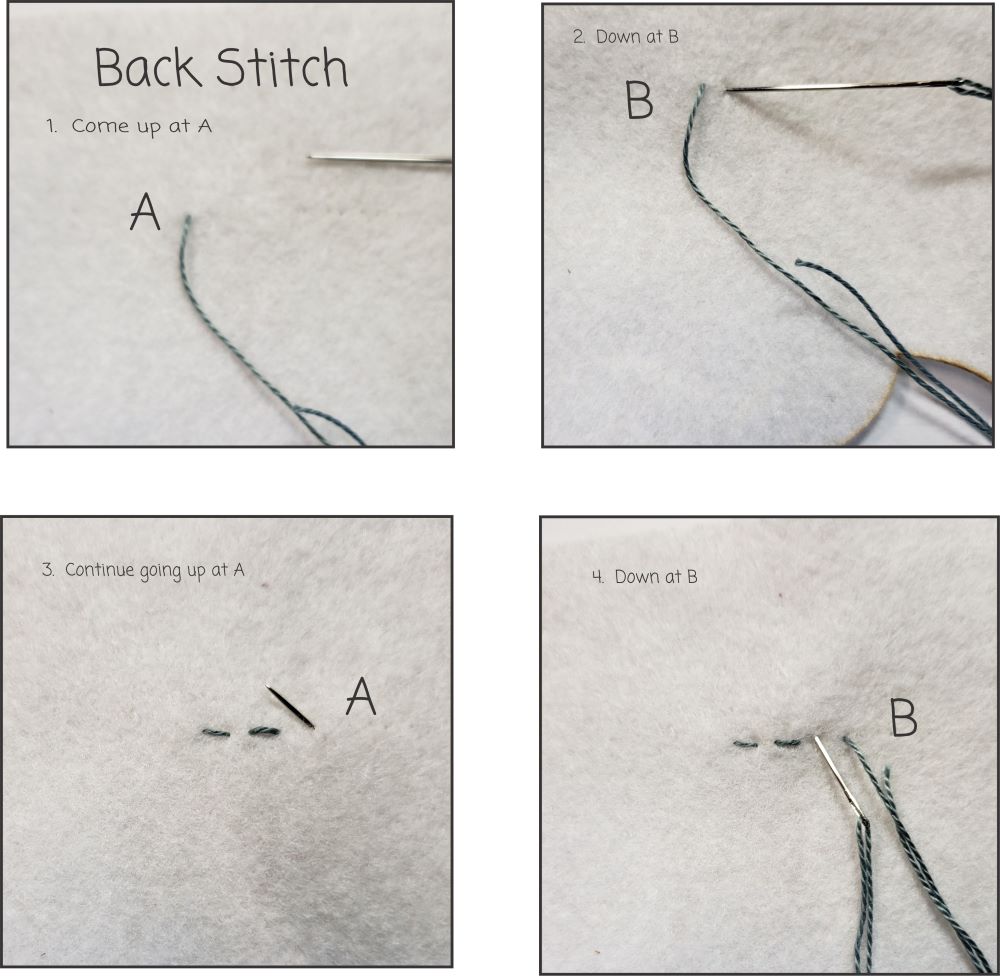
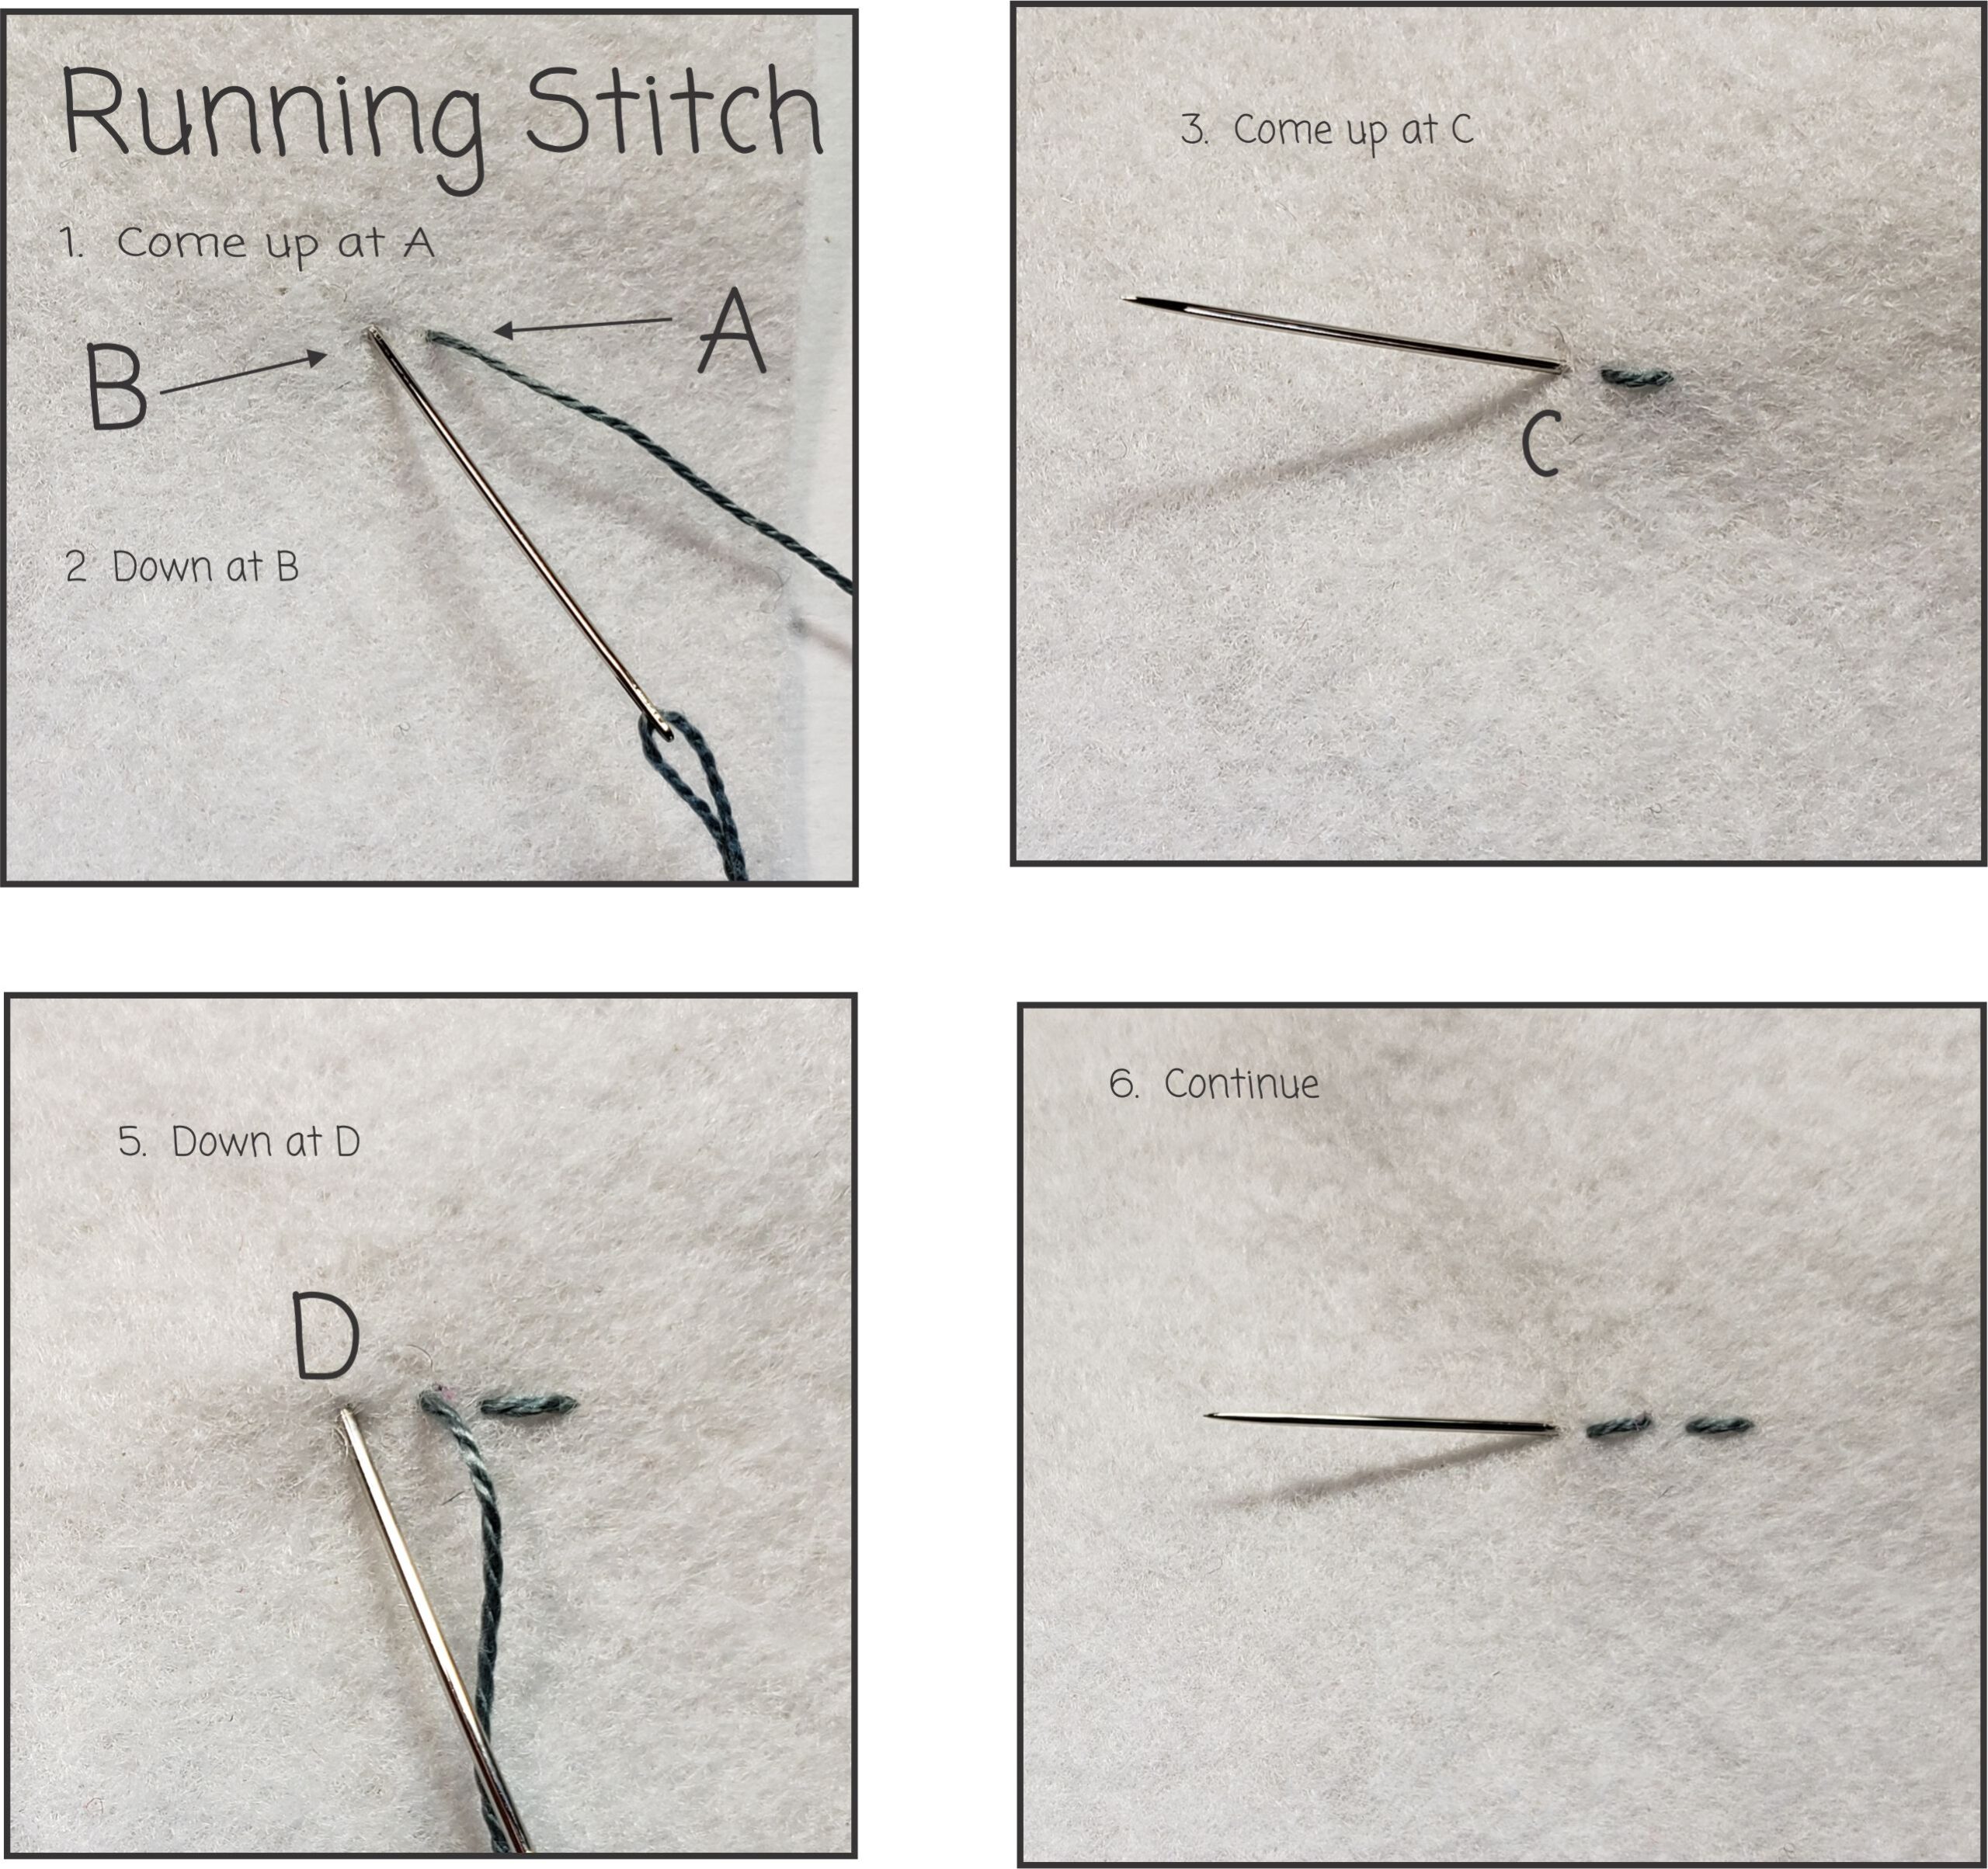
Above are illustrations on how to stitch a Back Stitch. Below are illustrations on how to stitch a Running Stitch. You may find that you prefer the Back Stitch for one area over the Running Stitch. Pick the one that works best for you and it is okay to mix the stitches. Instructions will list a Running Stitch or Back Stitch – please feel free to stitch whichever stitch you are more comfortable with.
I like to stitch all the Pumpkins at once.
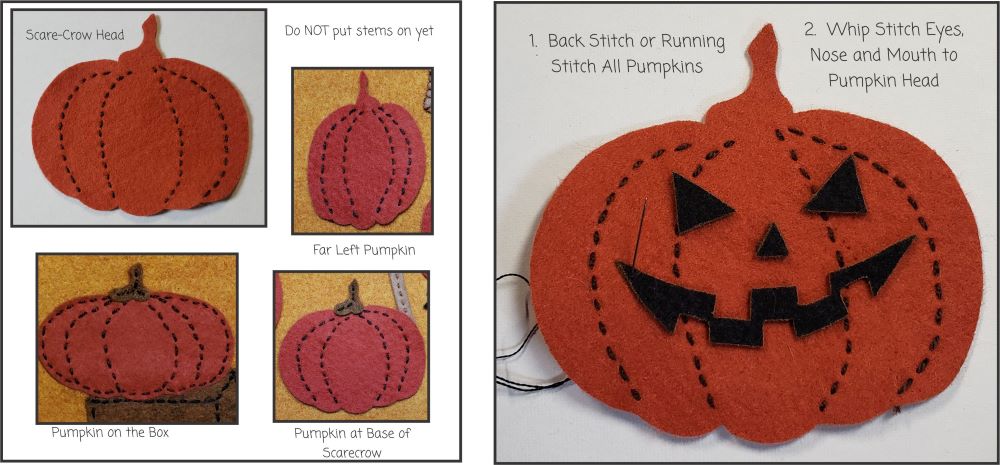
Make sure that you do not stitch the outer part of the Pumpkins. NOTE: PUMPKIN ON THE BOX illustration shows the Pumpkin is stitched on the outer edges. DO NOT STITCH THIS PUMPKIN’S OUTER EDGES.
Next; Spray Adhesive to the wrong side of the Eyes, Nose and Mouth. Set on Pumpkin Head. Whip Stitch the Eyes and Nose to the Pumpkin Head. Back Stitch or Running Stitch the center of the Mouth to the Pumpkin Head.
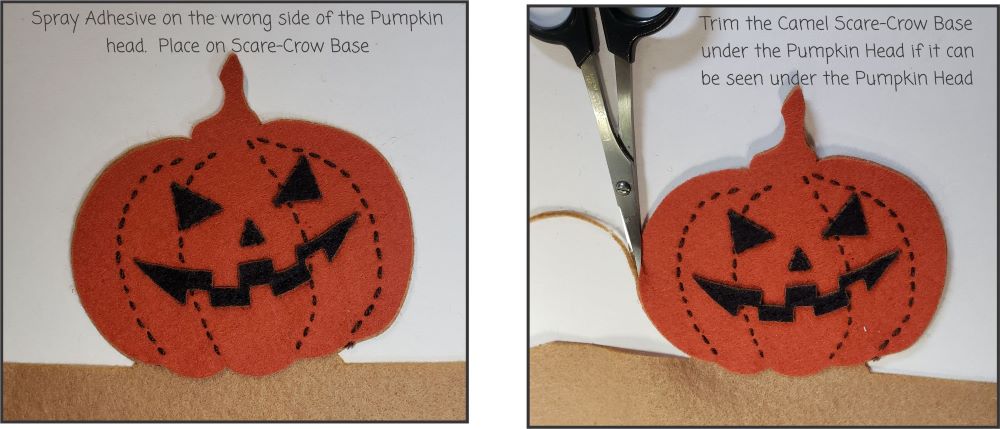
Spray adhesive to the wrong side of the Pumpkin Head. Set Pumpkin Head on the Scare-Crow Base. Trim the Camel Scare-Crow Base under the Pumpkin Head it is can be seen under the Pumpkin Head.
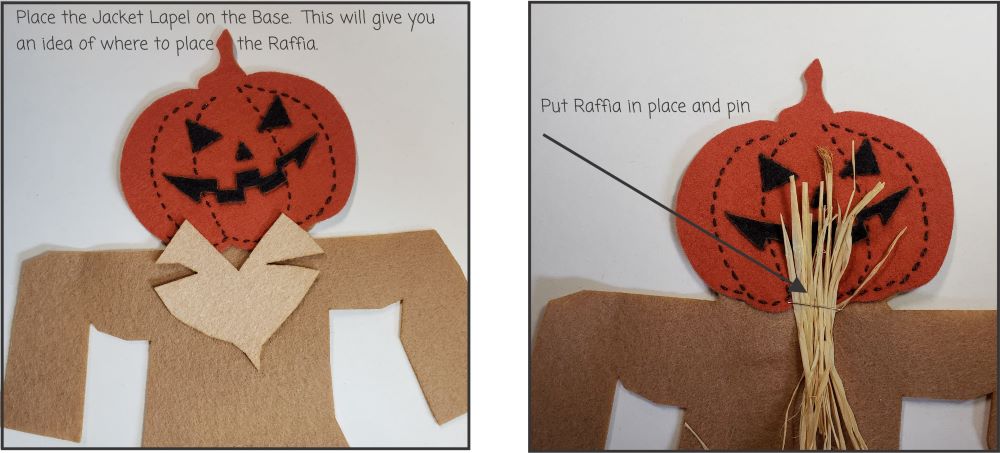
Place the Jacket Collar/Lapel on the Base. This will give you an idea of where to place the Raffia. Remove the Jacket Collar/Lapel. Place the Raffia on the Base and pin in place.
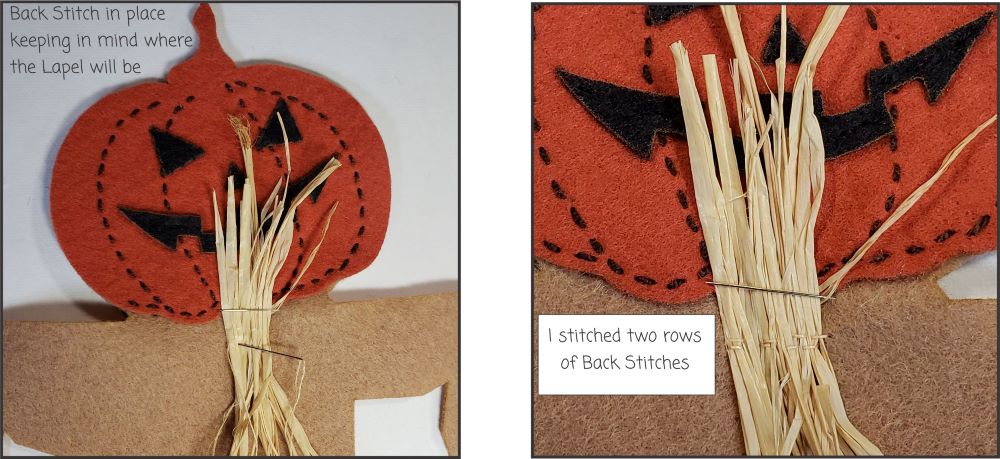
Back Stitch the Raffia in place. Keep in mind placement of the Collar/Lapel. Stitch two rows of Back Stitches.
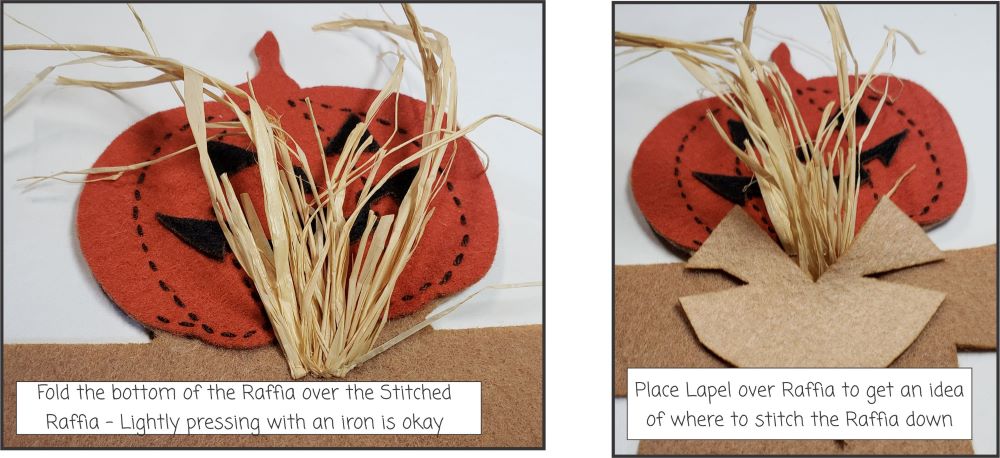
Fold the bottom of the Raffia over the Stitched Raffia. Lightly pressing with an iron is helpful. Place Collar/Lapel over the Raffia to get an idea where to stitch down. Stitch the Raffia down again, Making sure the Collar/Lapel will cover the stitching. Stitch two Back Stitch rows to hold Raffia down. 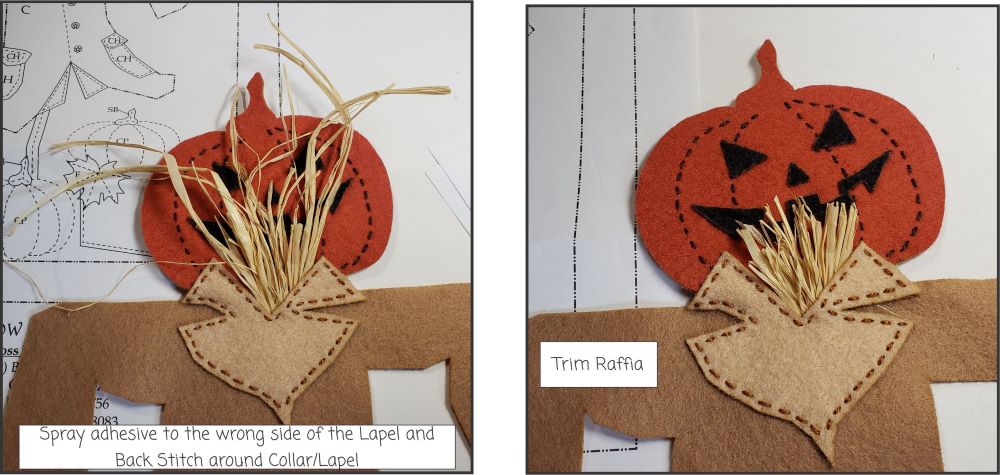
Spray adhesive to the wrong side of the Collar/Lapel. Set in place and Back Stitch around the Collar/Lapel. Trim Raffia.
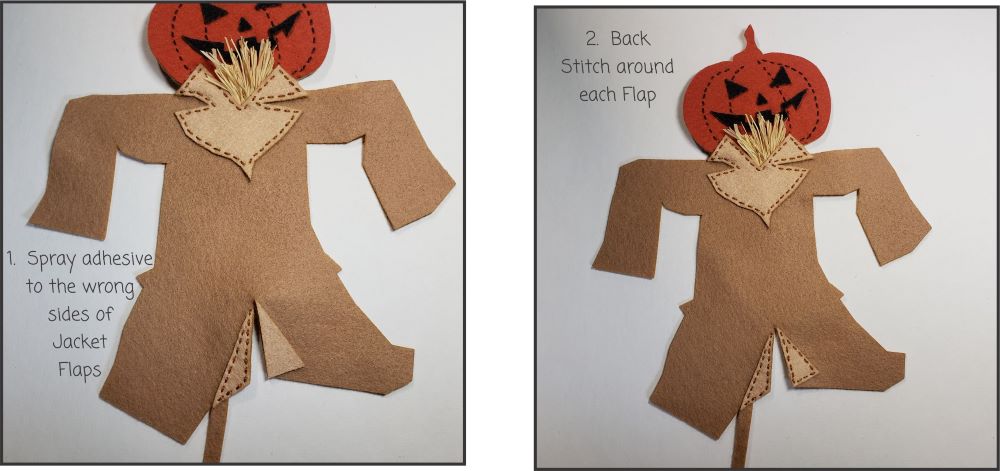
Spray adhesive to the wrong side of the Jacket Flaps. Set in place. Back Stitch around each Flap.
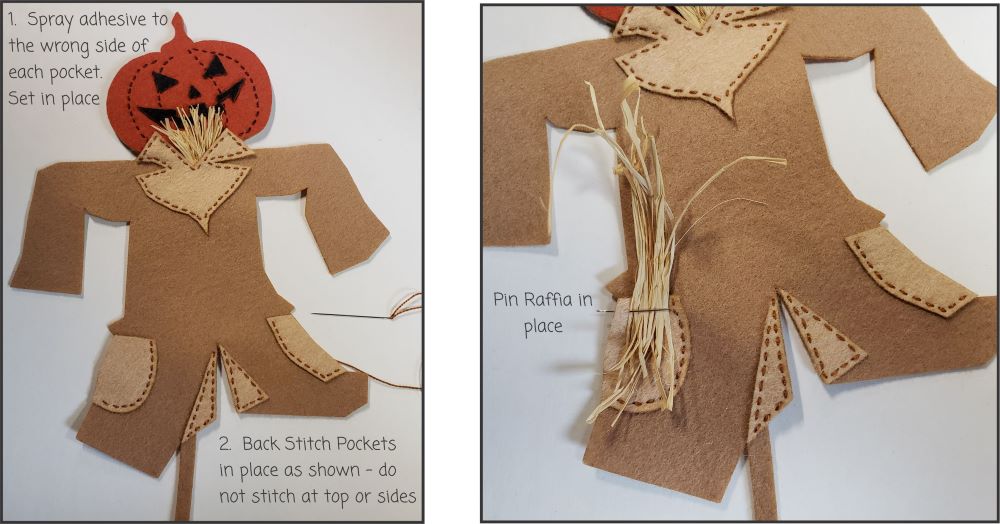
Spray adhesive to the wrong side of each pocket. Set in place. Back Stitch Pockets in place. DO NOT STITCH OUTER POCKETS. Next pin Raffia over one Pocket.
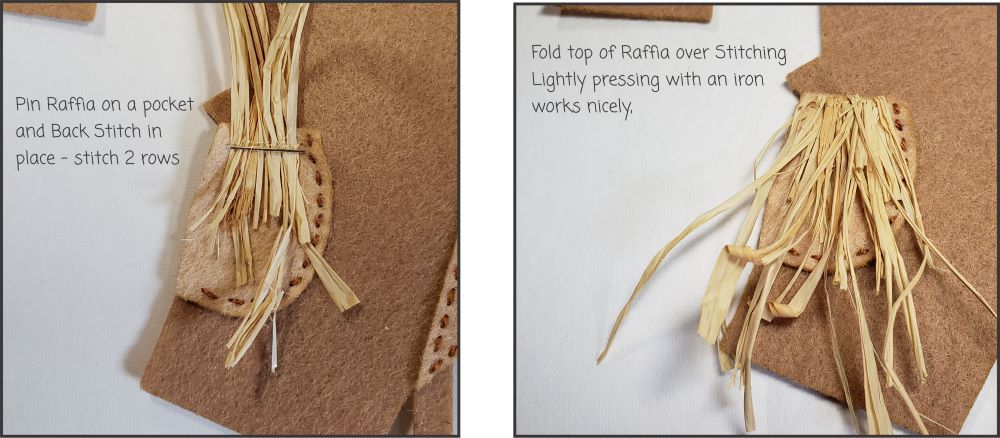
Pin Raffia on a Pocket and Back Stitch in place. Stitch 2 rows. Fold top of Raffia over the Back Stitching. Lightly pressing with an iron helps keep the fold.
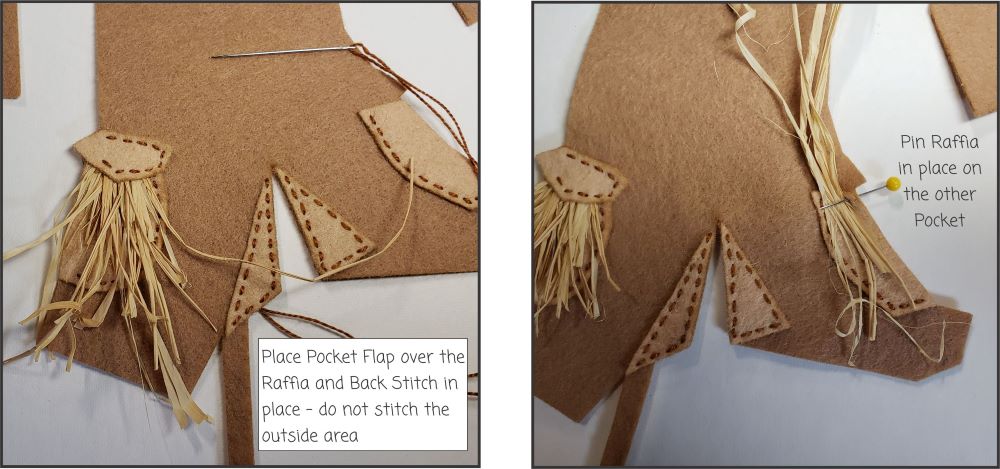
Spray adhesive to the wrong side of the Pocket Flap. Back Stitch around the Flap. DO NOT BACK STITCH OUTER FLAP.
Repeat for other Pocket. Pin Raffia in place.
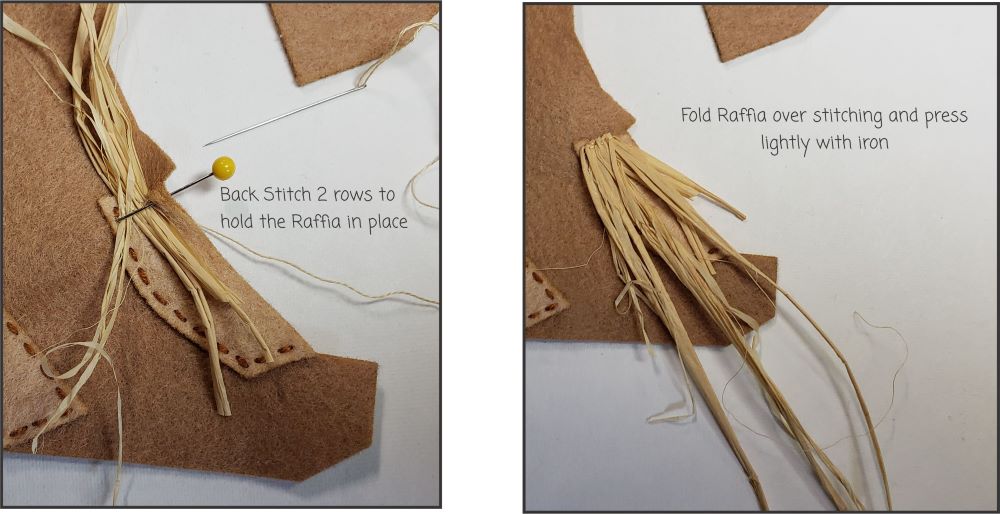
Back Stitch 2 rows to hold the Raffia in place. Fold Raffia over Back Stitching. Press lightly to hold Raffia down.
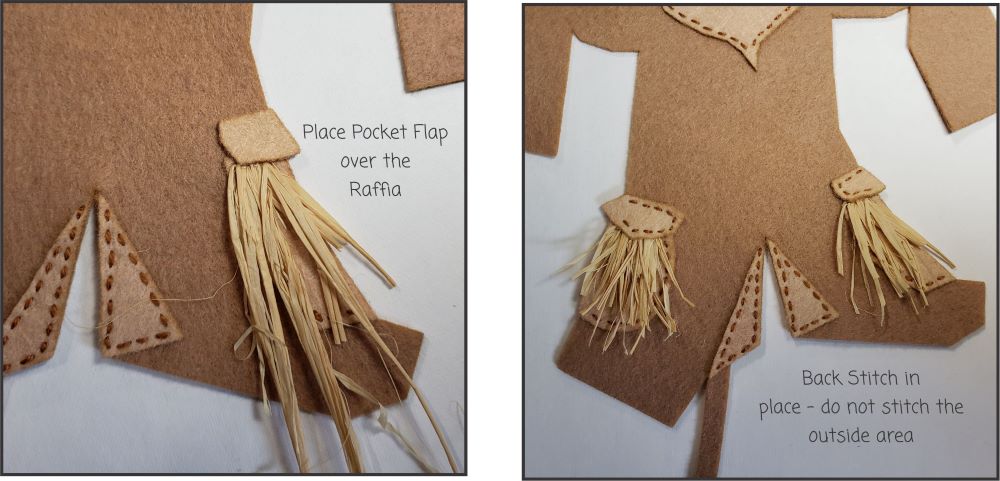
Spray Adhesive to the wrong side of the remaining Pocket Flap. Set in place. Back Stitch in place – DO NOT STITCH THE OUTSIDE AREA OF THE POCKET FLAP.