Kits Available at:
https://artsi2.com/product/scare-crow/
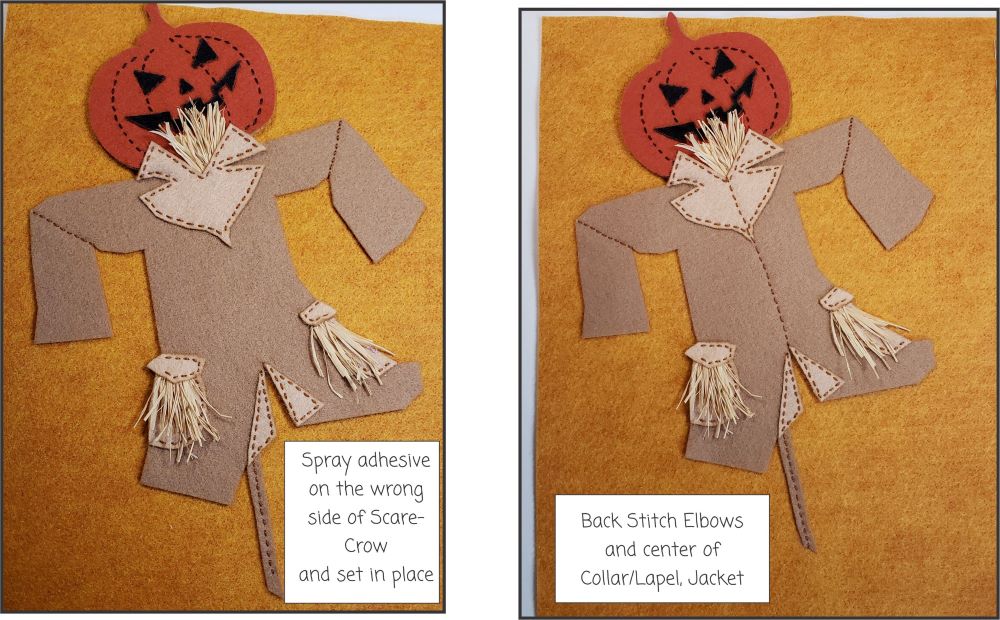
Spray Adhesive on the wrong side of the Scare-Crow and set in place. Back Stitch Elbows, Center of Collar/Lapel and the center of the Jacket.
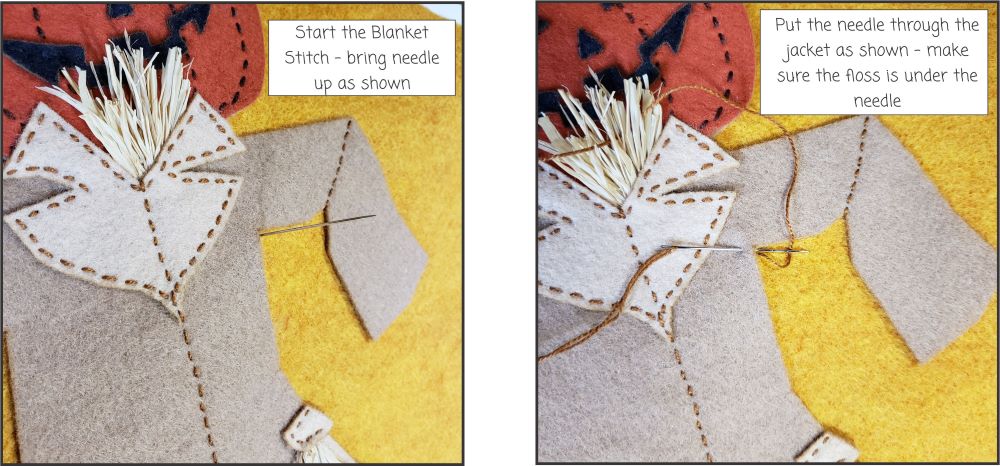
Start the Blanket Stitch. Bring up the needle as shown in the above picture. Put the needle through the Jacket as shown. Make sure the Floss is under the needle.

Continue the Blanket Stitch until you come to the Pocket Flap. Back Stitch the outer edge of the Pocket Flap and the Pocket.
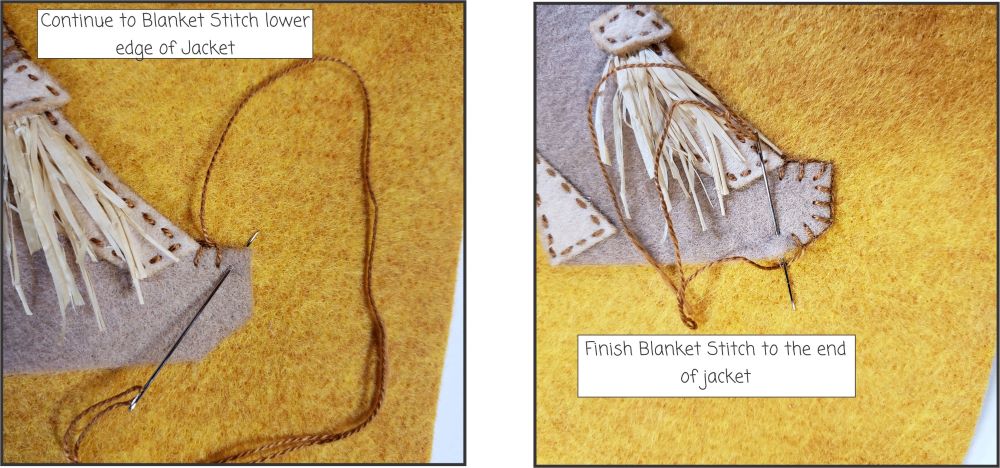
Continue to Blanket Stitch lower edge of Jacket.

The above pictures show how to finish the last Blanket Stitch.
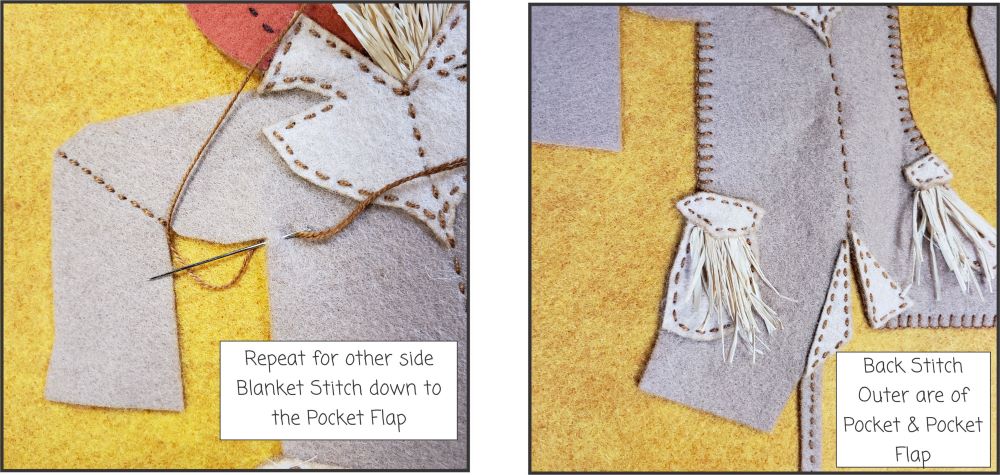
Repeat for the other side of the Jacket. Stop Blanket Stitching when you reach the Pocket Flap. Back Stitch the outer edge of the Pocket Flap and Pocket.
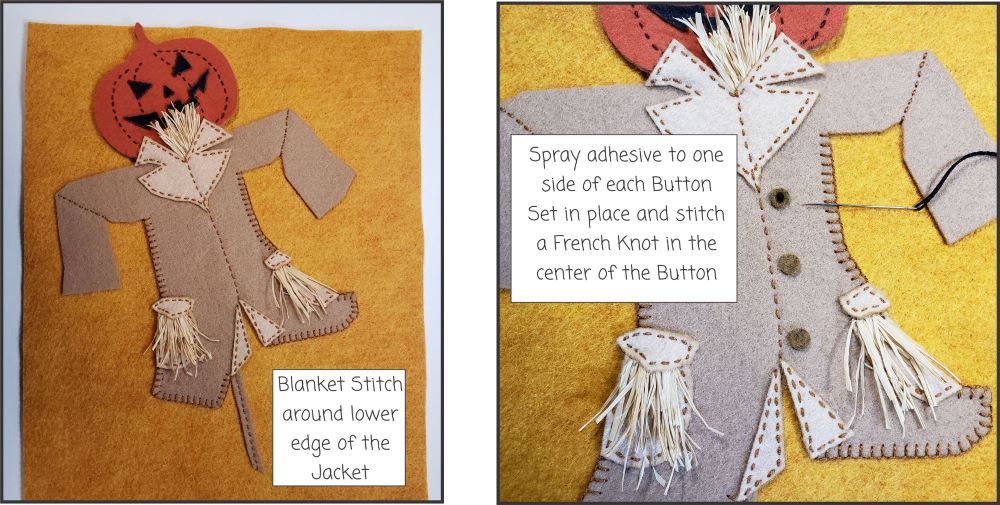
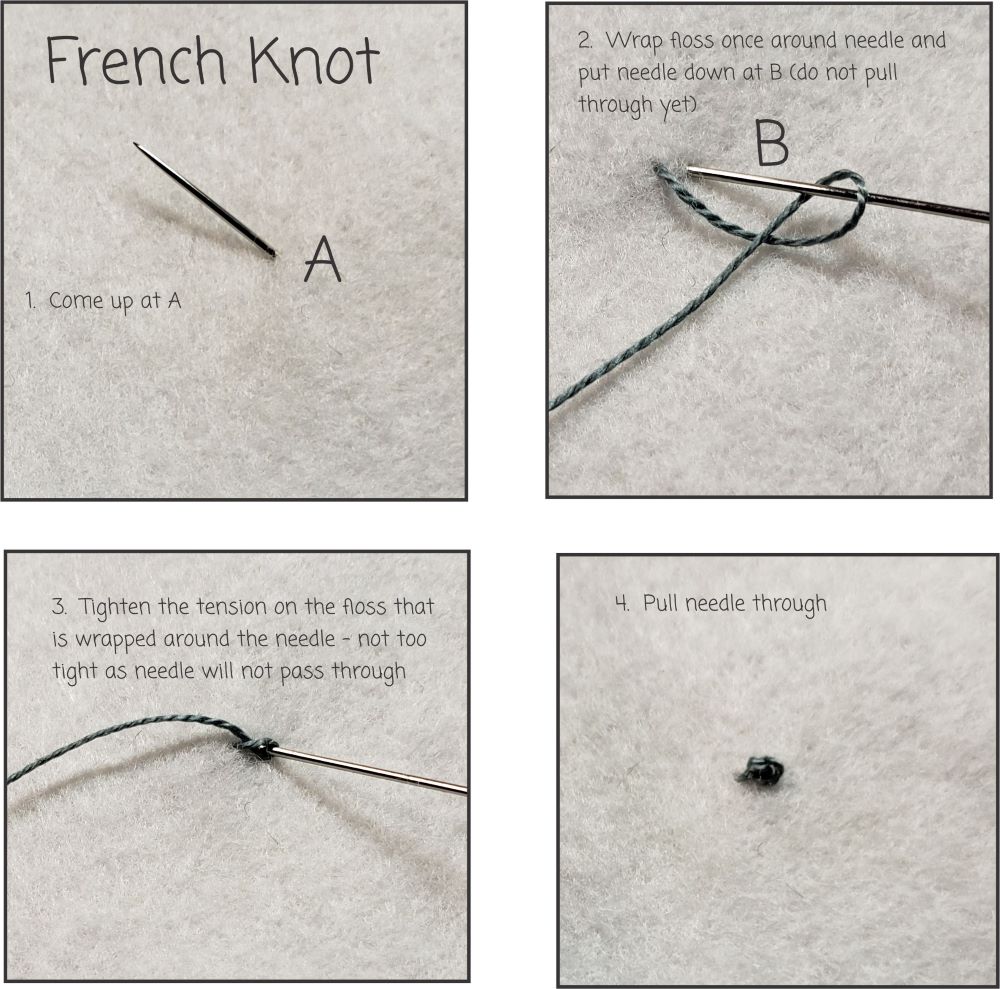
Blanket Stitch around the lower edge of the Jacket. Spray adhesive to the Buttons. Set in place and Stitch a French Knot in the center of each Button.
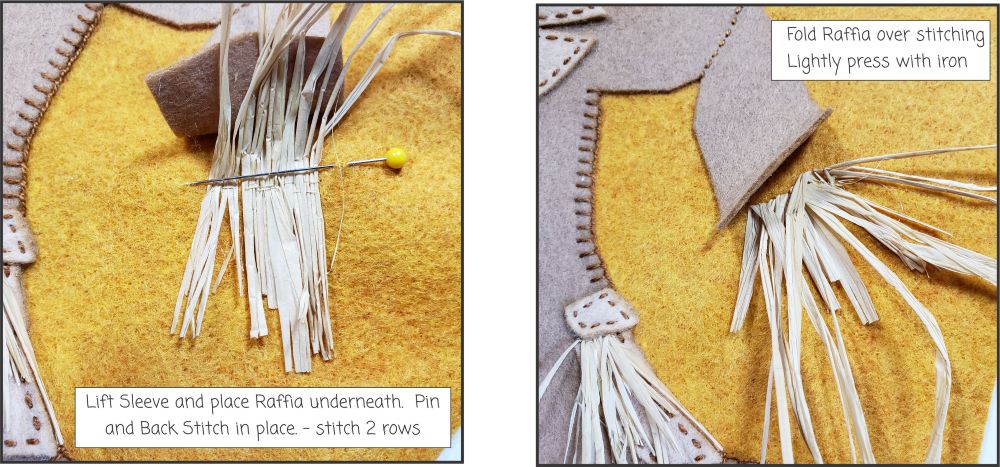
Lift the Right Sleeve up and place Raffia underneath. Pin, stitch 2 rows of Back Stitching to hold in place. Fold the top of the Raffia over the Back Stitching and light press with an iron.
Optional: Back Stitch 2 rows over the Raffia to hold in place. Make sure the Back Stitches will be hidden under Sleeve.
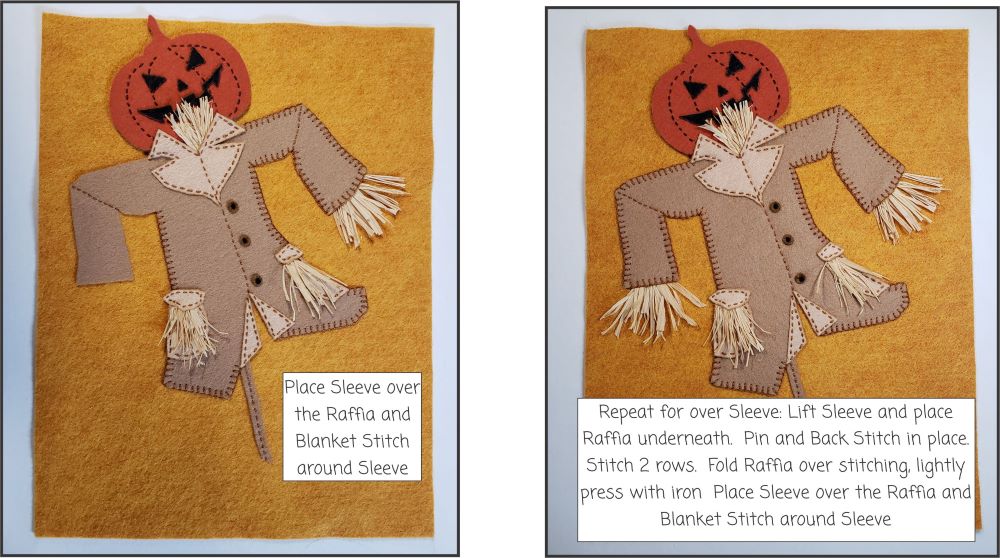
Blanket Stitch around the Sleeve. Repeat for other side.
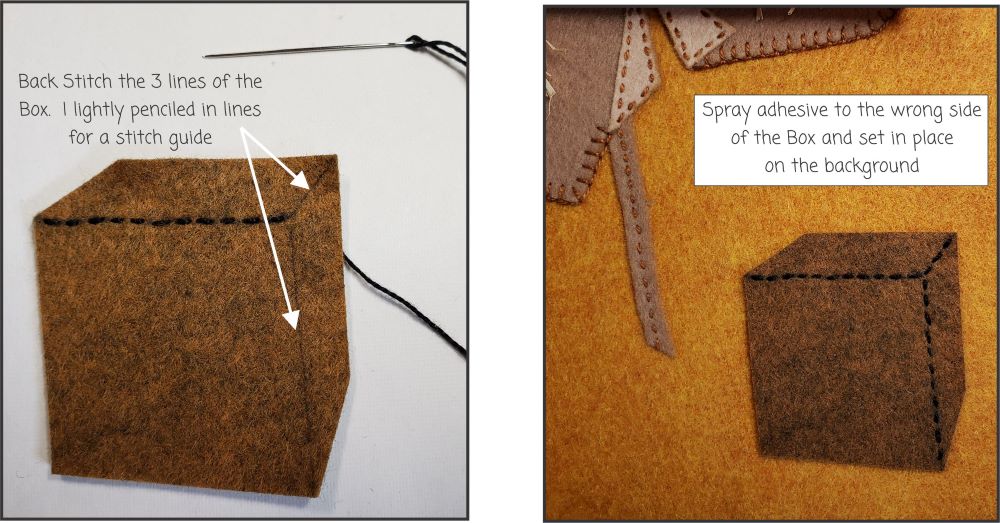
Back Stitch the 3 lines on the Box I lightly penciled in the lines for a stitch Guide. Spray adhesive to the wrong side of the Box and set in place on the background.
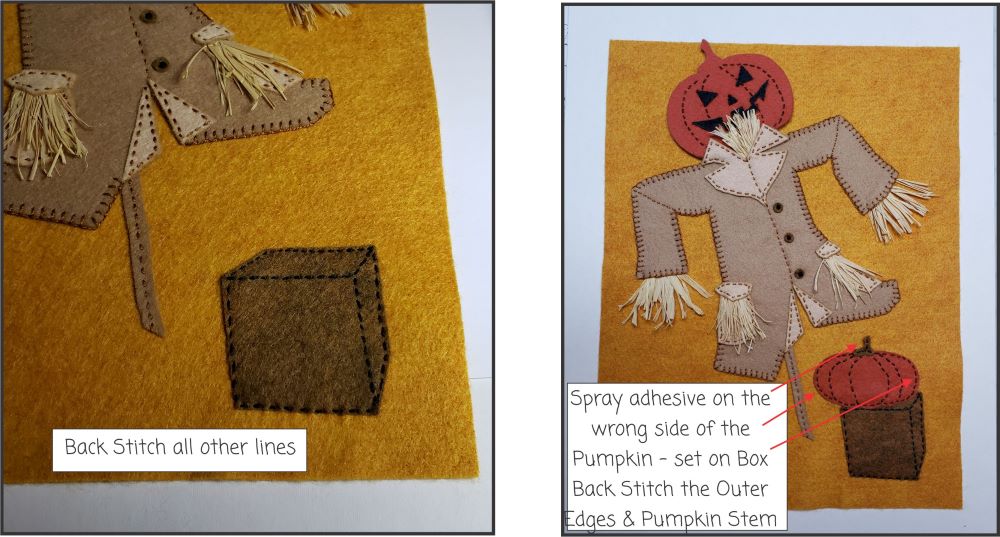
Back Stitch around the Box. Spray adhesive on the wrong side of the Pumpkin and Pumpkin Stem. Set on the Box and Back Stitch the outer edges and the Pumpkin Stem
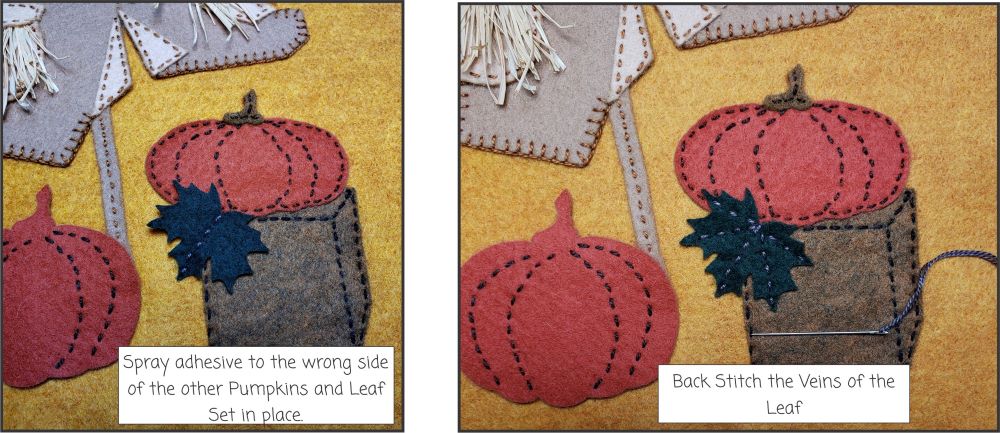
Spray adhesive to the wrong side of the remaining Pumpkins, Pumpkin Stems and the Evergreen Leaf. Set in place. Back Stitch the Veins of the Leaf.
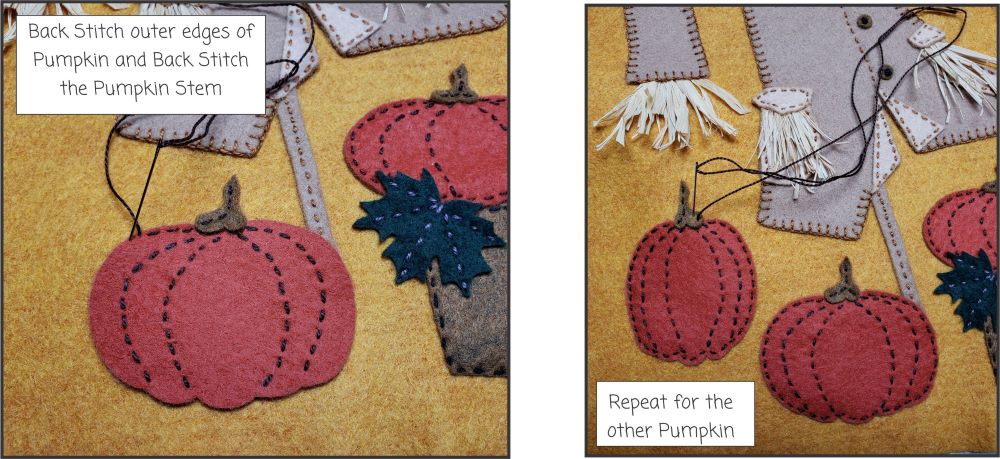
Back Stitch the outer edges of the Pumpkins and the Pumpkin Stems.