Kits Available at:
https://artsi2.com/product/scare-crow/
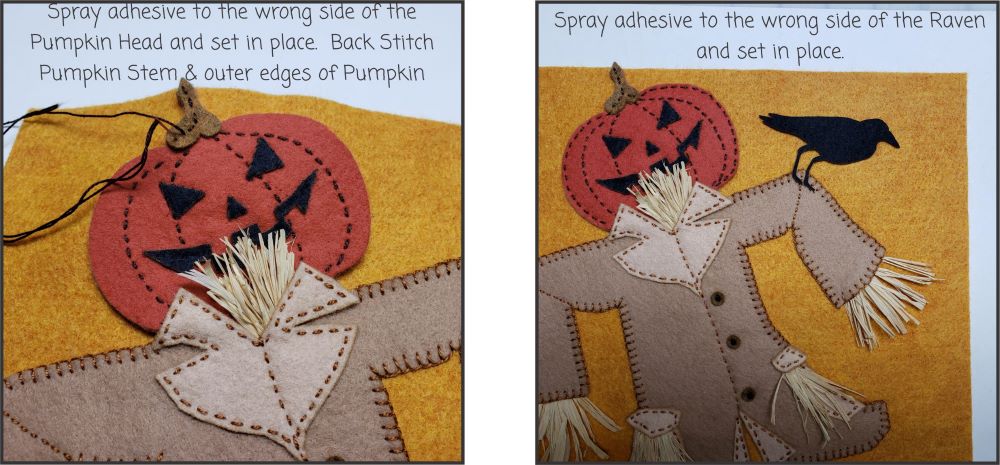
Spray adhesive to the wrong side of the Pumpkin Head and the Raven. Set the Pumpkin Head in place. Back Stitch the Pumpkin stem and the outer edges of the Pumpkin Head. Set the Raven in place.
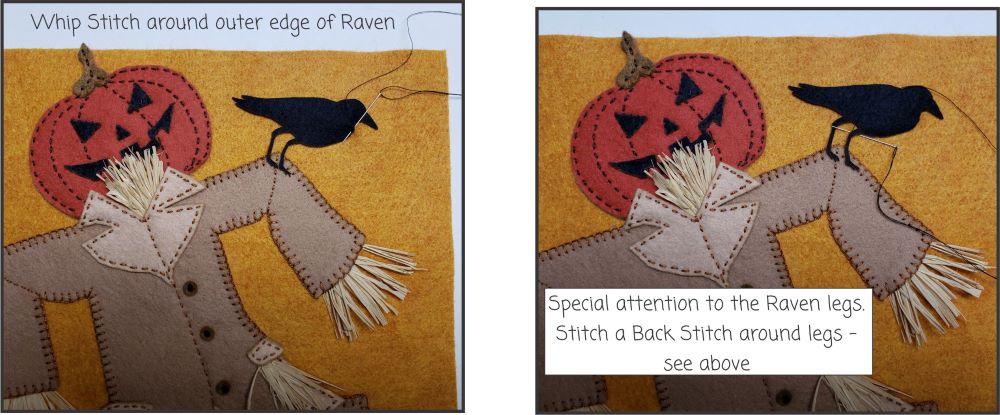
Whip Stitch the outer edge of the Raven. DO NOT STITCH DOWN THE BEAK. Special attention is needed for the Raven Legs. Stitch a Back Stitch around the Legs.
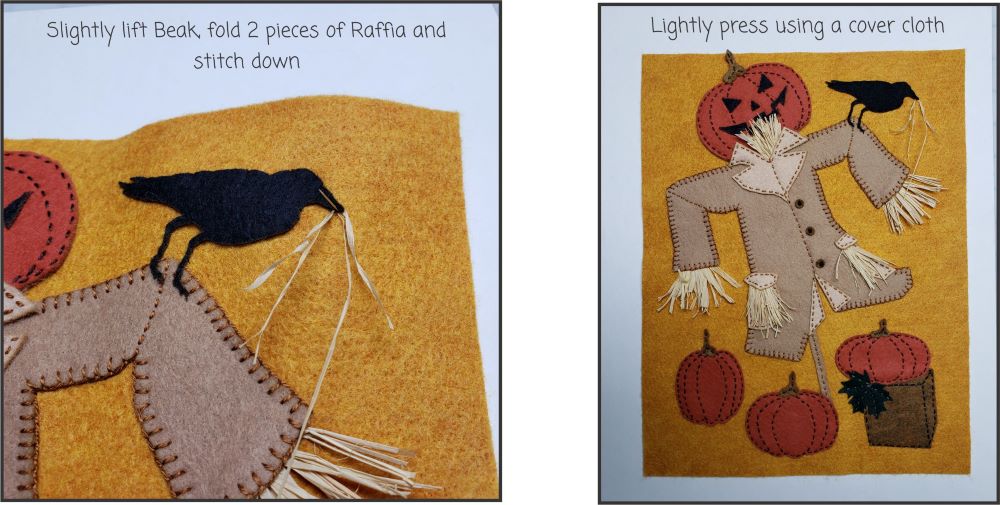
Slightly lift Beak. Fold 2 pieces of Raffia and stitch down. Lightly press using a cover cloth,
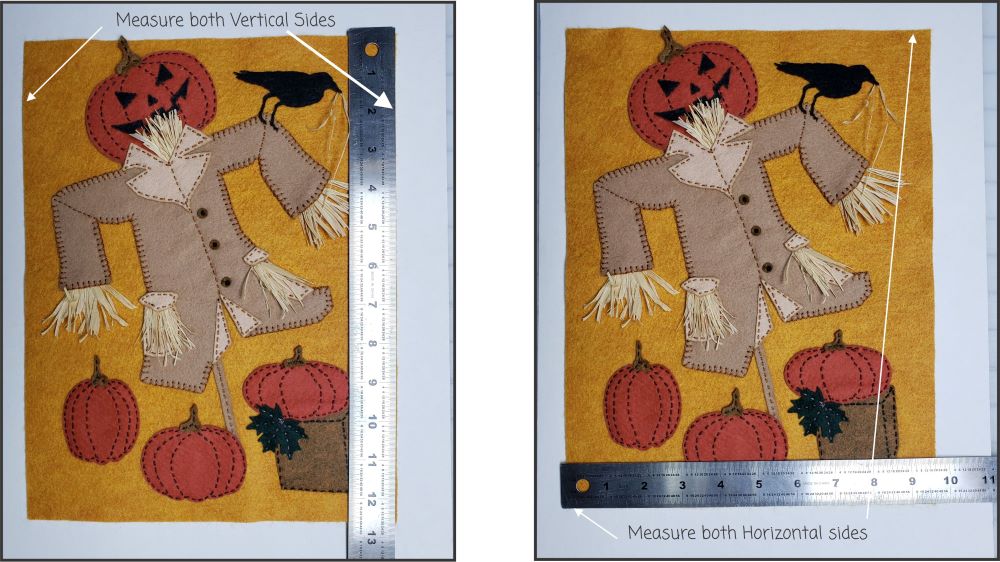
First measure the Vertical sides. Both Vertical sides should measure the same. If they do not trim the side that is longer.
Second measure the Horizontal sides. Both side should measure the same. If they don’t – trim the side that is longer.
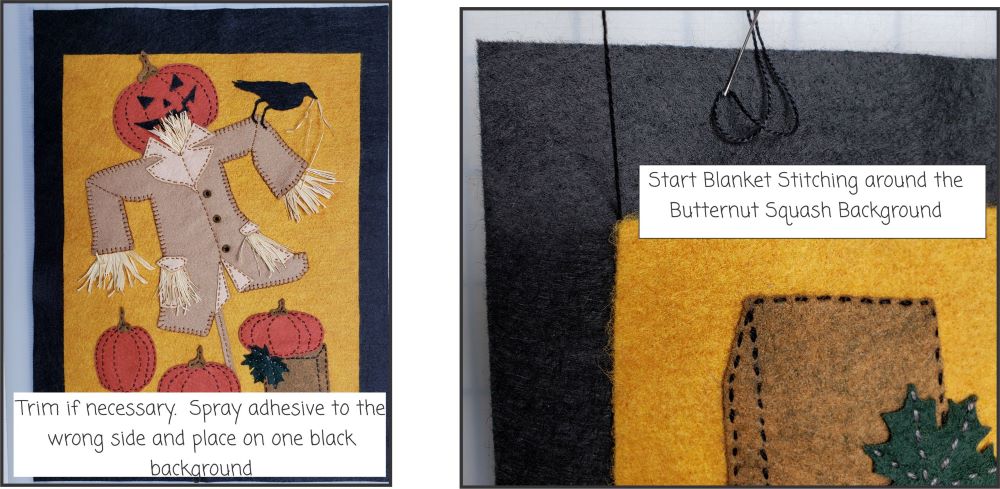
Spray adhesive to the wrong side and place on one Black Background. Start Blanket Stitching around the Butternut Squash Background. Use 1 Strand of Gray Perle Cotton.
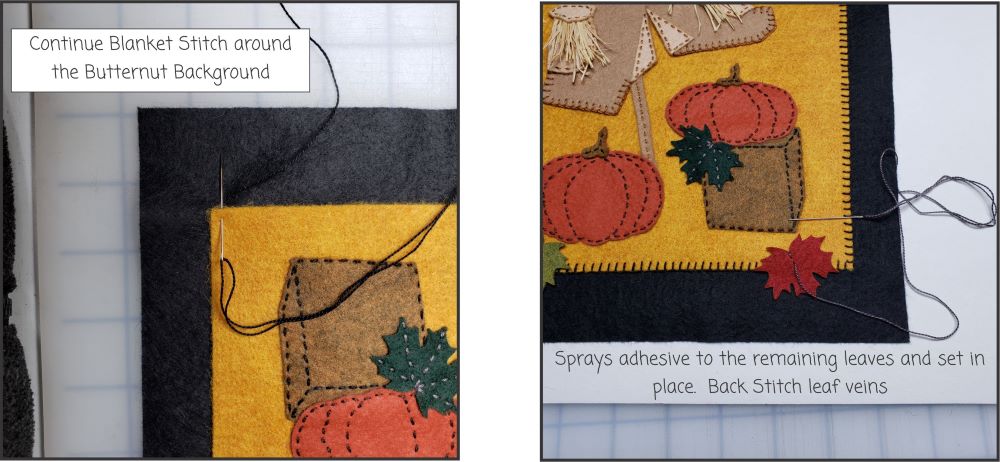
Spray adhesive to the remaining leaves. Set in place and Back Stitch leaf veins.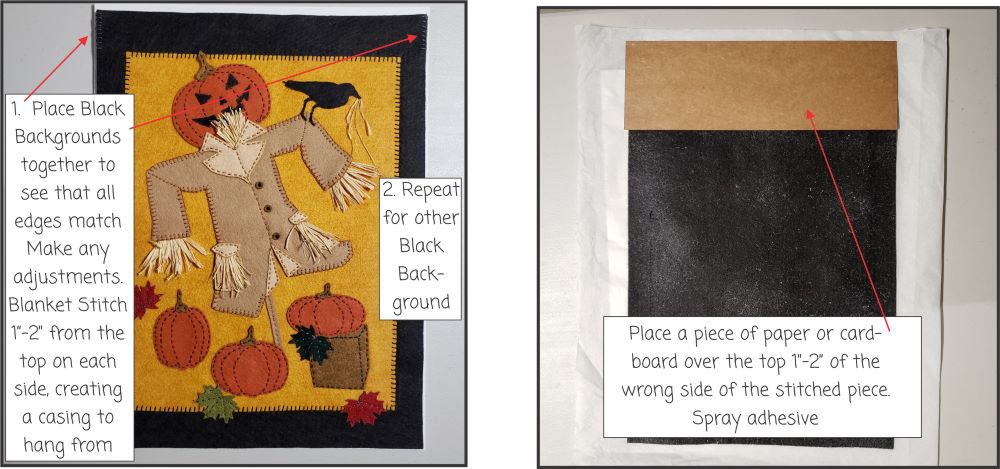
The next step will create a casing for hanging the wall hanging. Place Black Backgrounds together. Make sure they are the same size. Make any necessary adjustments before proceeding to the next step.
Blanket Stitch 1″-2″ from the top on both sides. Repeat for other black Background.
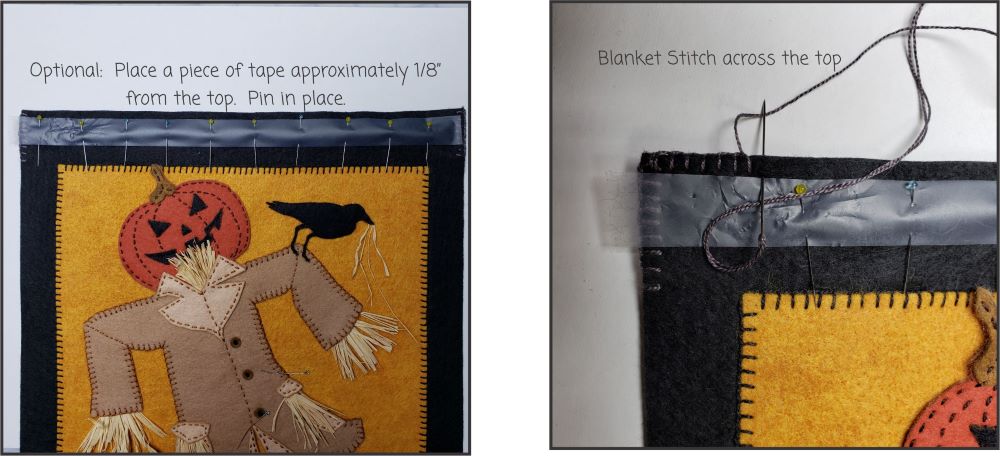
Optional: Place a piece of tape approximately 1/8″ from the top. Pin in place to ensure that it won’t shift. Blanket Stitch across the top.
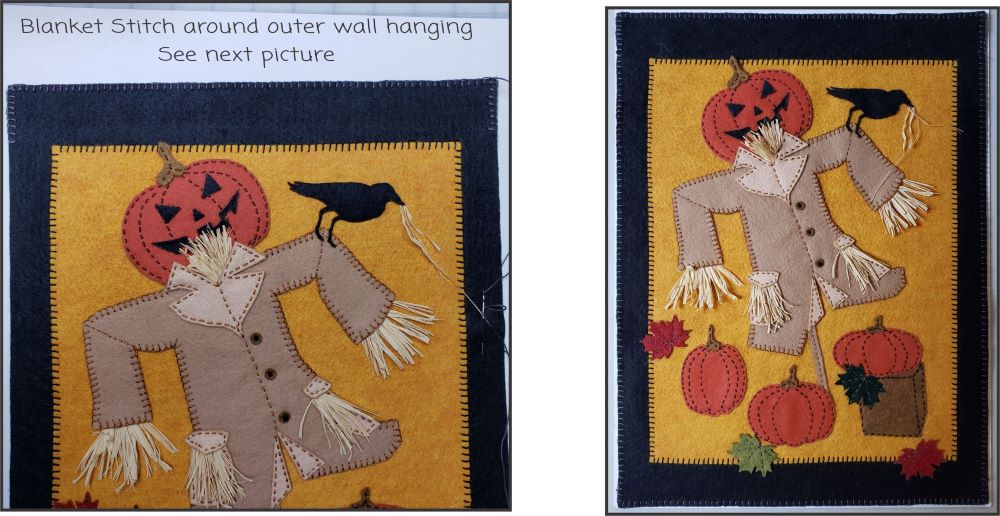
Blanket Stitch around the outer wall hanging. Start below the 1″-2″ Blanket Stitch and stitch all around until you come to the other 1″-2″ Blanket Stitching on the other side.