Kits Available at:
https://artsi2.com/product/halloween-witchs-boot/
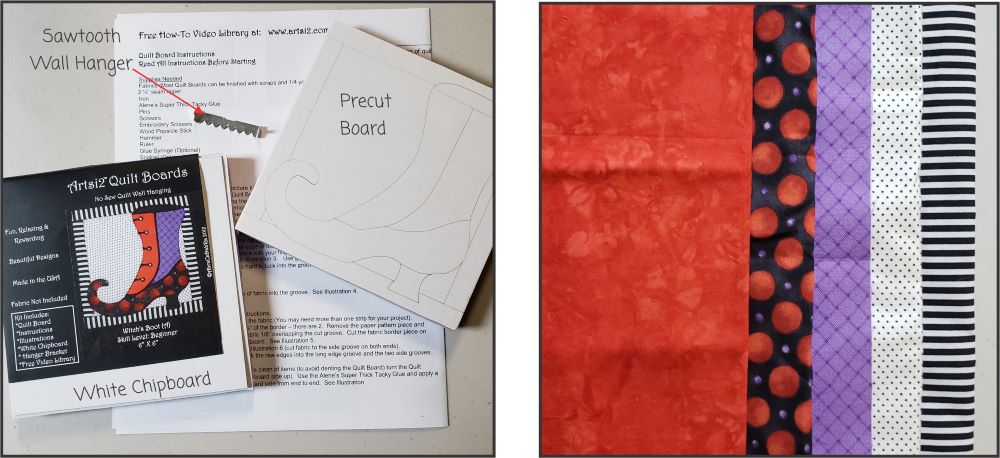
Contents of Kit:
- Precut Board
- Sawtooth Wall Hanger
- White Chipboard
- Instructions
- Illustrations
- Color Cover Sheet
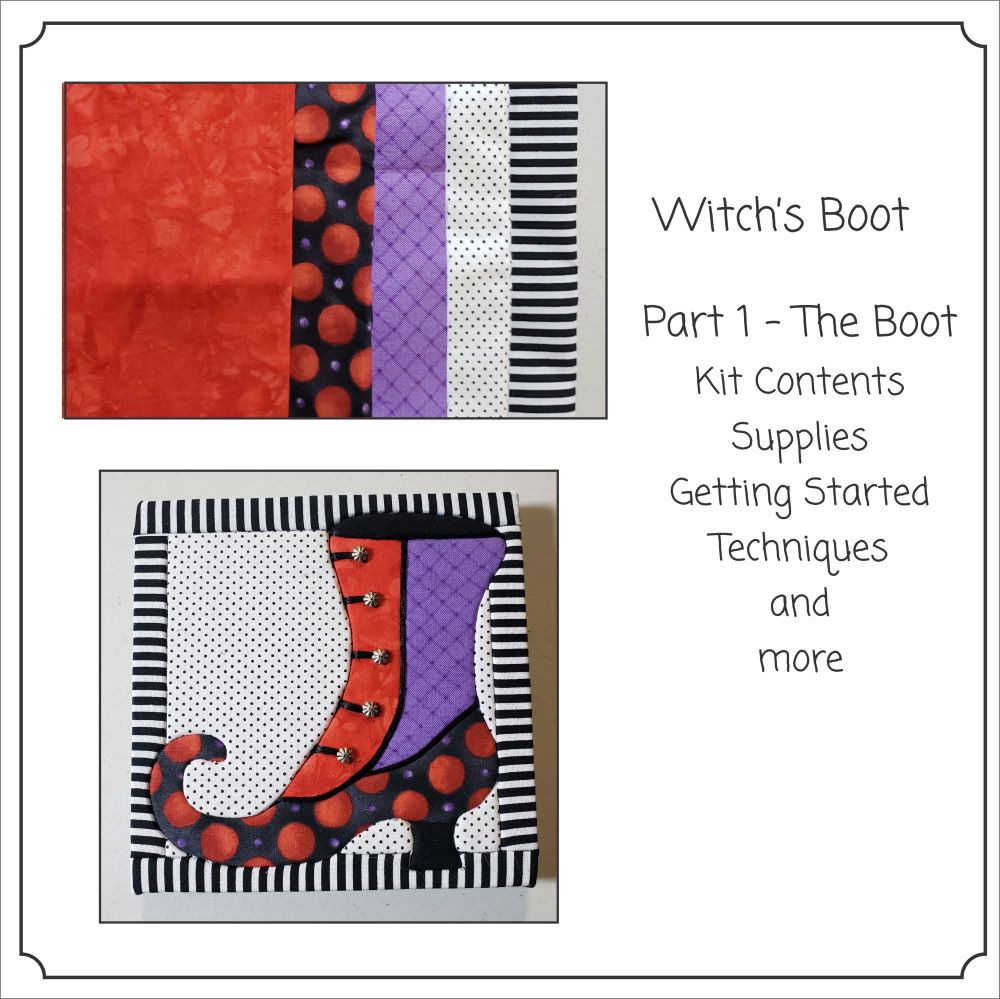
Choosing Fabrics
Picking out fabrics is one of my favorite things. A good way to figure out how many different fabrics you will need; count how many were used in the cover sheet photo. You might use a little more or a little less depending on how you want The Witch’s Hat to look. I start with a palette of fabrics. Sometimes when working on a project I decide that a different fabric would be a better choice. For those that do not have a fabric stash – craft stores, fabric and quilt stores offer Fat Quarters (18″X21″). Some fabric stores will cut as small as an 8th of a yard. Listed below are some fabric requirements:
All fabrics in this project (except the Borders) will require 6″X6″ Square of fabric or less. The Borders require a strip 2″ wide X 44-45″ long.
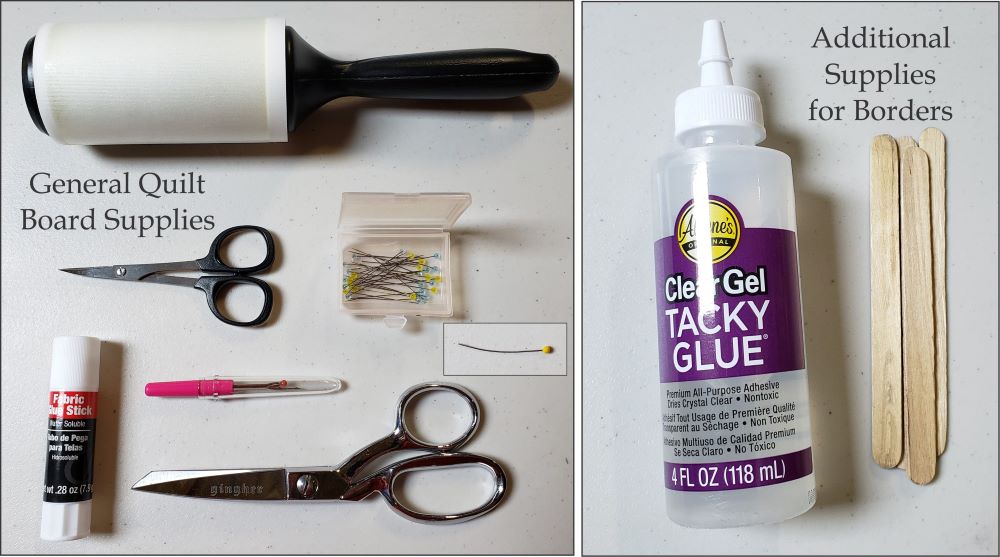
Supplies Needed
- Lint Roller
- Curved Embroidery Scissors (My favorite KAI #N5100, 4″ Curved Tip Needlecraft Scissors) I love these scissors. Inexpensive, sharp and long lasting.
- Small Seam Ripper
- Dritz Fabric Glue Stick
- Shears
- Fine Pins (My favorite Clover #Q2507 Patchwork Pins – Fine)
- Quilt Pin (yellow ball)
- Craft Sticks
- Allene’s Tacky Glue (any work – Fast Grab, Original or Clear Gel) Allene’s offers a sample pack with all three.
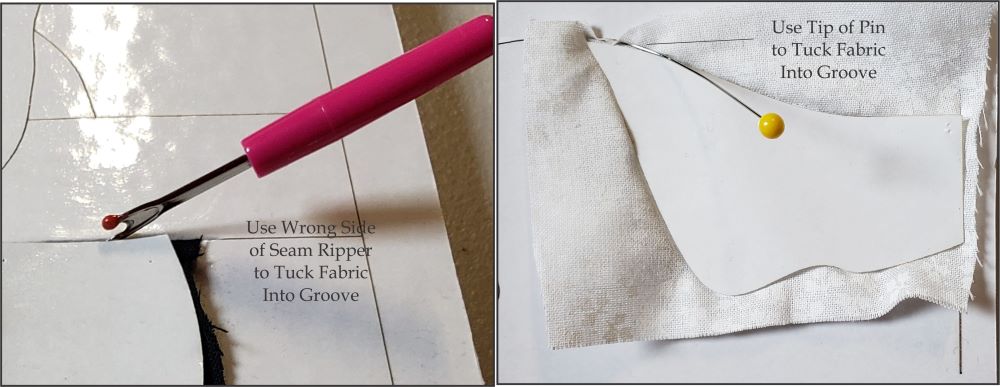
Two different methods of tucking fabric into groove
- Seam Ripper – This is ideal for every aspect. Use the wrong side of the Seam Ripper to tuck fabric into the grooves. See above
- Quilt Pin – this technique was discovered by accident. My Husband and I were at a show. He couldn’t find a Seam Ripper to demonstrate the technique. He used a pin instead! I was looking at his sample and told him it looked really nice. He told me about his new technique. I tried it and I use it most of the time now. The pin will start to bend and that is the way I like it – a slight bend.
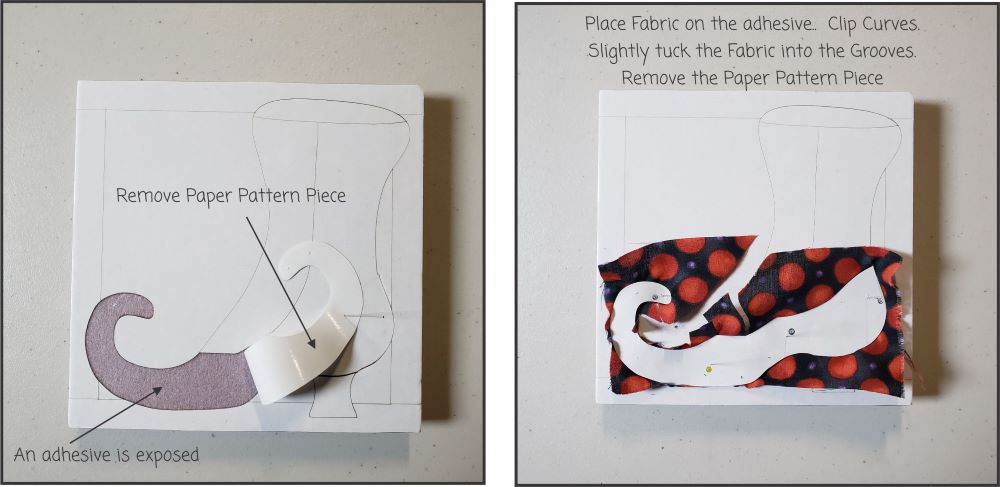 Remove the Paper Pattern Piece – an adhesive will be exposed. Place the fabric on the adhesive. Pin the Paper Pattern Piece over the Fabric. Slightly tuck the Fabric into the grooves using your preferred method. See Above. Then clip the curves.
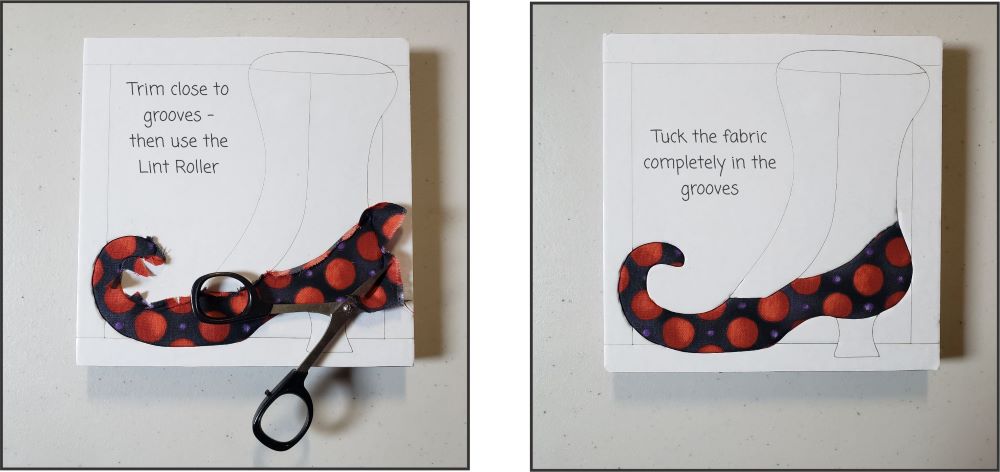
Remove the Paper Pattern Piece, trim the fabric close to the grooves. This is a good time to use the Lint Roller, Then tuck the fabric all the way into the grooves using your preferred method (see above).
Remove the Paper Pattern Piece. Place the fabric over the Adhesive and pin the Paper Pattern Piece over the Fabric. Clip the curves, then slightly tuck the Fabric into the Grooves. Remove the Paper Pattern Piece and trim Fabric close to the Grooves. Use Lint Roller.
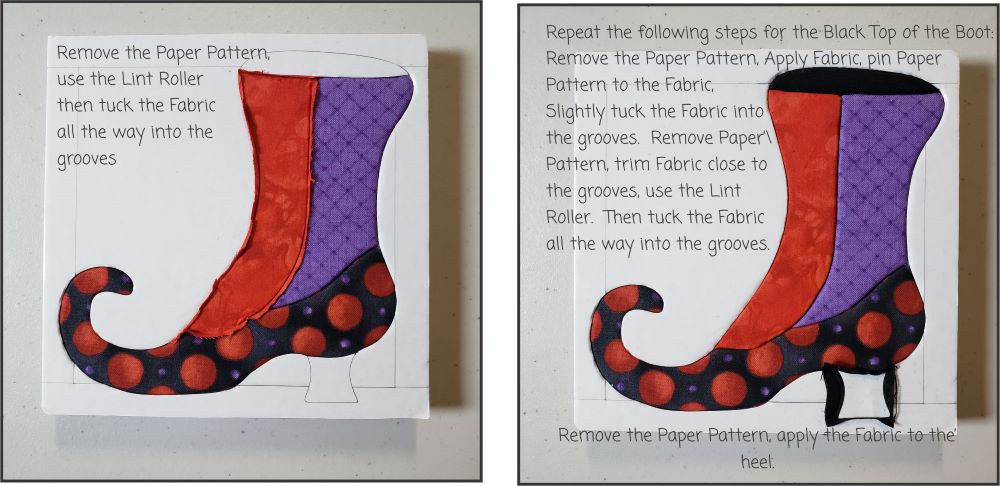
Remove the Paper Pattern, use the Lint Roller. then tuck the Fabric all the way into the grooves.
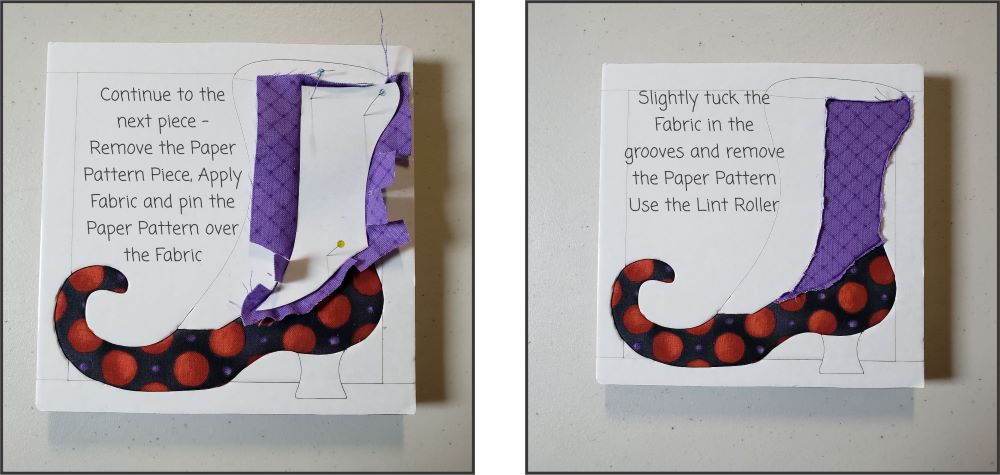
Repeat the following steps for the Black Top of the Boot. Remove the Paper Pattern, apply Fabric, pin Paper Pattern to the Fabric. Slightly tuck the Fabric into the grooves. Remove Paper Pattern, trim Fabric close to the grooves, use the Lint Roller. Then tuck the Fabric all the way into the grooves.
Remove the Paper Pattern and apply the Fabric to the heel and pin the Paper Pattern to the Fabric. Slightly tuck the Fabric into the grooves. Trim Fabric close to the grooves, remove the Paper Pattern. Use the Lint Roller then tuck the Fabric all the way into the grooves.
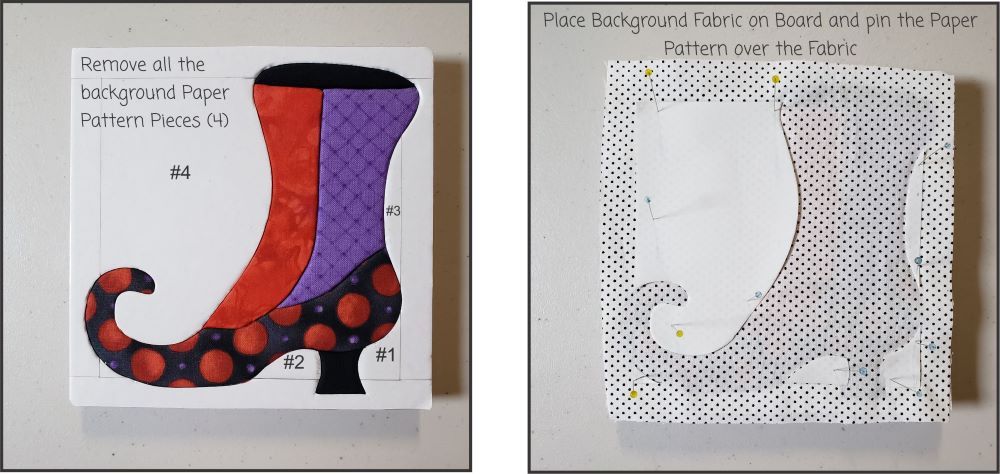
Remove all the background Paper Pattern Pieces. A total of 4. Place the background Fabric on the Board and pin the Paper Patterns over the Fabric.
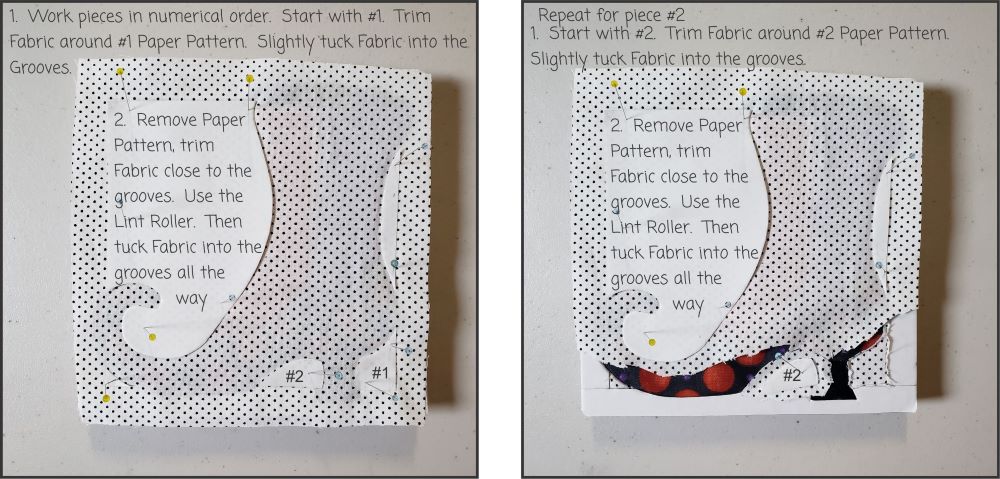
Work the pieces in numerical order. Trim the Fabric around piece #1. Slightly tuck the Fabric into the grooves. Remove Paper Pattern, trim Fabric close to the grooves. Use the Lint Roller. Then tuck Fabric into the grooves all the way.
Now it’s time to work on piece #2. Trim the Fabric around Paper Pattern piece #2. Slightly tuck Fabric into the grooves. Remove the Paper Pattern, trim the Fabric close to the grooves. Use the Lint Roller. Then tuck the Fabric into the grooves all the way.

Repeat for Piece #3. Trim Fabric around #3 Paper Pattern. Slightly tuck Fabric into the grooves. Remove the Paper Pattern, trim Fabric close to the grooves. Use the Lint Roller. Then tuck Fabric into the grooves all the way.
Next #4, trim Fabric around Paper Pattern Piece #4. Slightly tuck the Fabric into the grooves, clip the curve, remove the Paper Pattern, trim the Fabric close to the grooves. Use the Lint Roller then tuck the Fabric into the grooves all the way.
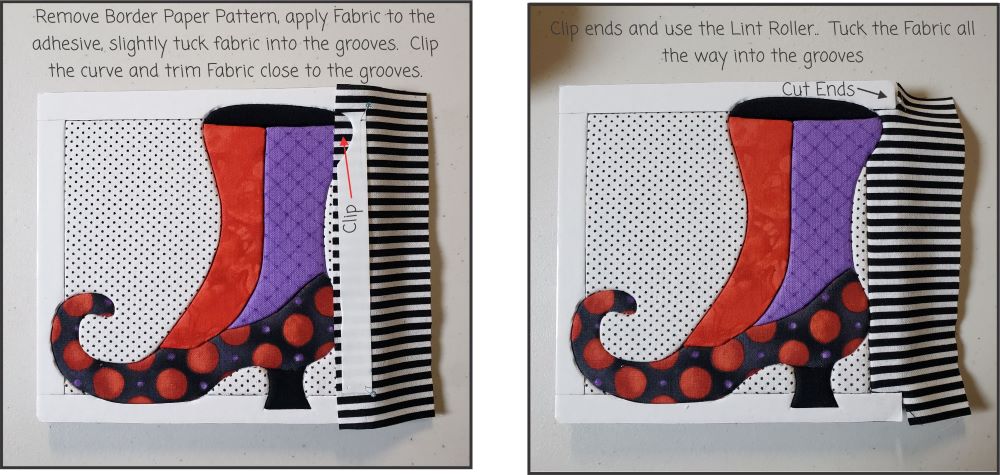
Cut 2 strips 2″ X 6″. Remove the right border Paper Pattern and apply one of the strips to the adhesive. Pin Paper Pattern over the Fabric. Slightly tuck the Fabric into the grooves. Clip the curve and clip the ends. Remove the Paper Pattern and trim Fabric close to the grooves. Use the Lint Roller and then tuck the Fabric all the way into the grooves. 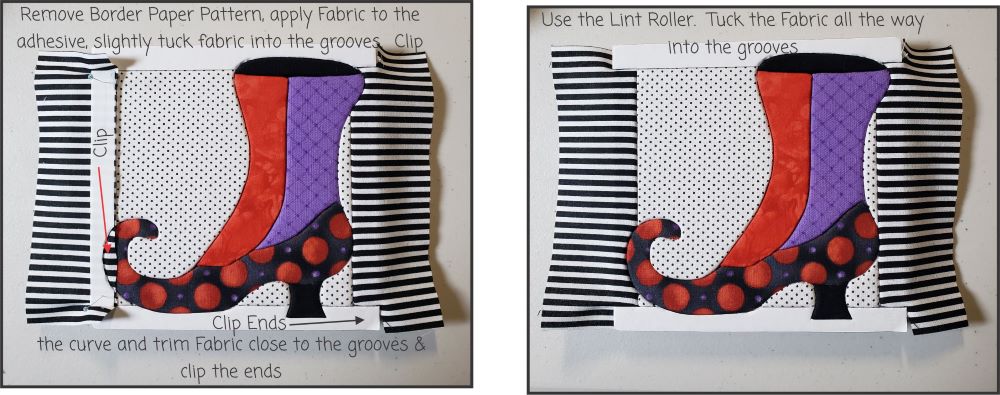
Repeat for the other side” Remove the Paper Pattern, apply Fabric to the adhesive, slightly tuck Fabric into the grooves. Clip curve, clip ends, remove the Paper Pattern. Trim the Fabric close to the grooves. Use the Lint Roll and then tuck the Fabric all the way into the grooves.
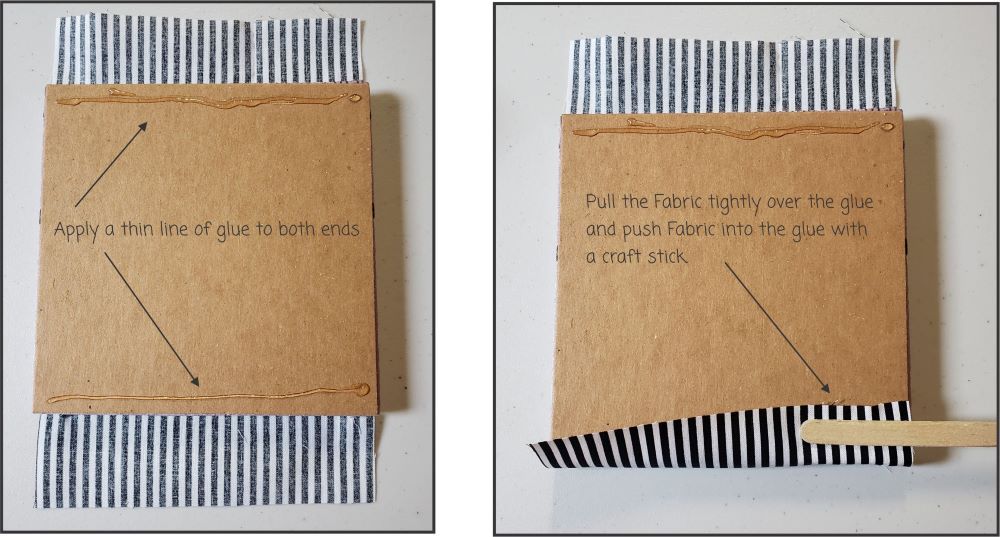
Turn the Board over and apply a thin line of glue to both ends. Pull the Fabric tightly over the glue and push the Fabric into the glue with a stick. Repeat for other end.
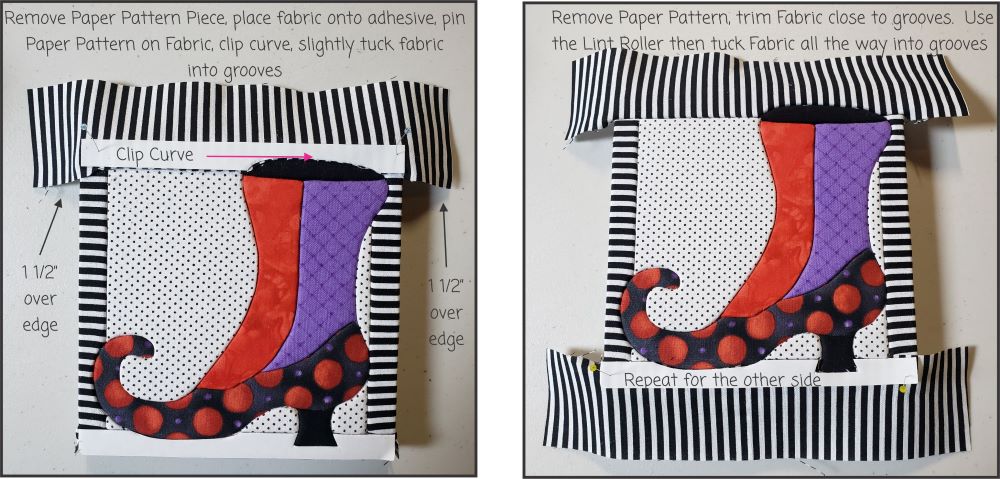
Cut 2 strips 2″ X 9″. Remove Paper Pattern and place the Fabric onto the adhesive, making sure that the Fabric overlaps the board approximately 1 1/2″. Pin Paper Pattern on Fabric, clip curve, slightly tuck the Fabric into the grooves. Remove the Paper Pattern, trim the Fabric close to the grooves. Use the Lint Roller then tuck the Fabric all the way into the grooves. Repeat for the other side.

Turn the Board over to the wrong side. Press all 4 ends up by 1/8″.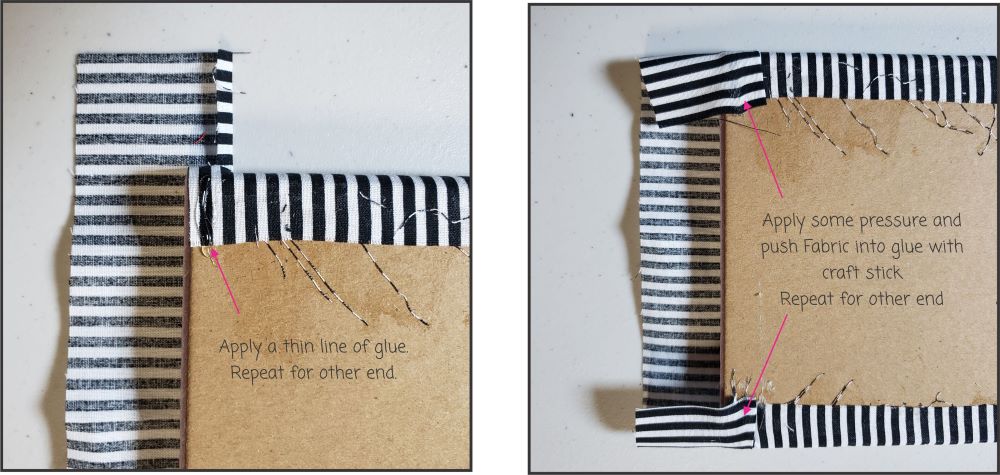
Apply a thin line of glue and repeat for other end. Use the craft stick to push the Fabric into the glue. Apply some pressure to the Fabric. 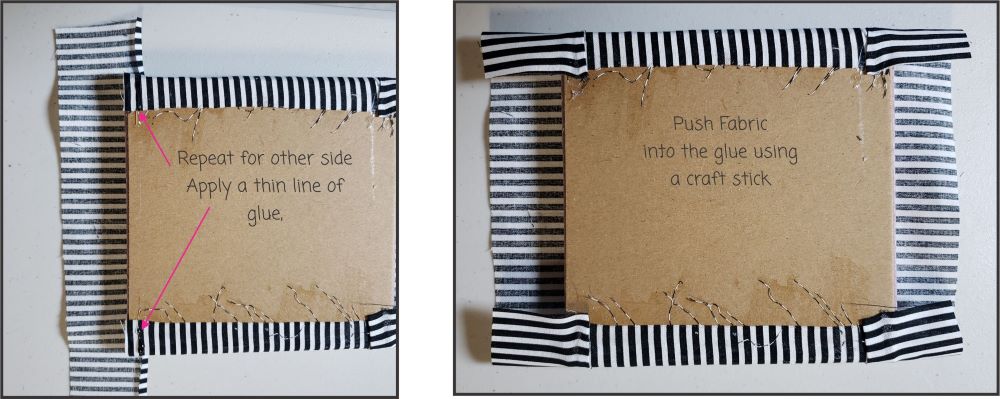
Push Fabric into the glue on the other side using a craft stick.
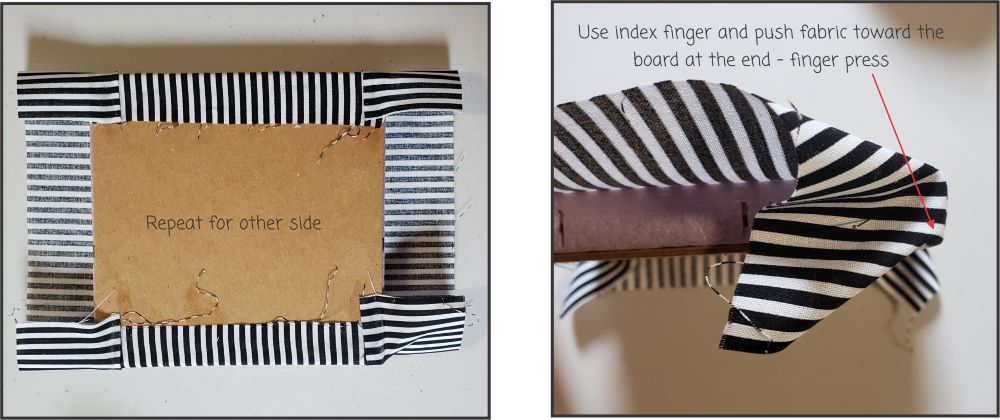
Use your index finger and push the Fabric toward the Board at the end. Finger press. I do use an iron. But too much heat will melt the foam. Be very careful if deciding to use an iron. A quick touch with the iron is plenty.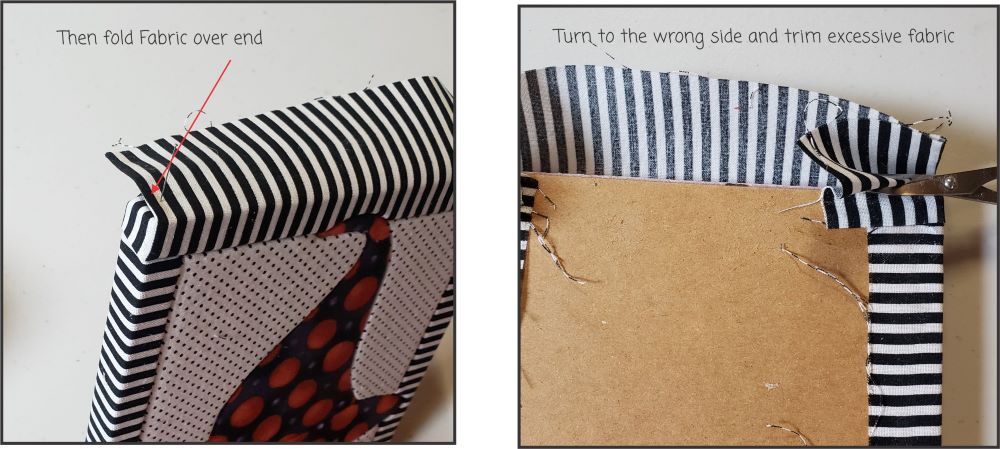
Fold the Fabric over the end. Finger press or a light touch with an iron. Turn to the wrong side and trim excess Fabric at all 4 corners.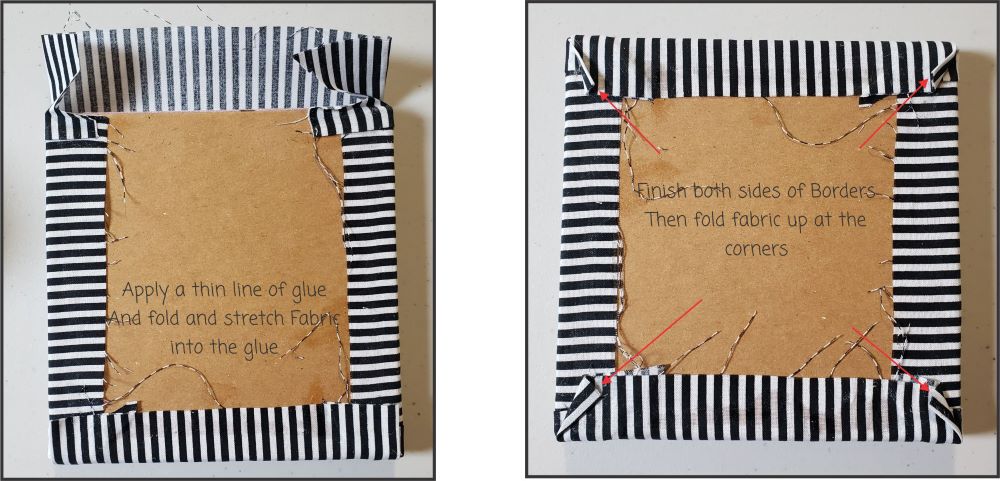
Place a thin line of glue and fold and stretch the Fabric into the glue. Push the Fabric into the glue using a craft stick. Repeat for other side.
Fold corners slightly and finger press or iron with a quick touch.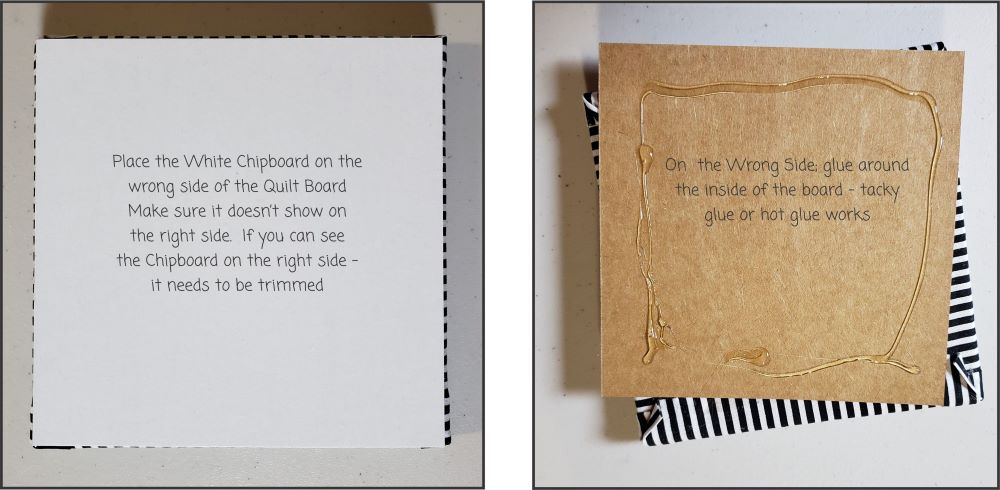
The White Chipboard is used to finish the back of the picture. Turn the picture around – does the Chipboard show in the front. If it does – trim the Chipboard. Generally it doesn’t require much trimming. Apply a thin line of glue to the wrong side; inside the outer edge. Set the Chipboard in place on the Quilt Board.