Kits Available at:
https://artsi2.com/product/halloween-witchs-boot/
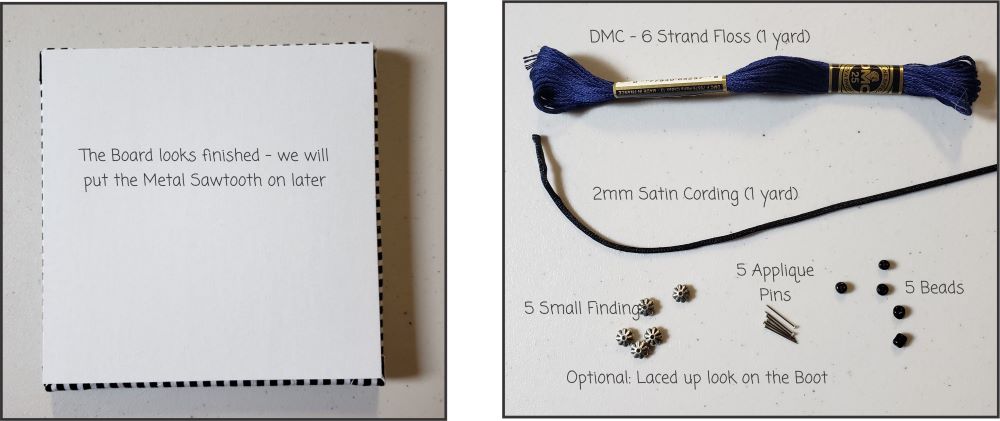
The Board looks finished. We will put the Sawtooth Wall Hanger on later. If you want the Boot to look laced there are some supplies that are needed:
- 2mm Satin Cording (1 yard) OR DMC 6 Strand Floss (1 yard)
- Qty. 5 Applique Pins 1/2″ long
- 5 Beads OR 5 Small Buttons OR 5 Small Findings
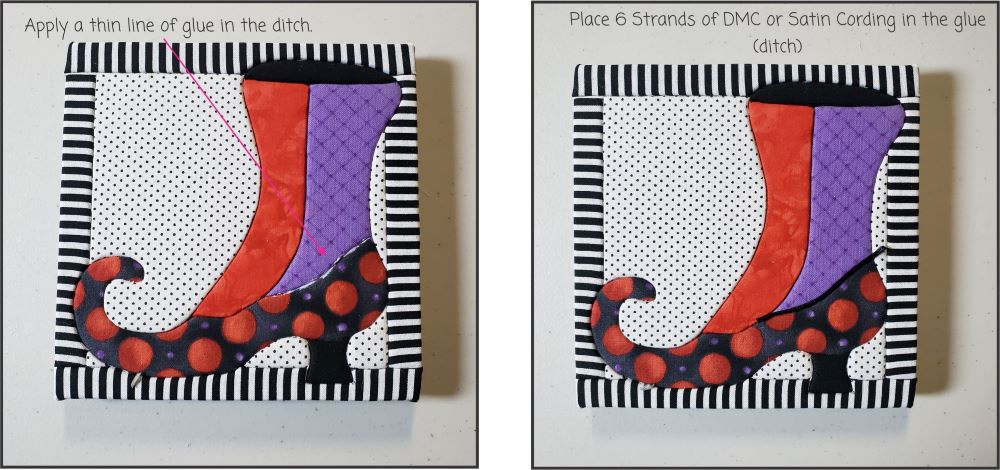
Apply a thin line of glue in the ditch. Set the DMC or Cording into the glue.
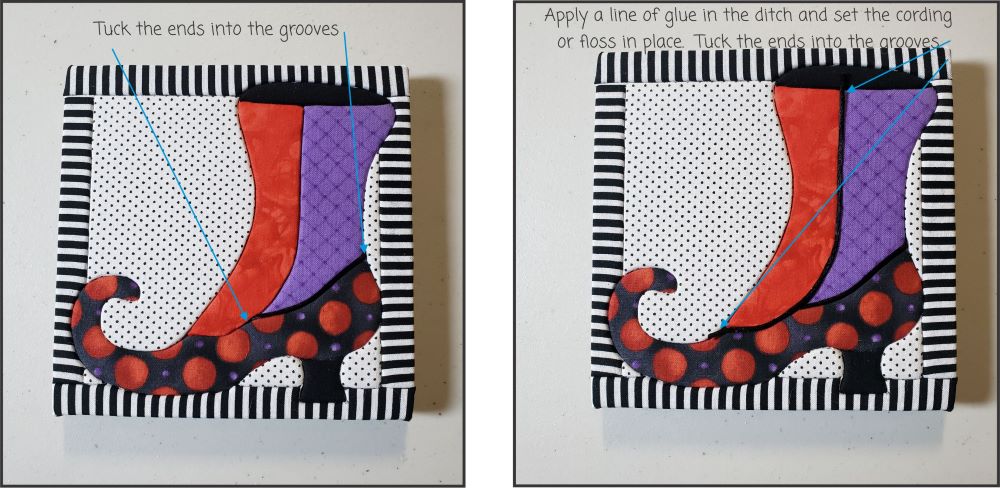
Tuck the raw ends into the grooves. Apply a line of glue in the ditch and set the Cording or DMC into the glue. Tuck the raw edges into the grooves. 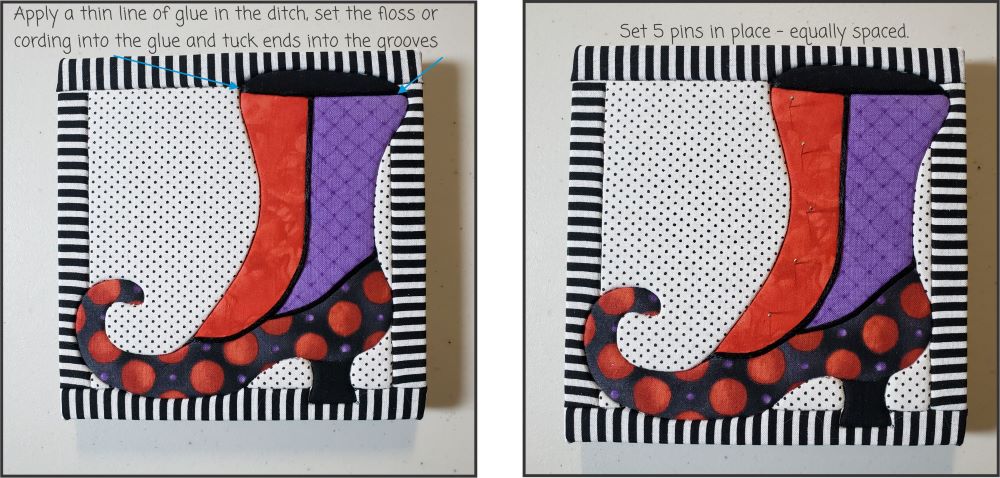
Apply a thin line of glue to the groove. Place the DMC or Cording into the glue and tuck the raw edges in the grooves. Next; set the 5 pins in place. I place them randomly but if you want a more polished look – place the pins in place. Measure between each pin and adjust until they are placed evenly. Then make sure that the pins are placed equal distance from the outside of the boot to the pin. Adjust to make sure all pins are equal distance to the edge of the Boot. 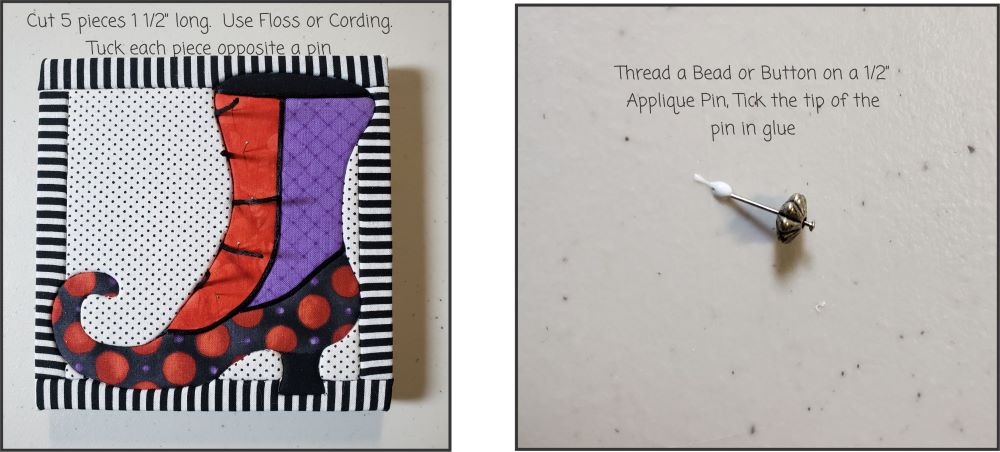
Cut 5 pieces of DMC or Cording measuring 1 1/2″ long. Tuck each piece opposite a pin. Thread a Bead or Button on the 1/2″ Applique Pin. Tick the tip of the pin in glue.
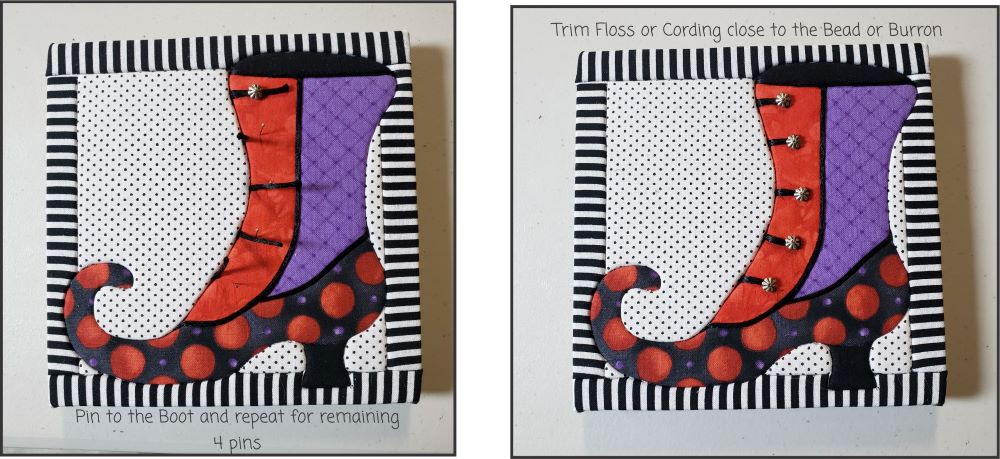
Pin to the Boot and repeat for remaining pins. Trim the Floss or Cording close to the Bead or Button.
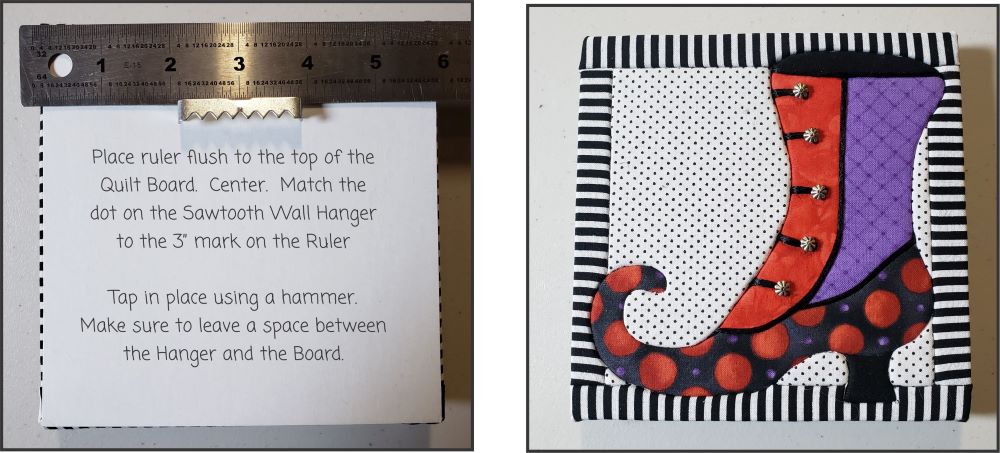
Turn the Board to the wrong side. Place ruler flush to the top of the Quilt Board. Center the ruler. Match the dot on the Sawtooth Wall Hanger to the 3″ mark on the Ruler. Tap the Wall Hanger in place using a hammer. Make sure to leave a space between the Hanger and the Board
Kits Available at:
https://artsi2.com/product/halloween-witchs-boot/