Kits Available at:
https://artsi2.com/product/halloween-witchs-hat/
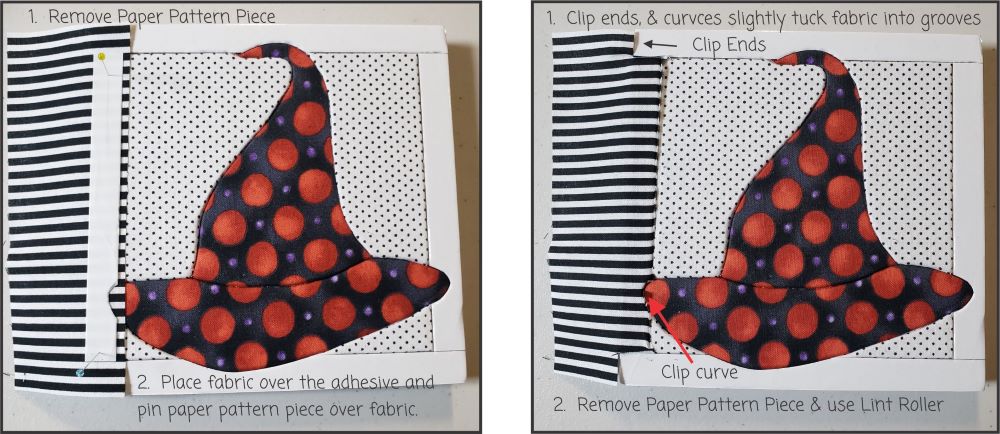
Remove Paper Pattern Piece. Cut (qty. 2) pieces, measuring 2″ X 6″ using your Border Fabric. Place Fabric on the adhesive and then pin the Paper Pattern Piece over the Fabric. Slightly tuck the Fabric into the grooves. Clip the ends, clip the curve and trim fabric close to the grooves.
Remove the Paper Pattern Piece, use the Lint Roller and then tuck the fabric all the way into the grooves.
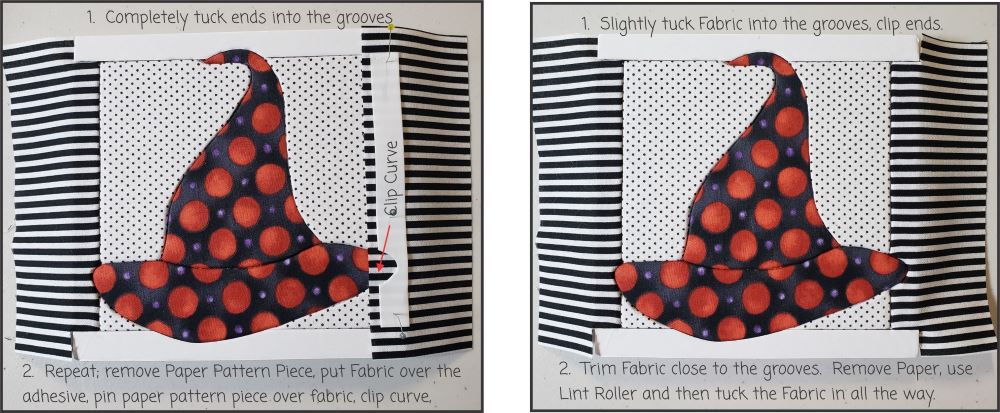
Repeat for the other side: Remove the Paper Pattern Piece, put Fabric over the adhesive, pin Paper Pattern Piece over the Fabric and clip the curve. Slightly tuck fabric into grooves. Remove paper pattern piece, trim Fabric close to the grooves, use Lint Roller and then tuck Fabric all the way into the grooves.
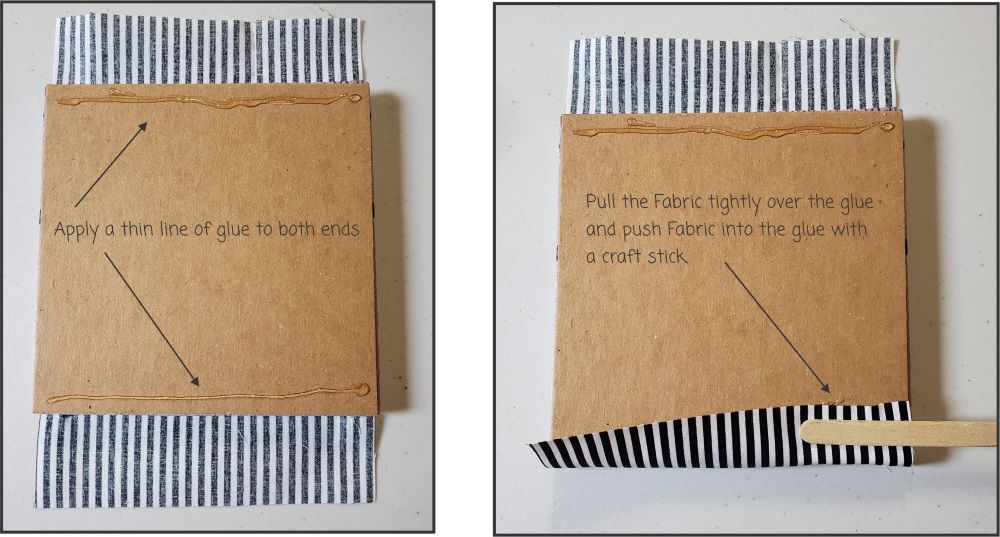
Turn the Quilt Board over and apply a thin line of glue to both ends. Pull the Fabric tightly over the glue and push Fabric into the glue with a craft stick.
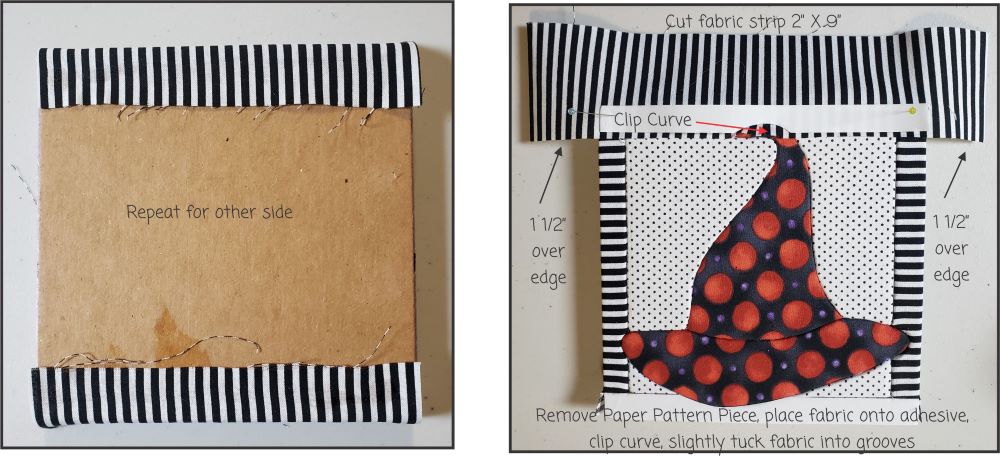
Repeat for the other side. Using your Border Fabric, cut (qty. 2) strips measuring 2″X9″. Remove the Paper Pattern Piece, set the Fabric in place, see above. Pin the Paper Pattern Piece in place and clip the curve. Slightly tuck the fabric into the grooves. Trim Fabric close to the grooves. Remove the Paper Pattern Piece, use the Lint Roller, then tuck the Fabric all the way into the grooves.

Repeat for the other side. Turn the Quilt Board over. Press the ends up 1/8″ (see picture).
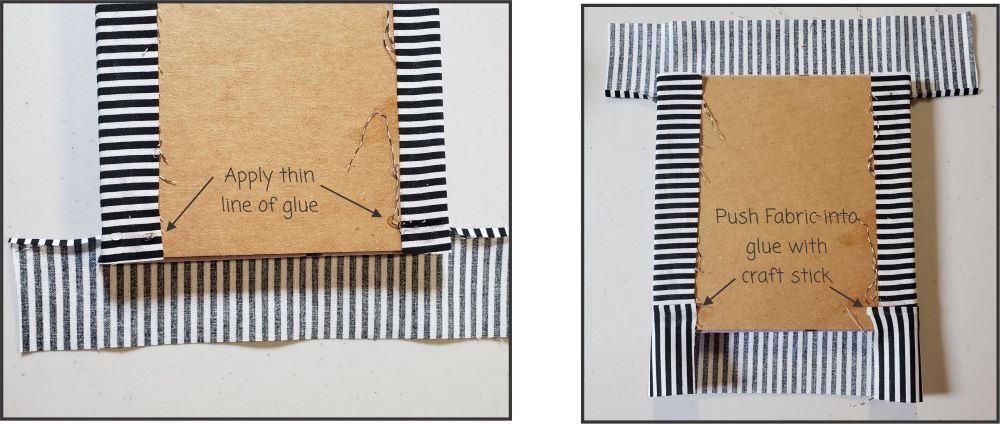
Apply a thin line of glue. Push Fabric into the glue using a craft stick. Apply some pressure.
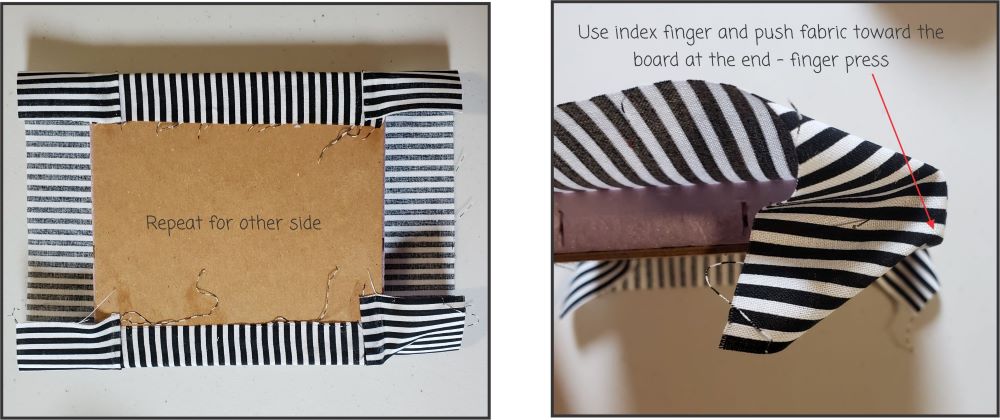
Repeat for other side. Using your index finger, push the Fabric toward the board at the end. Finger press. I use an iron but be very careful to just slightly touch the iron to the Fabric. The Foam will melt if exposed to heat.
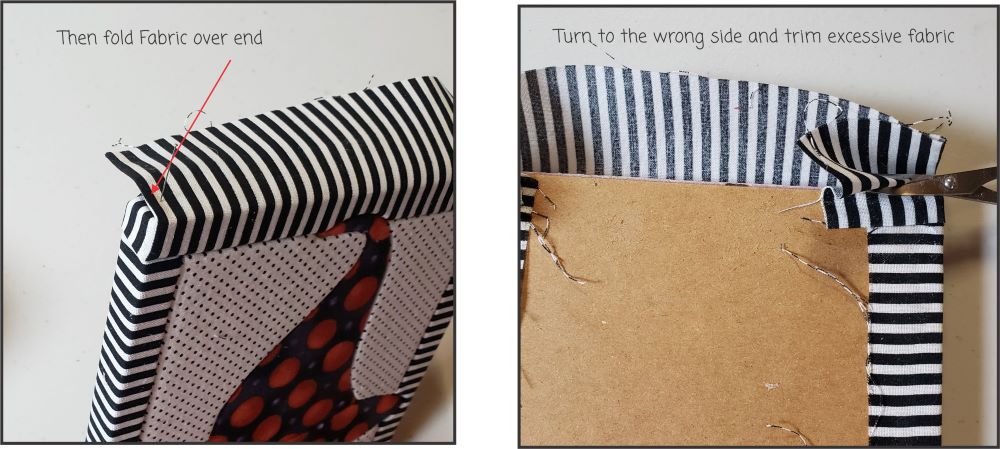
Then fold the Fabric over the end. Finger press or slightly touch with an iron. (Remember the foam will melt with too much heat and it doesn’t take too much to start melting the foam.) Then turn the quilt board to the wrong side and trim excess Fabric. Repeat for all four sides.
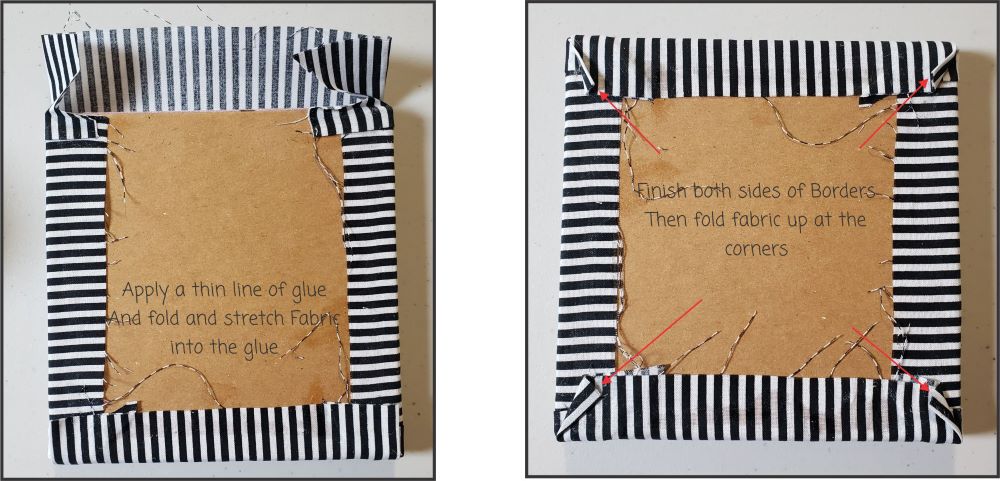
Apply a thin line of glue. Apply some pressure and fold fabric over the glue. Push the Fabric into the glue using a craft stick. Repeat for other side. Then turn and finger press all four corners as pictured above.
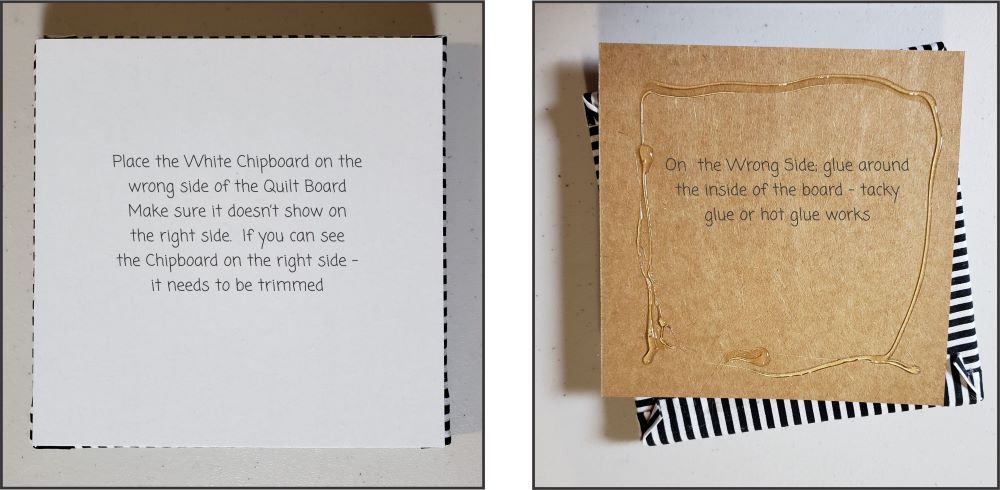
The White Chipboard is used to finish the back of the Quilt Board. Place the Chipboard on the wrong side of the Quilt Board. Turn to the right side. If the chipboard can be seen – it needs to be trimmed. Usually not by much. Then turn the Chipboard to the wrong side and run a thin line of glue around the inside edge. Hot glue or Tacky Glue works great.
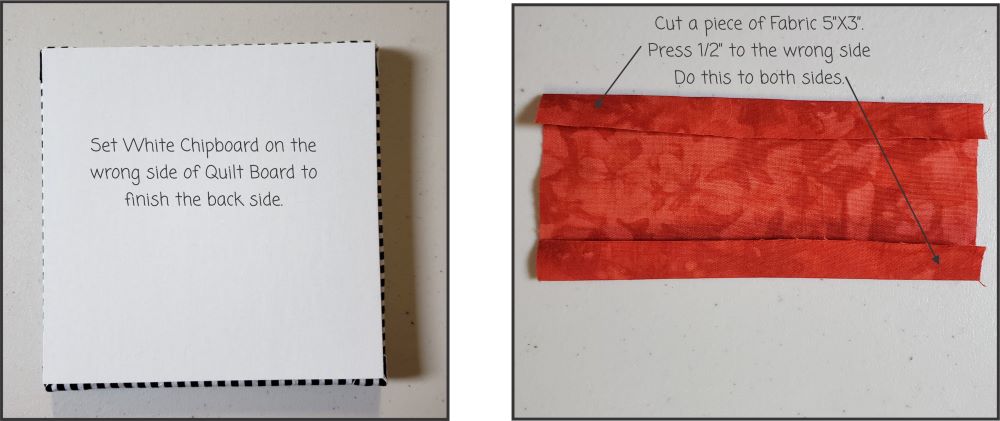
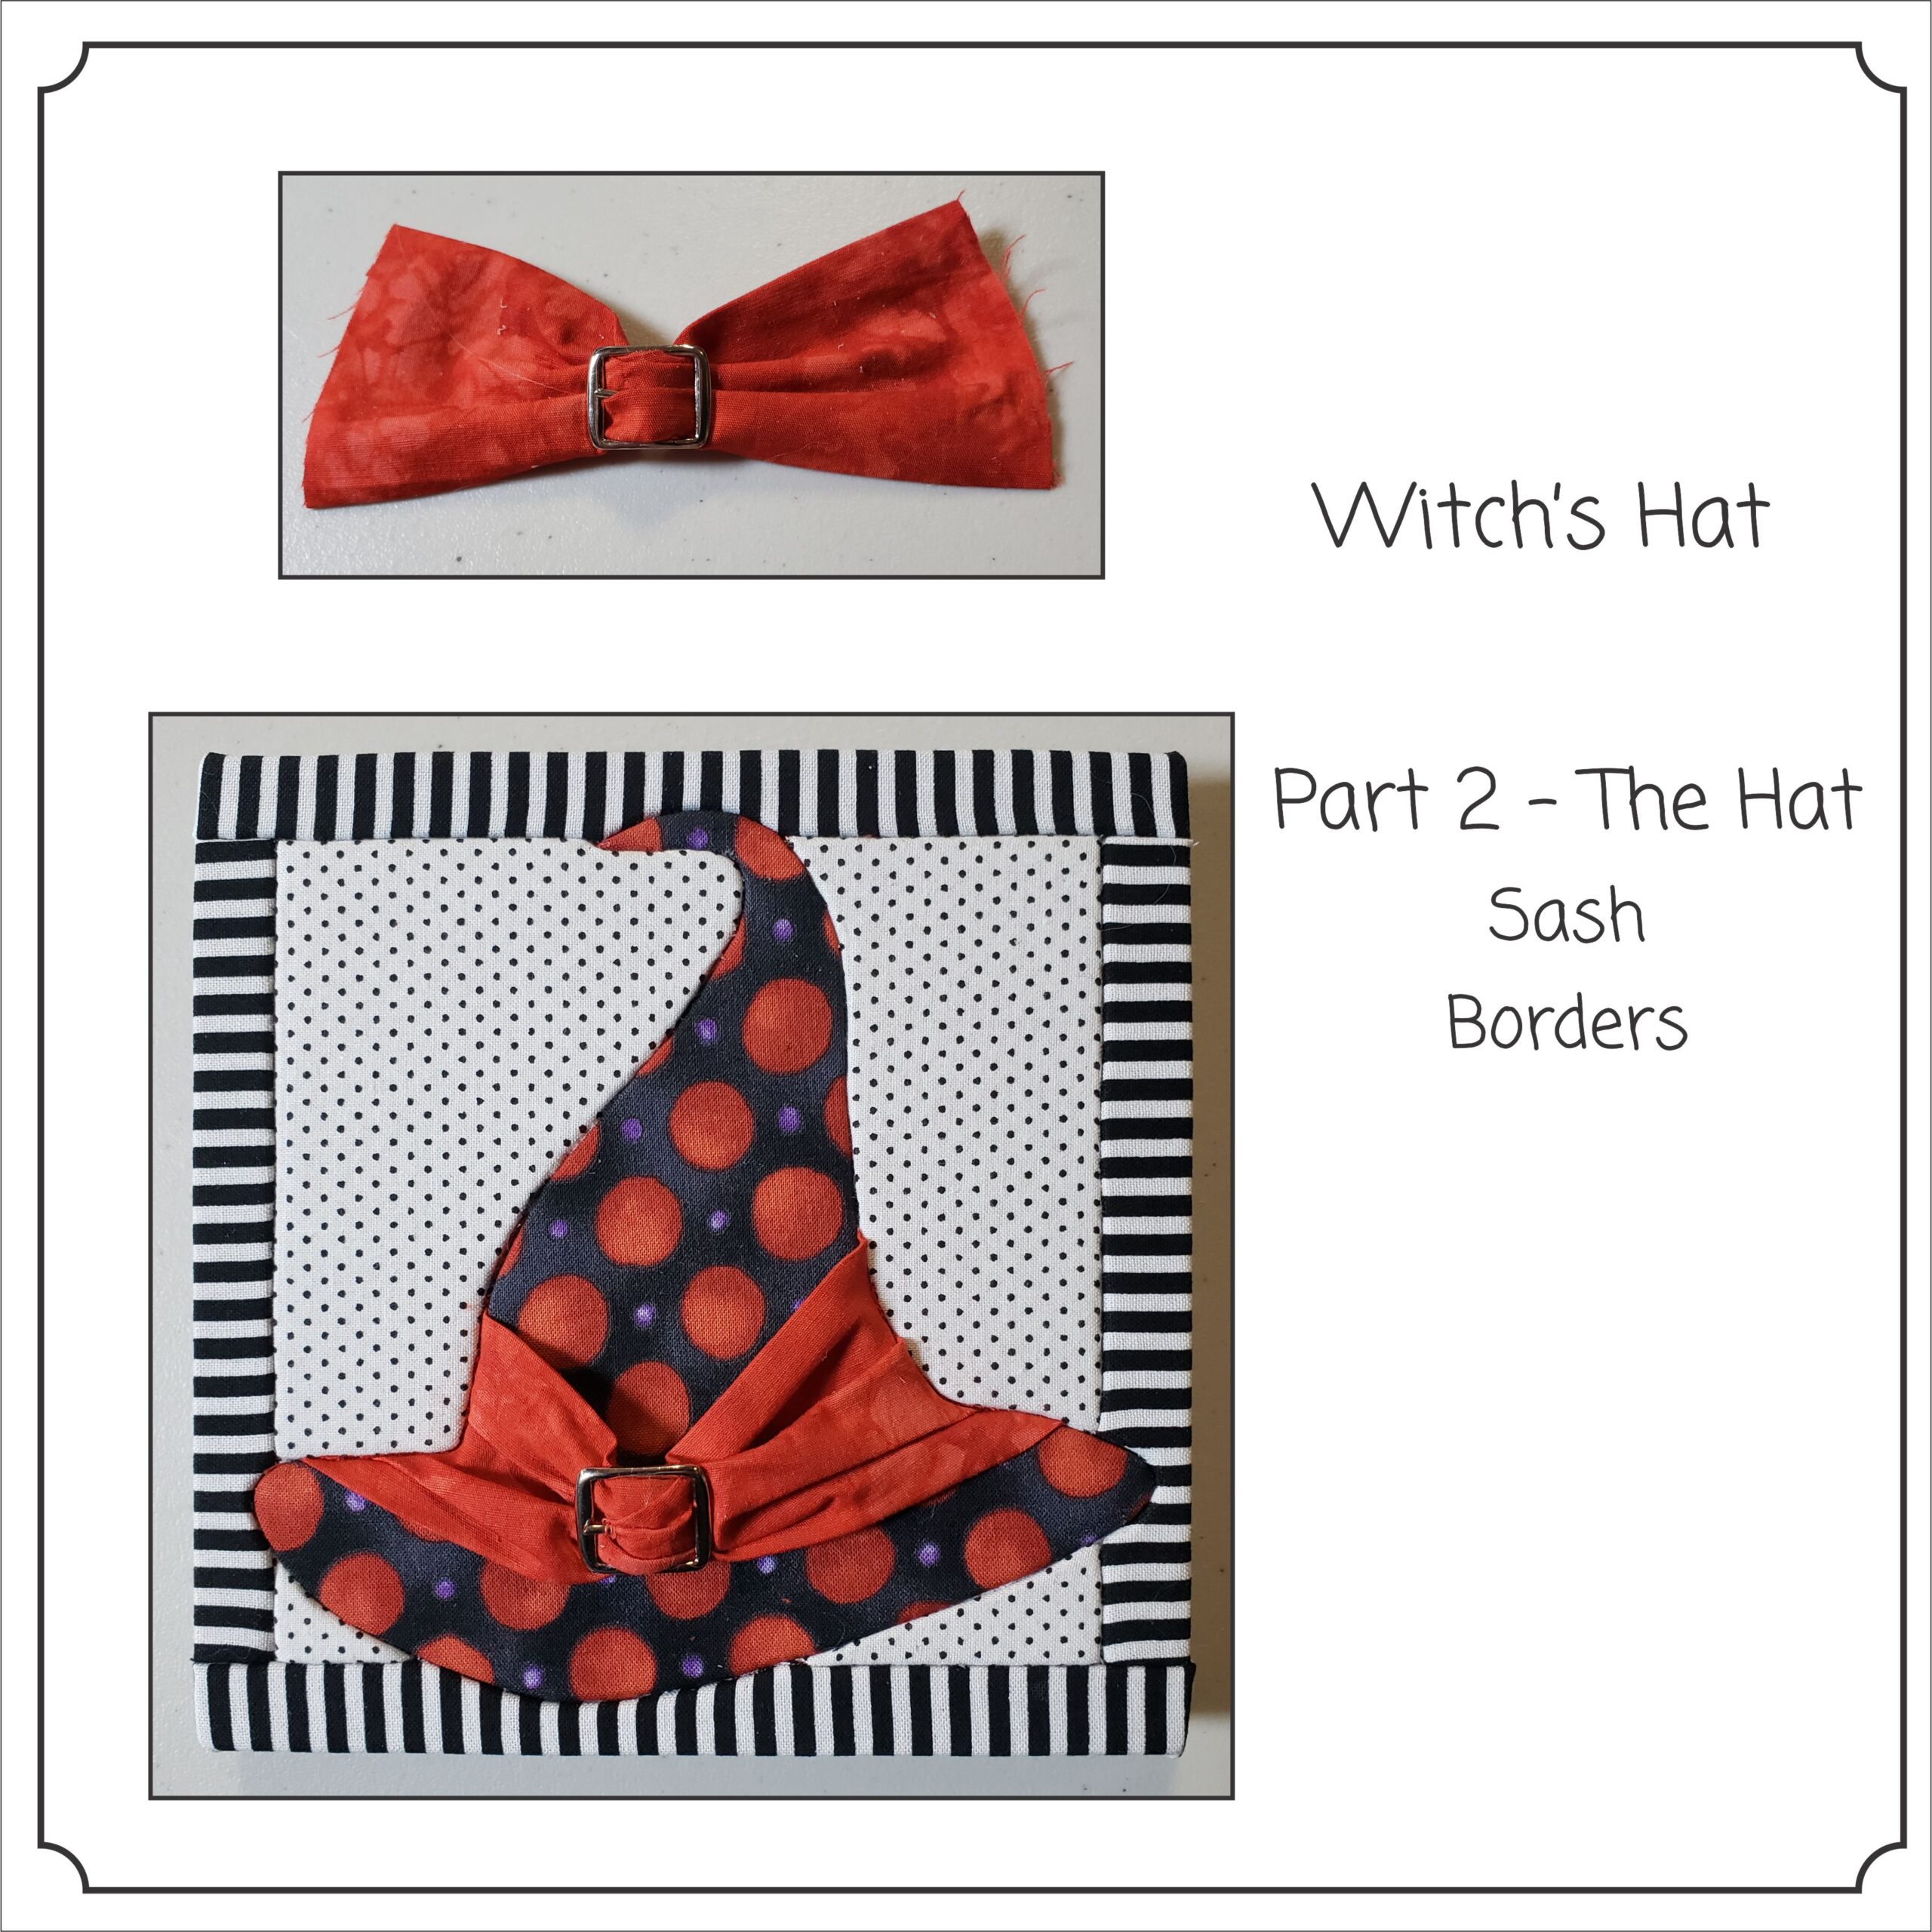
Set the Chipboard in place. Cut a piece of Fabric for the sash on the Hat. On the the 5″ edge, press up 1/2″ and repeat for the other side.
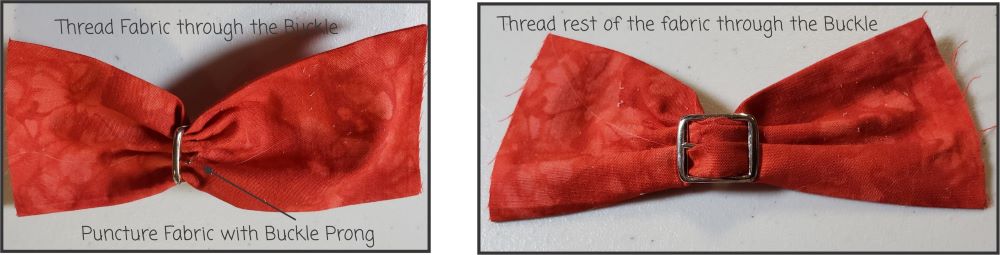
Thread the Fabric through the Buckle. Center the Buckle then puncture the Fabric with the Buckle Prong. Thread the rest of the Fabric through the Buckle.
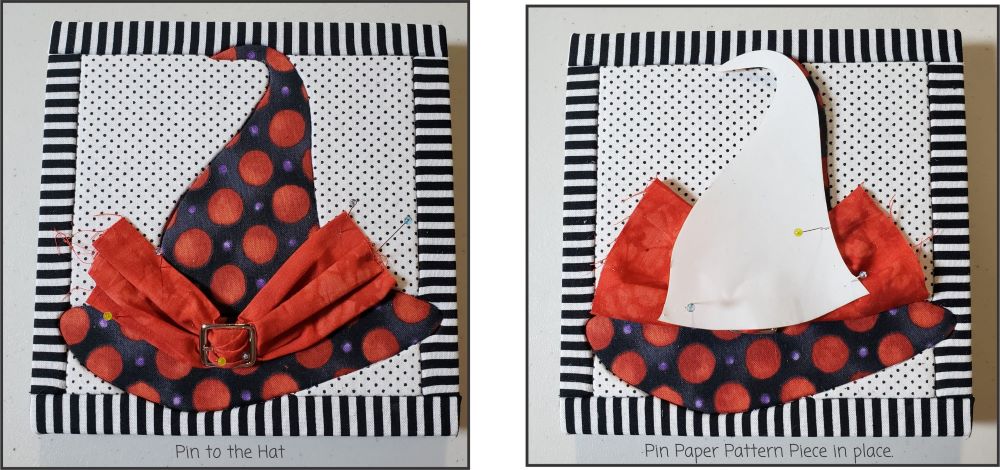
Pin the Sash to the Hat. Then pin the Paper Pattern Piece in place.
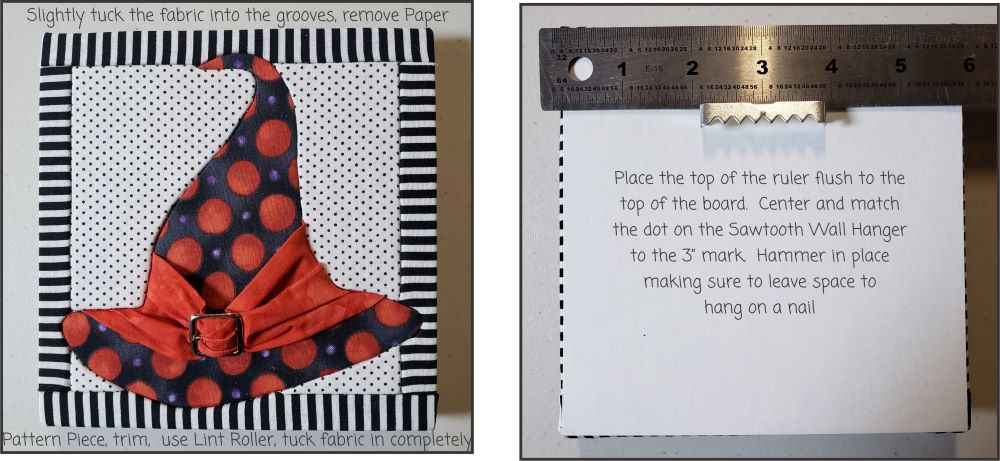
Slightly tuck the Fabric into the Grooves. Remove the Paper Pattern Piece, trim, use the Lint Roller and tuck the Fabric completely in the grooves.